Configuring Windows Shares
This guide will walk you through the process of setting up and configuring Windows shares with proper permissions and access controls.
Configuration Steps:
1. Access Files and Storage Services
Navigate to Files and Storage Services in your Windows Server management interface.
2. Create New Share
Go to Shares, then select Tasks > New Task > SMB Share - Quick.
3. Configure Share Settings
Choose a custom path and create a new folder. You can enable access-based enumeration for better security.
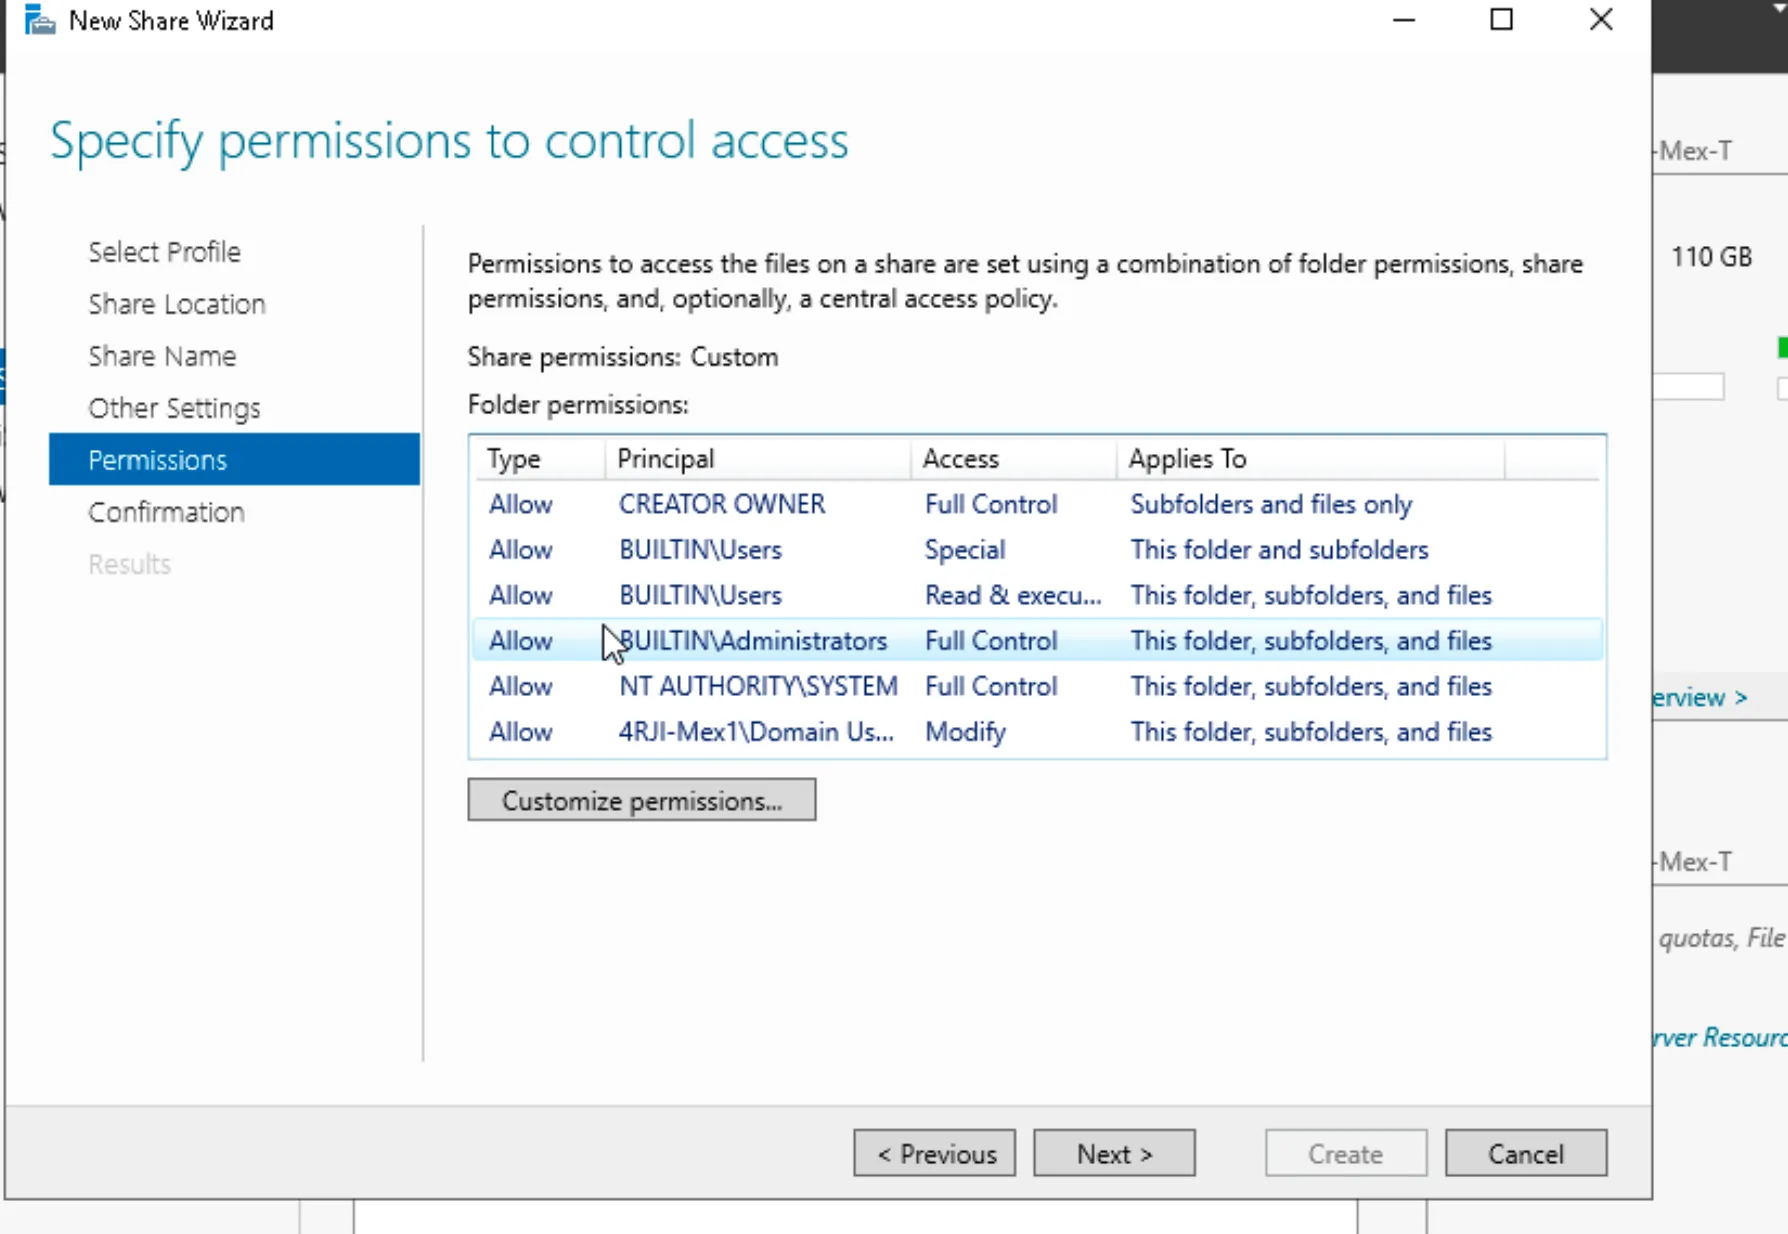
4. Customize Permissions
In the Share tab, add Domain Users and configure permissions:
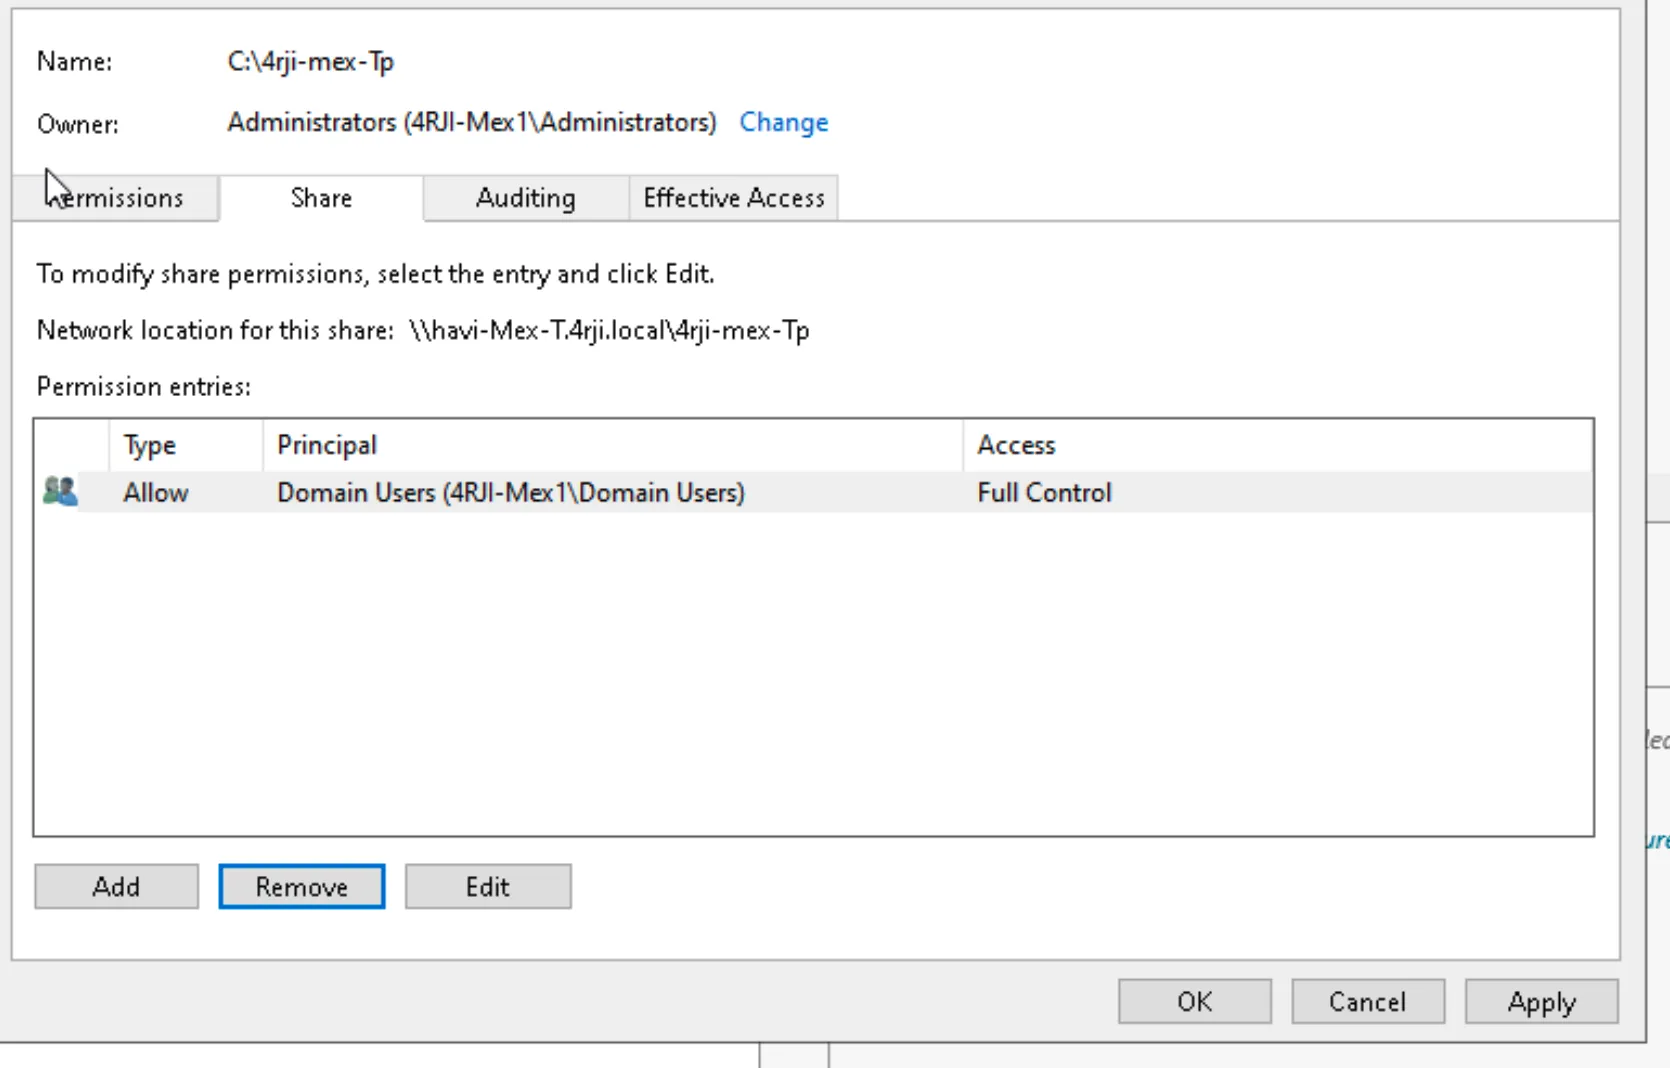
5. Set Share Permissions
Allow full control for Domain Users and remove Everyone:
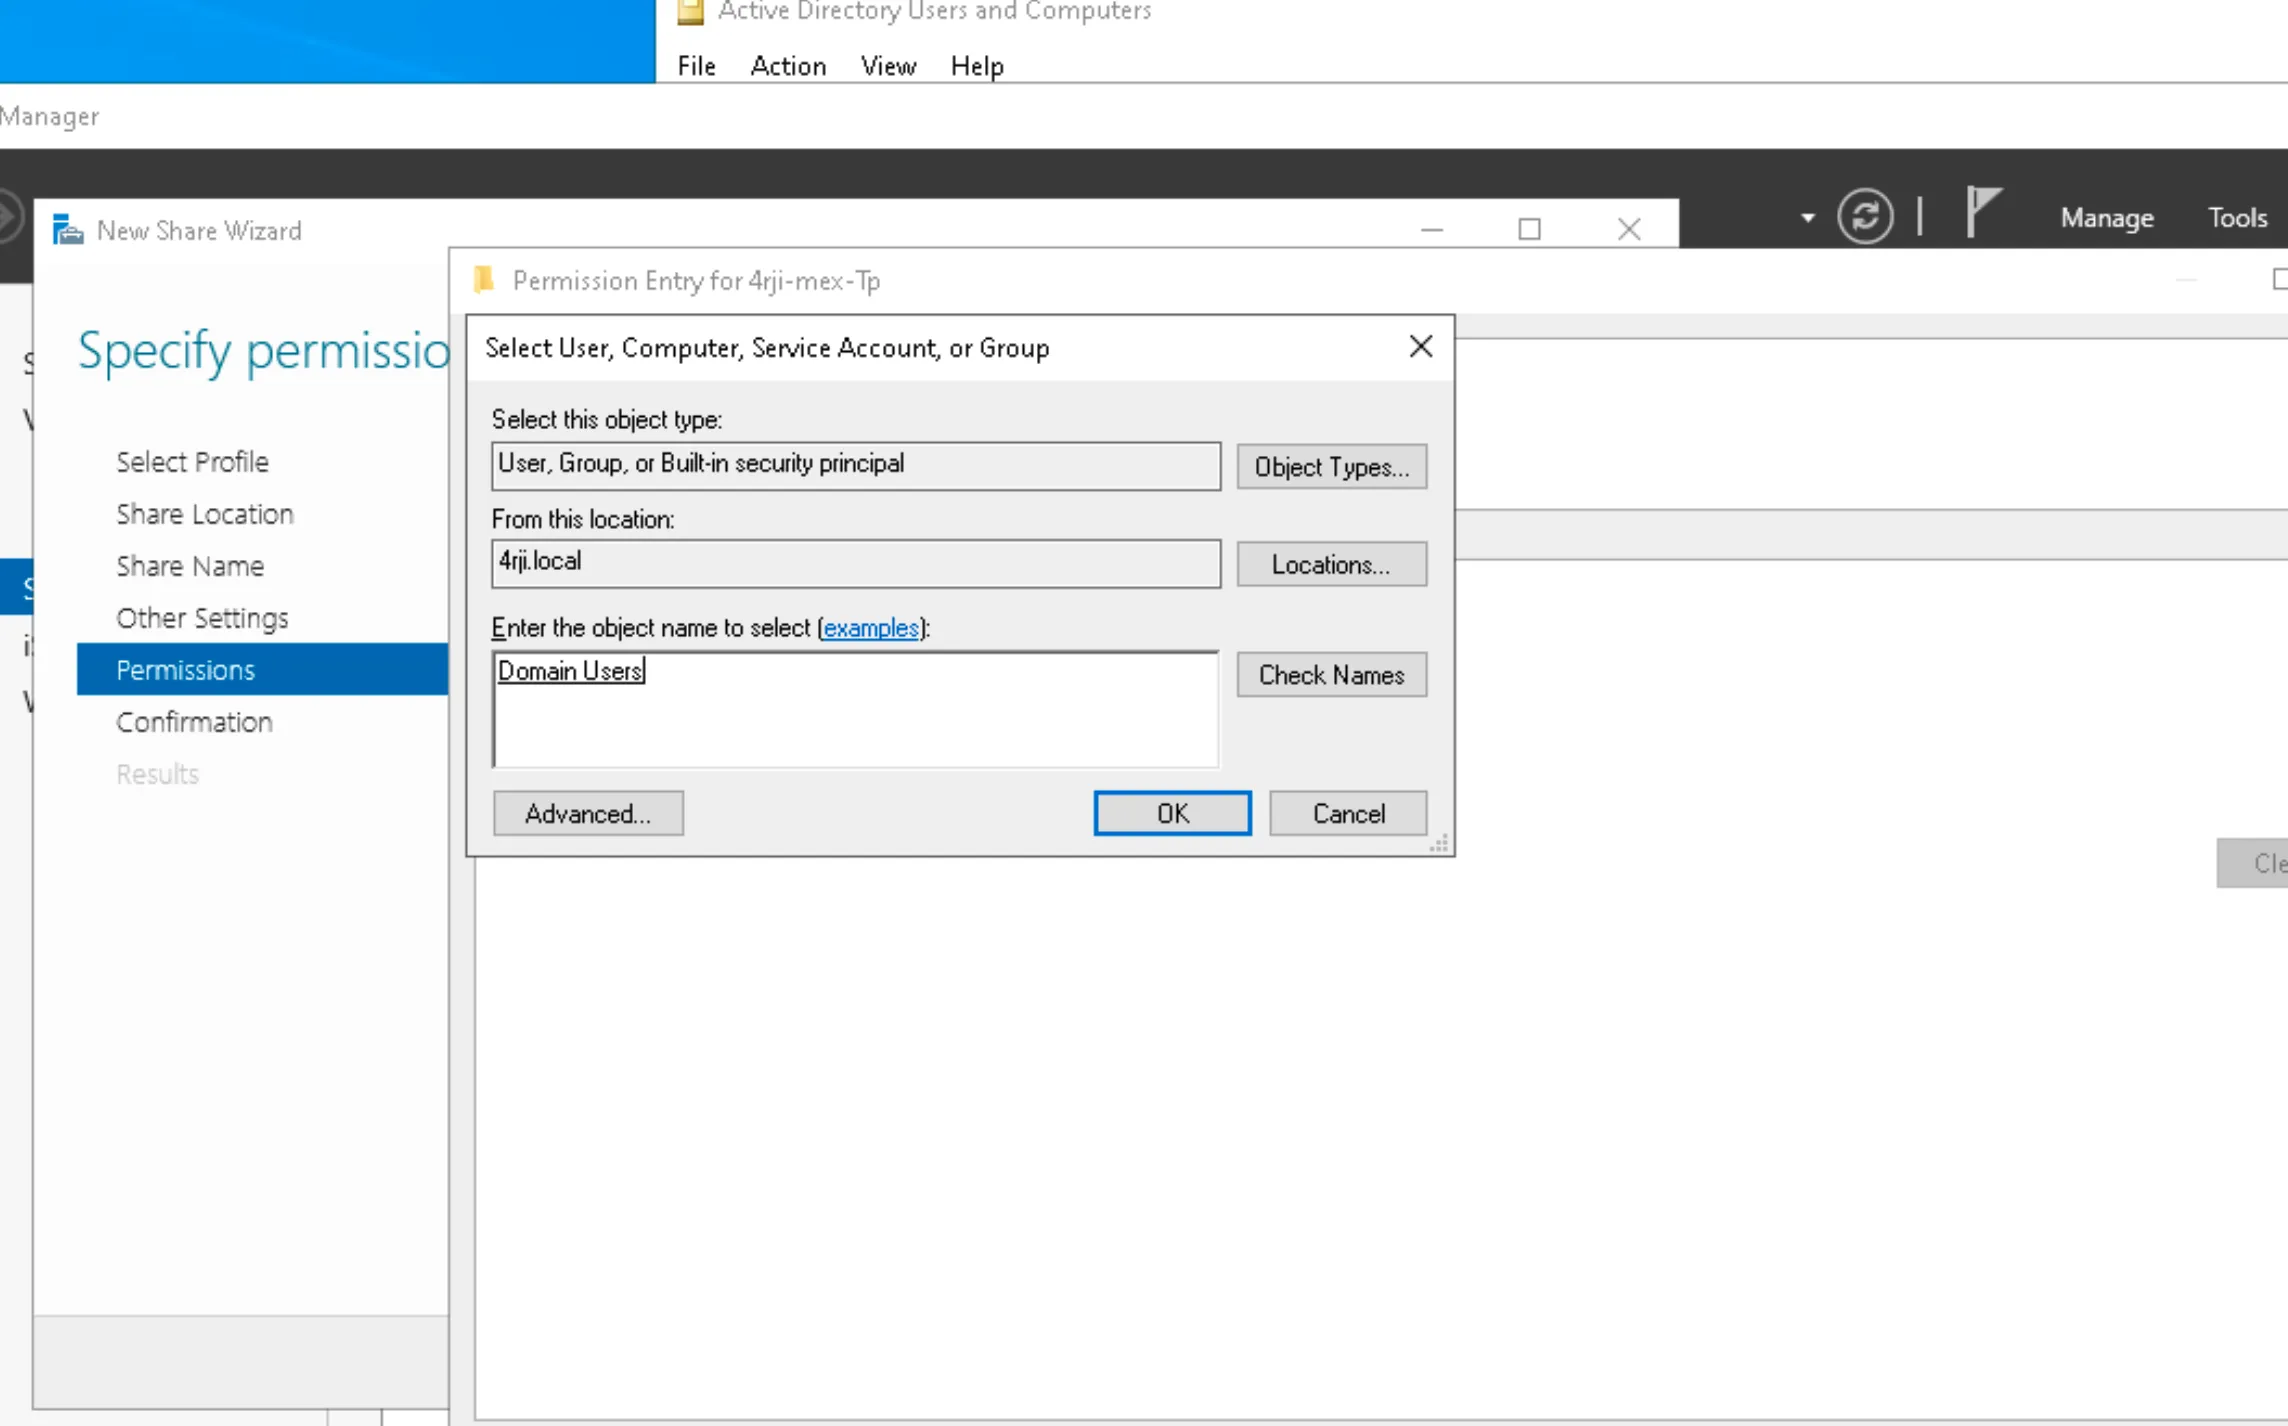
6. Configure NTFS Permissions
In the Permissions tab, add Domain Users with appropriate access:
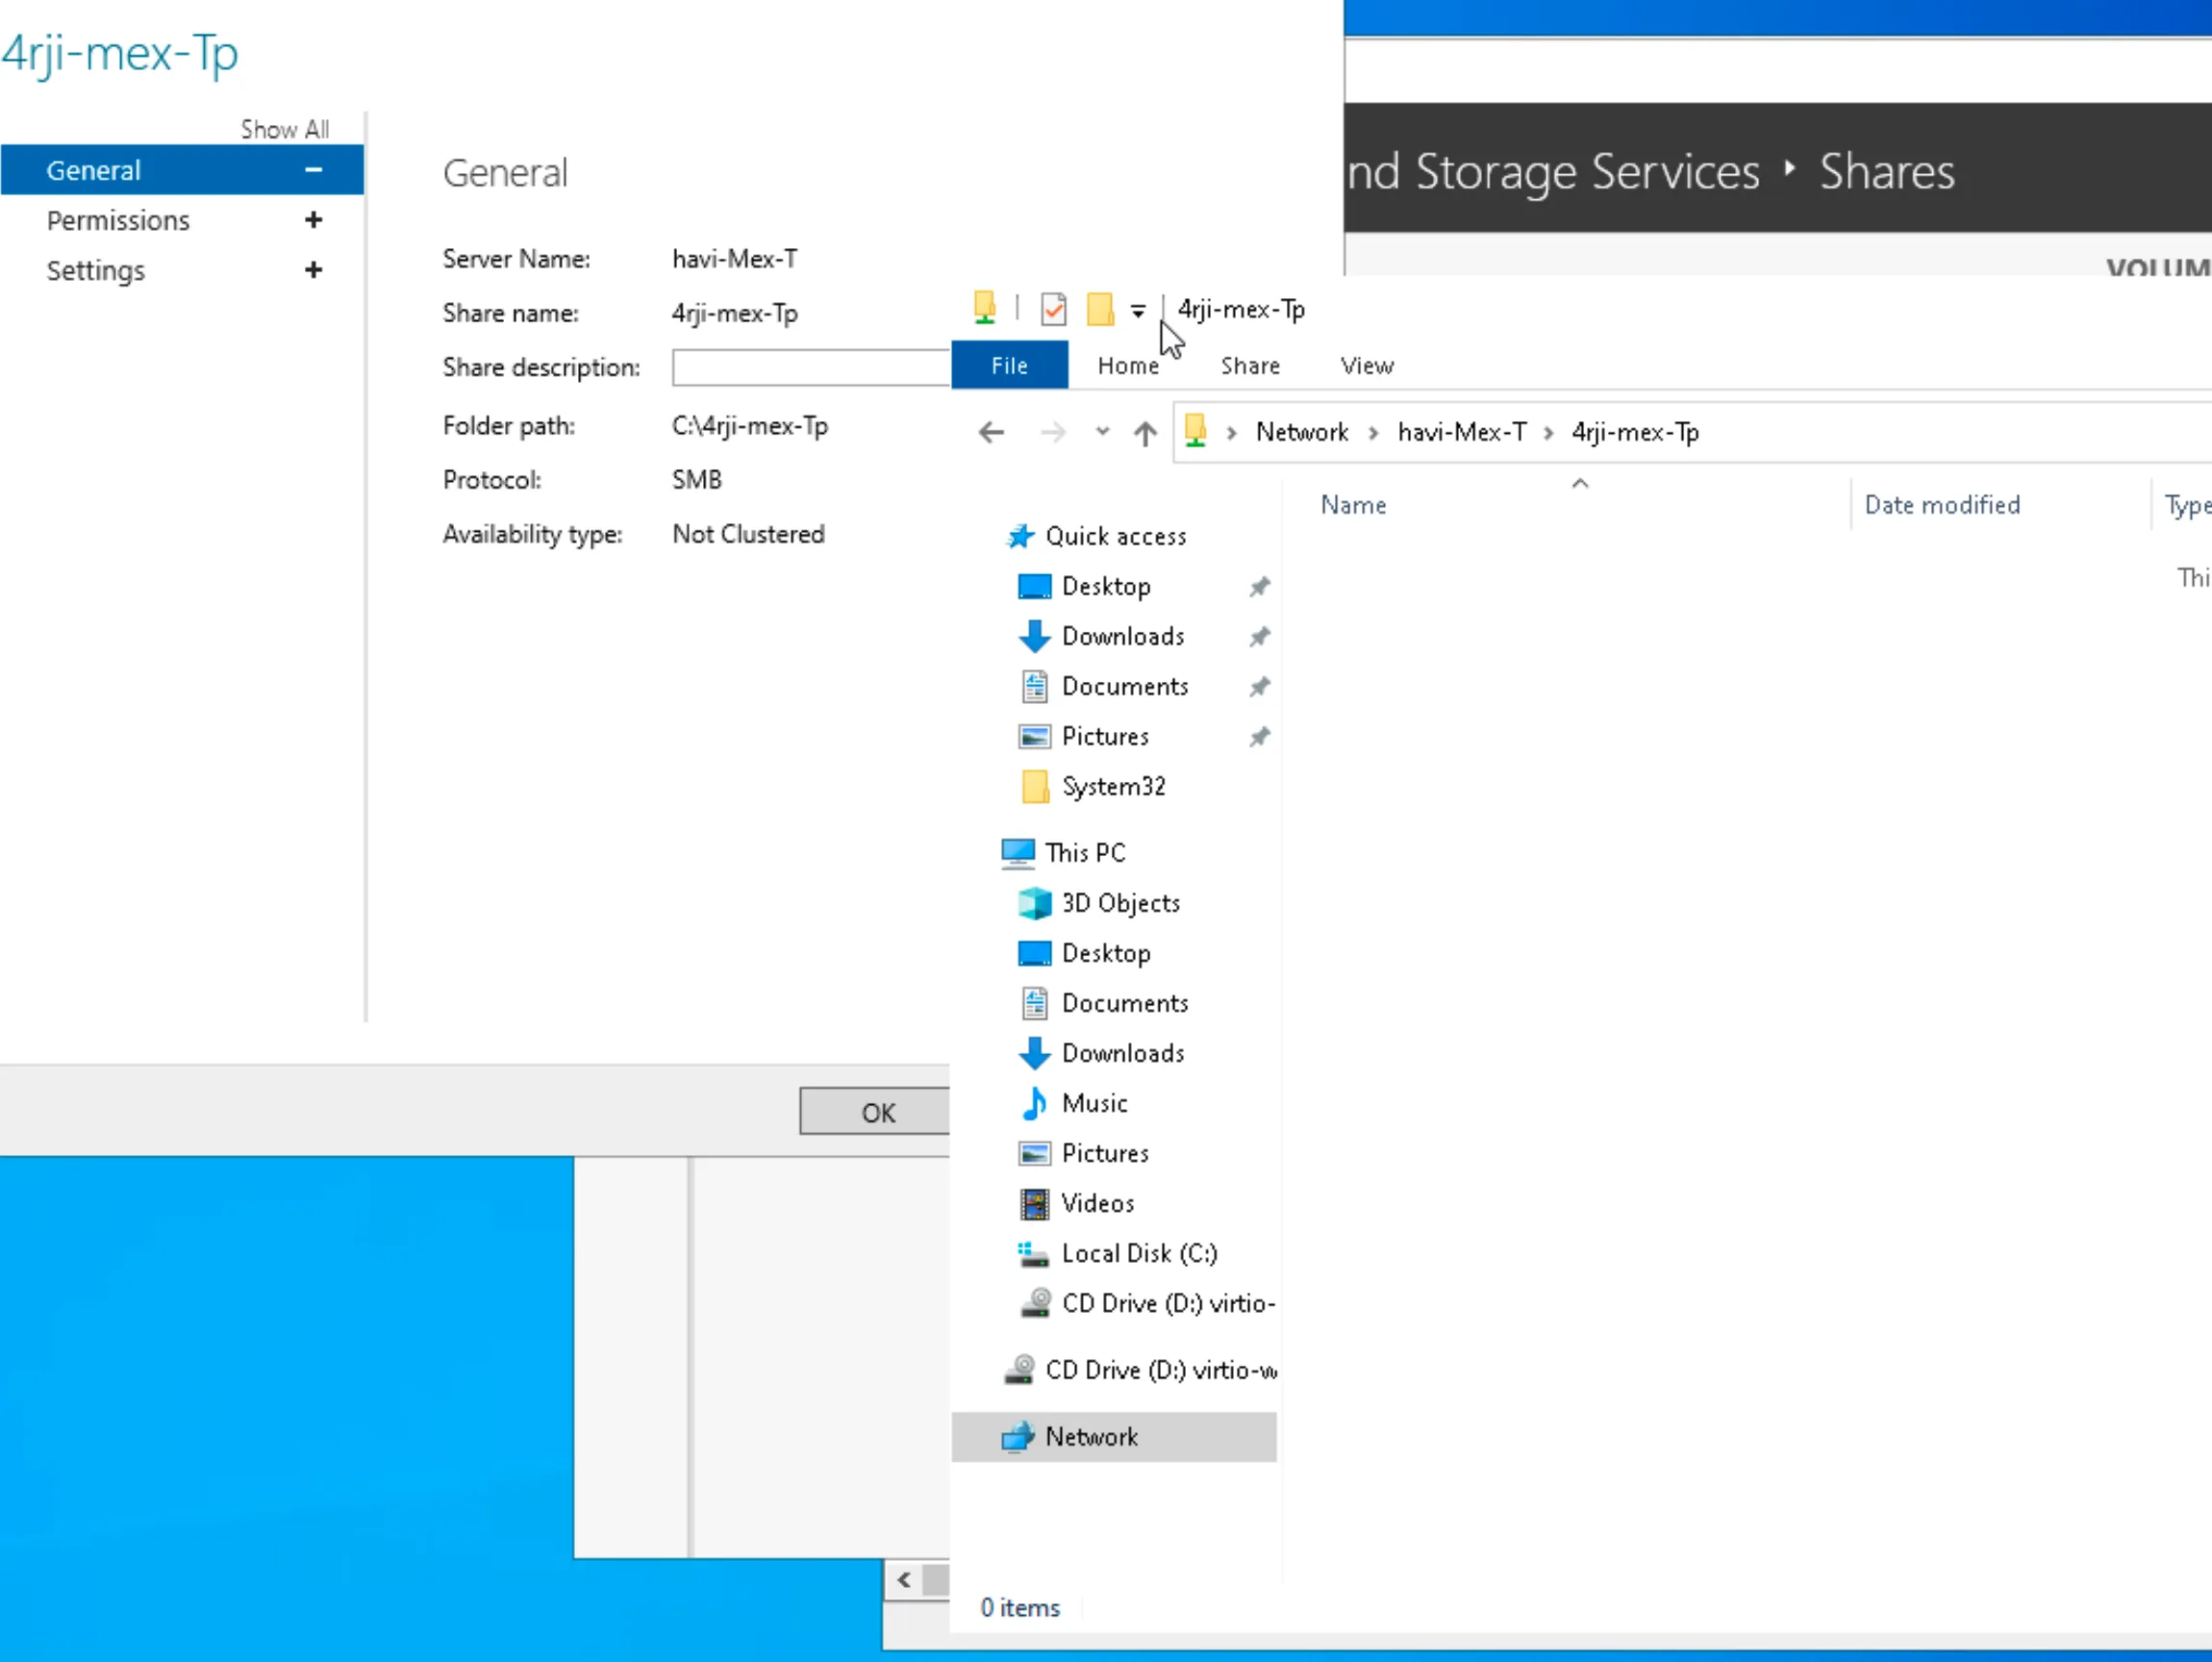
7. Verify Local Access
Test the share by accessing it from the same machine:
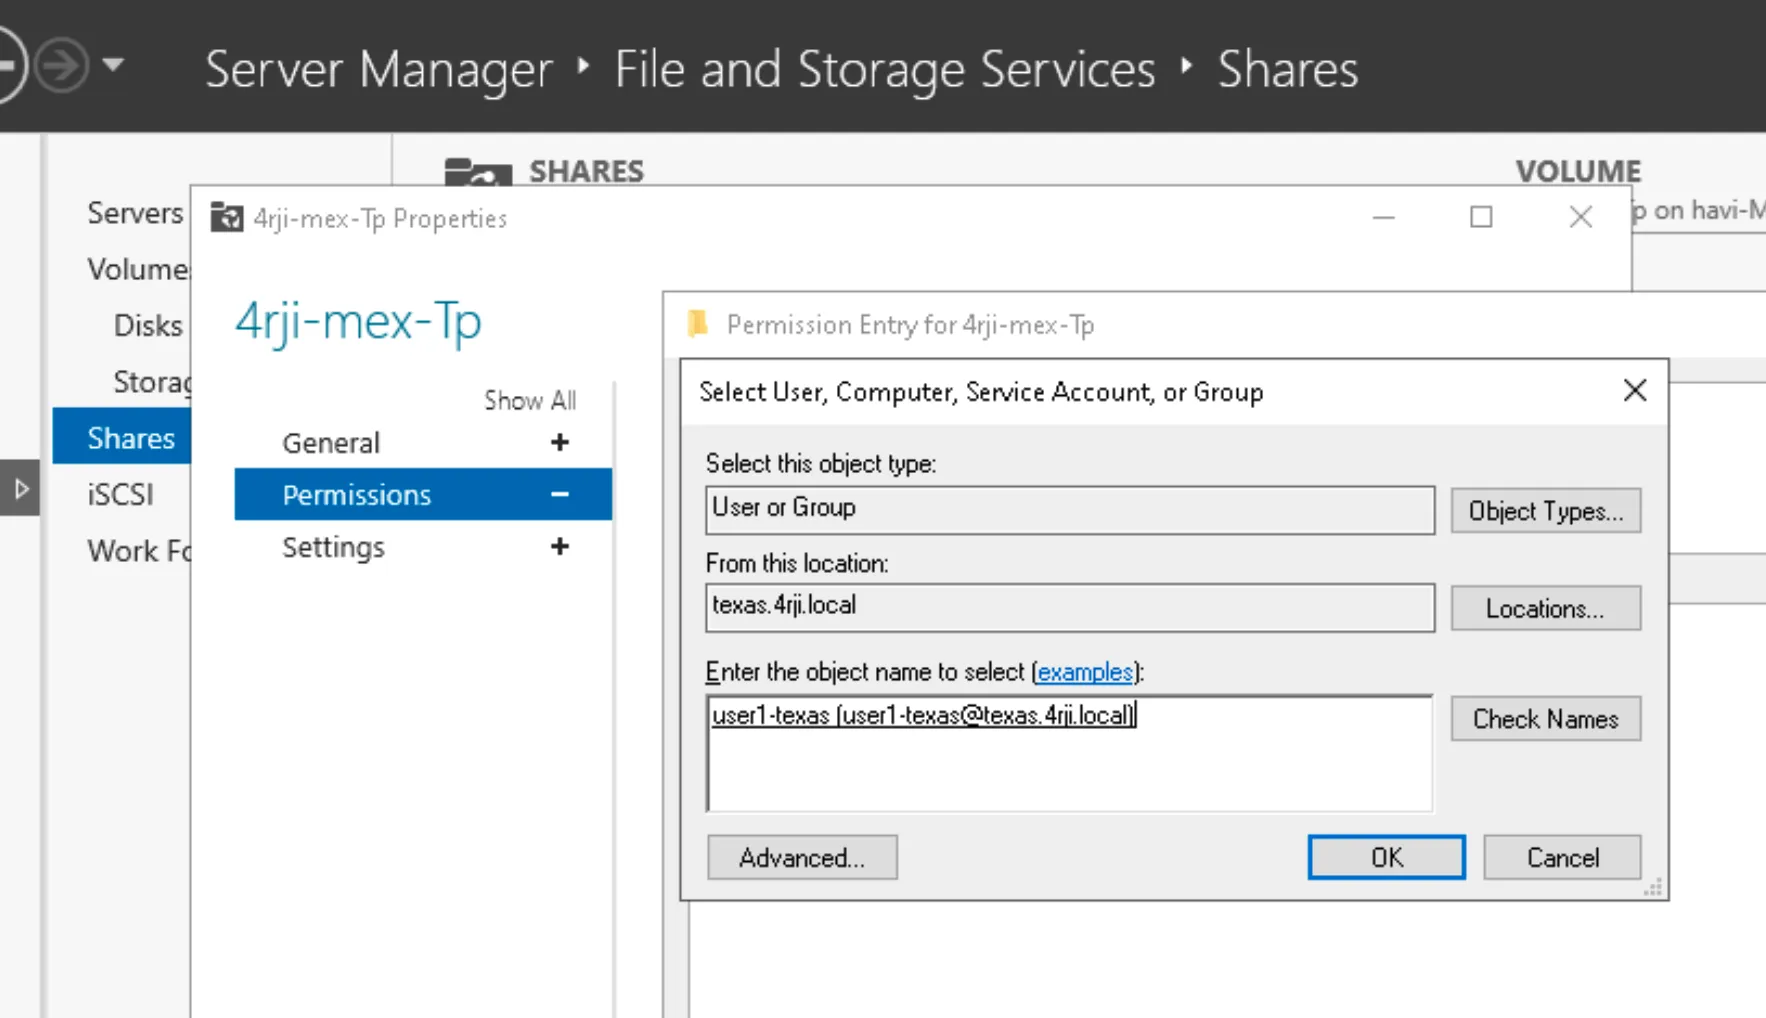
8. Add Additional Users
Add another user for share access (e.g., Texas user connected to Texas server):
9. Access the Server
Connect to the server:
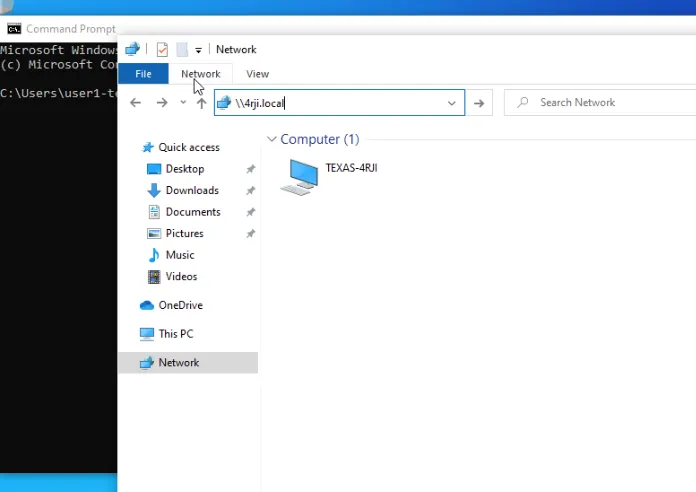
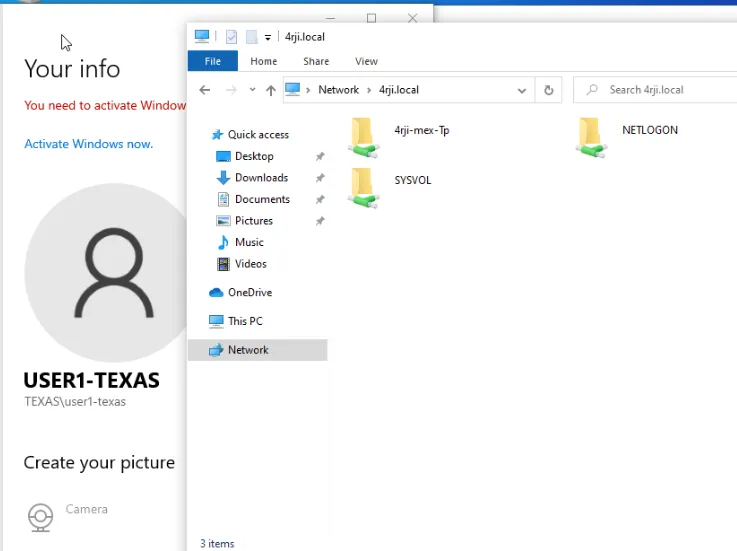
10. Access Shared Resources
You can now view and access the shared resources: