Go Traffic Load Monitor & Generator

A comprehensive suite of tools for monitoring and testing web server traffic

Project Highlights

This web traffic monitoring project documents a Go-based toolkit for visualizing, simulating, and stress-testing web server traffic. It includes a live monitoring dashboard, a browsing traffic simulator, and a high-concurrency load generator for testing how services behave under different traffic levels.

  • Built a Go web monitor with a live dashboard for real-time request tracking.
  • Created a traffic simulator for user-like HTTP browsing activity.
  • Developed a siege-style load generator with concurrency and duration controls.
  • Added visual load thresholds for low, medium, and high traffic conditions.
  • Tested traffic workflows across multiple terminals for monitoring and stress testing.
  • Captured request metrics such as transactions, availability, elapsed time, and transaction rate.

Go Traffic Load Monitor & Generator

This project includes 3 Go-based tools designed to simulate, monitor, and stress-test web server traffic in a coordinated and visual way.

🔧 Tools Overview

Tool Description
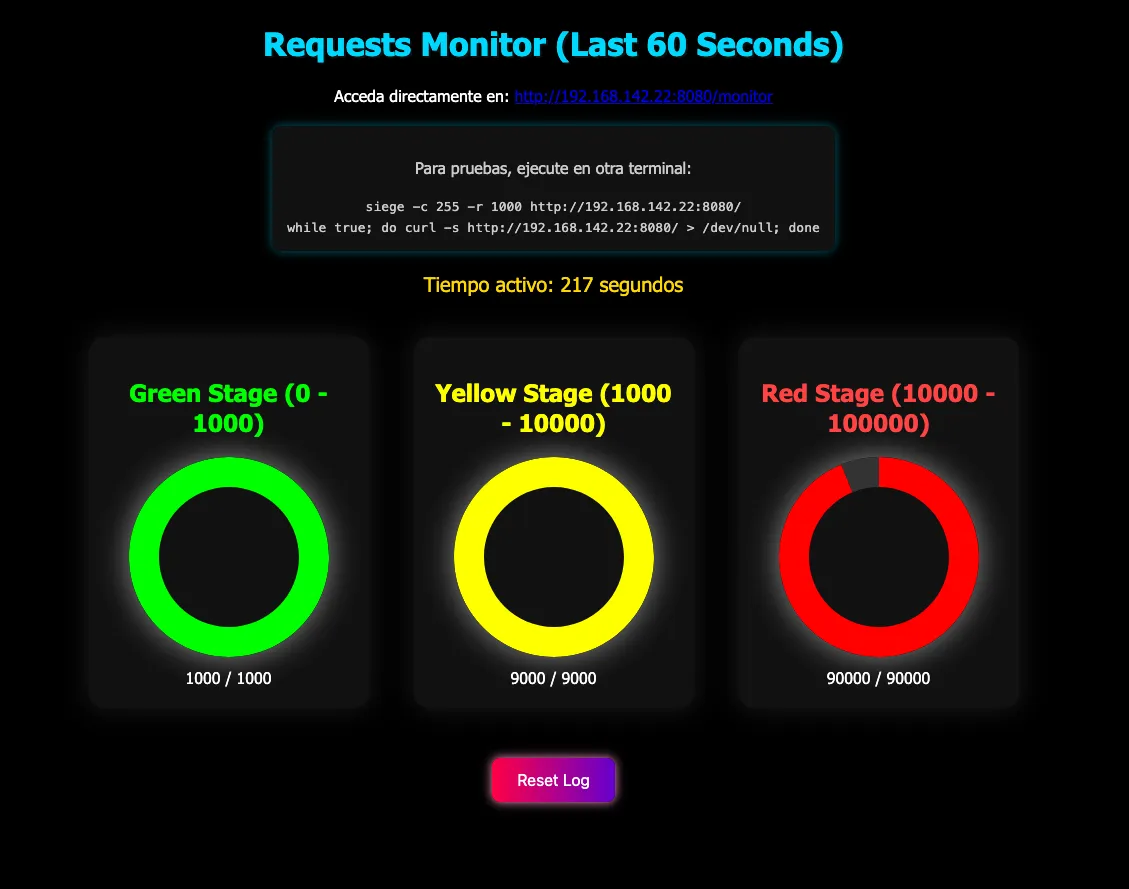
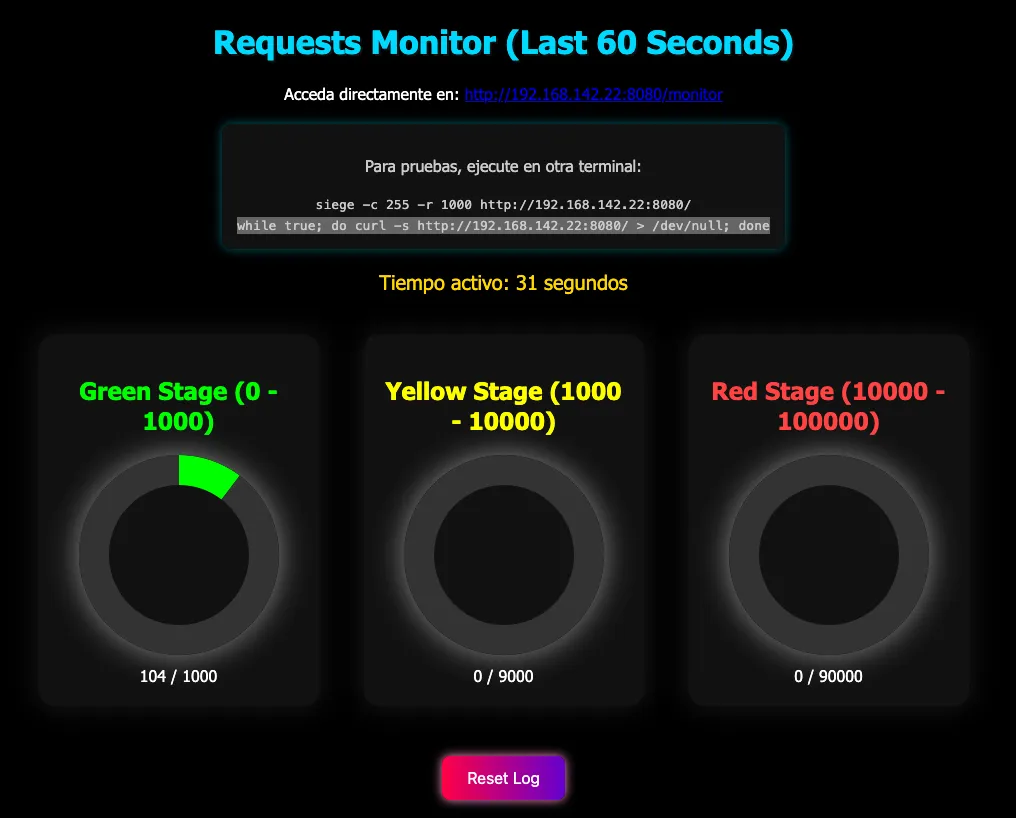
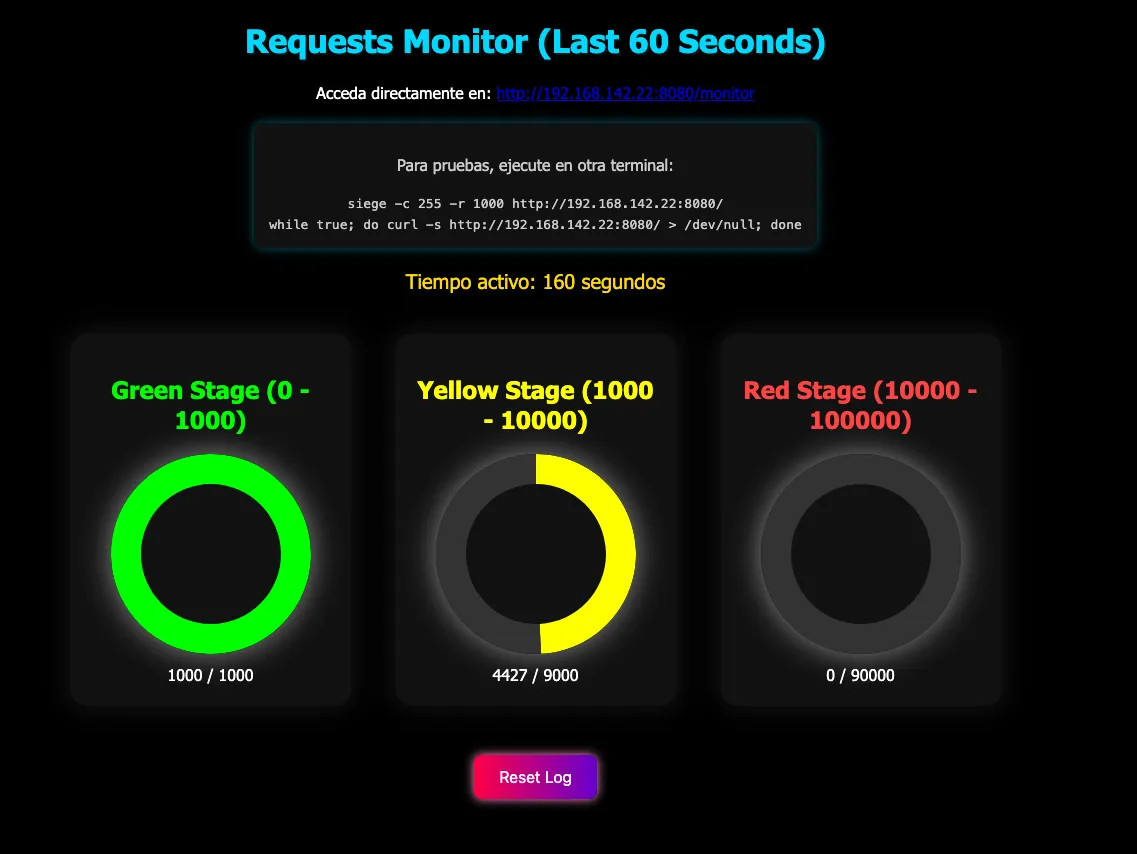
webmonitor.go Launches a local web server with a live dashboard showing real-time request count and traffic load levels.
trafico.go Simulates user-like HTTP browsing traffic to common or custom URLs.
siege.go High-performance HTTP load generator (Siege-style) with concurrency control and metrics reporting.

🚀 How to Use

1. Start the Monitoring Web Server
Live Dashboard
go run webmonitor.go

This starts a web server on port 8080. Once running, it will auto-open your browser or you can visit it manually at:

http://:8080/monitor

You'll see a real-time traffic dashboard with gauges for low, medium, and high load thresholds.

2. Generate Traffic with trafico.go

This simulates real HTTP GET requests to popular websites or a specific target:

go run trafico.go http://:8080

You can also run it without arguments to use predefined popular URLs (e.g., facebook.com, youtube.com, instagram.com).

You'll be prompted for:

  • • Session duration in minutes
  • • Delay between requests
  • • Number of concurrent workers

3. Stress Test with siege.go

This tool simulates high-concurrency load (similar to siege):

go run siege.go http://:8080 500 1

Arguments:

  • • Target URL
  • • Number of concurrent workers
  • • Duration (in minutes)

🧪 Test Workflow Example

1. In Terminal 1, run the monitor:

go run webmonitor.go

2. In Terminal 2, simulate browsing traffic:

go run trafico.go http://192.168.1.100:8080

3. In Terminal 3, fire off the stress test:

siegee 192.168.142.22:8080 50 1
[INFO] Target: http://192.168.142.22:8080
[INFO] Concurrency: 50
[INFO] Duration: 1m0s

========= Siege Report =========
Transactions:        890580 hits
Availability:        100.00 %
Elapsed time:        60.00 secs
Response time:       0.00 secs
Transaction rate:    14843.00 trans/sec
Successful transactions: 890580
Failed transactions:     0
Live Dashboard Live Dashboard

Simple Load Testing with k6

This Bash script provides a simple way to create and run HTTP load tests using k6. It automatically installs k6 when necessary, asks for the test parameters, generates a JavaScript test file in /tmp, and optionally runs the test.

🔍 What It Does

The script asks for:

  • • Target URL — The HTTP/HTTPS endpoint to test.
  • • Virtual Users (VUs) — Number of concurrent virtual users generating traffic.
  • • Duration — How long the load test should run, such as 30s, 5m, or 1h.
  • • p95 latency threshold — Maximum acceptable response time for 95% of requests.
  • • Maximum failure rate — Maximum percentage of HTTP requests allowed to fail.

If k6 is not installed, the script automatically installs it using Homebrew on macOS or APT on supported Debian/Ubuntu systems.

⚡ Usage

Make the script executable:

chmod +x k6-load-test

Run it:

./k6-load-test

Example configuration:

Target URL: localhost:8080
Virtual users [10]: 50
Duration [30s]: 5m
Maximum p95 latency in ms [500]: 500
Maximum failure rate % [1]: 2

If no protocol is provided, the script automatically adds http://.

For example:

localhost:8080

becomes:

http://localhost:8080

The generated k6 test is stored at:

/tmp/k6_load_test.js

It can also be executed manually:

k6 run /tmp/k6_load_test.js

📊 Understanding the Results

During the test, k6 continuously sends HTTP requests from the configured virtual users and measures application performance.

Some of the most useful metrics are:

  • • http_reqs
  • • http_req_duration
  • • http_req_failed
  • • p(95)

For example:

http_req_duration: p(95)=320ms
http_req_failed:   0.42%

A p(95) of 320 ms means that 95% of HTTP requests completed in 320 milliseconds or less.

If the test was configured with:

p95 < 500 ms
failure rate < 2%

these results would satisfy both performance thresholds.

⚠️ Important: VUs vs. Requests

Virtual users should not be confused with the total number of requests.

For example:

50 VUs
Duration: 5 minutes

does not mean that only 50 requests will be sent.

Each virtual user repeatedly executes the HTTP request for the duration of the test. Depending on the application’s response time, 50 VUs can generate thousands or even hundreds of thousands of requests.

This makes k6 useful for observing how an application behaves as concurrent traffic increases and for identifying latency, error-rate, and capacity problems under load.