ESXI setup

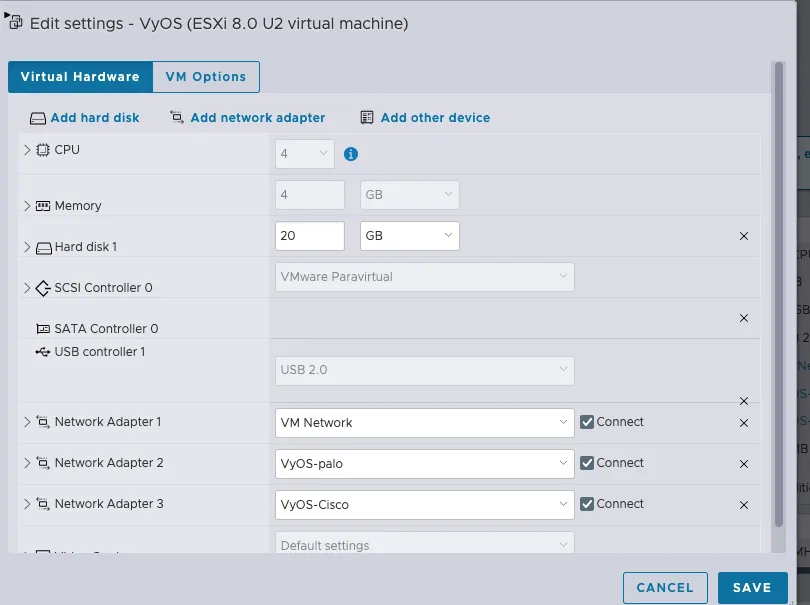
Installation steps
Mount the ISO and boot from it:
# Mount the ISO and boot
# (Use your hypervisor or mount command as appropriate)
By default, VyOS uses the following credentials:
- User: vyos
- Password: vyos
Next, run the installer:
install imageVisual reference:
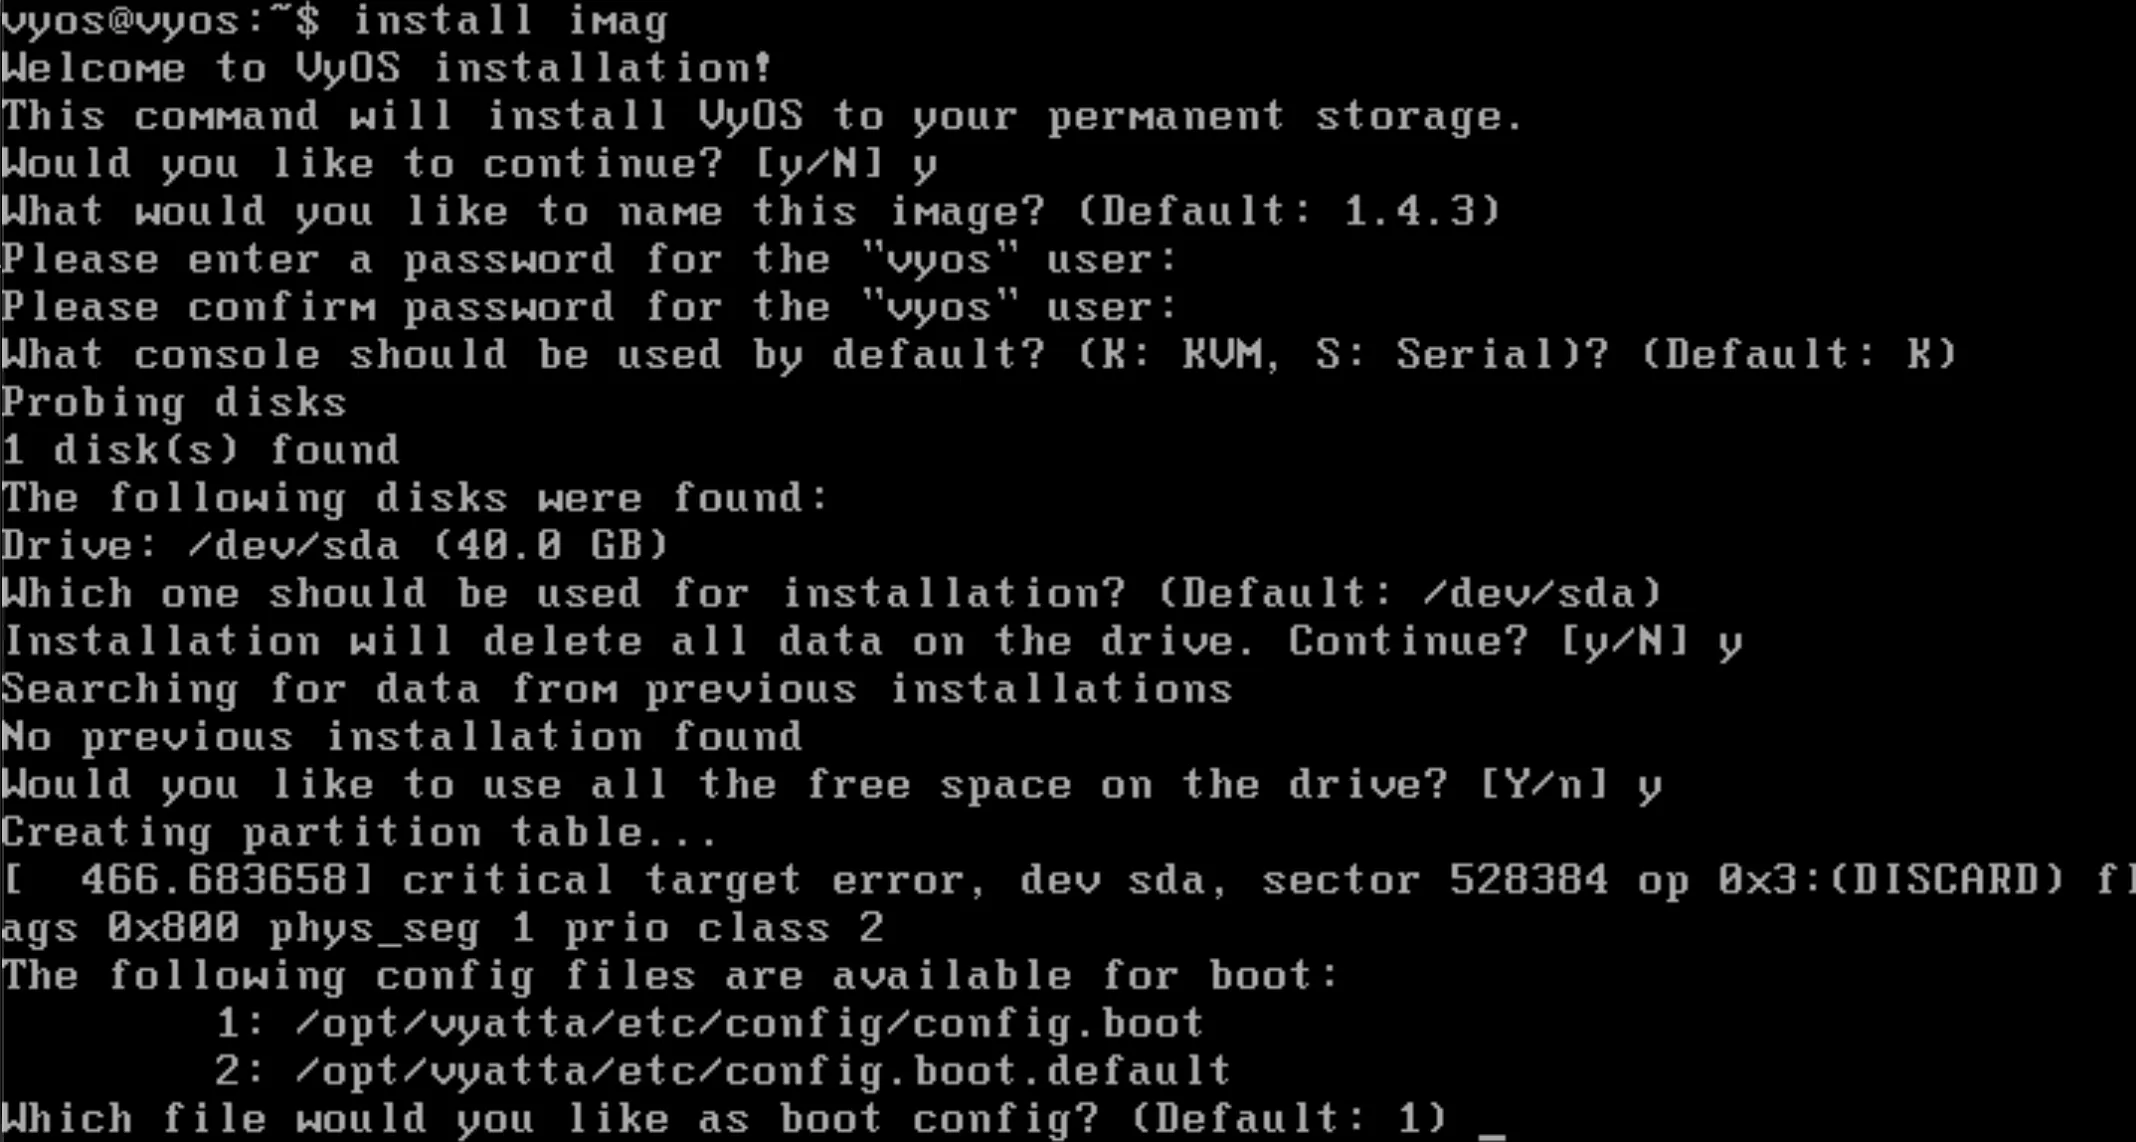
After installation completes, reboot the system.
Password Configuration
To change the password for the vyos user, use the following commands in configuration mode:
configure
set system login user vyos authentication plaintext-password metro123
commit
After setting up the VyOS user password, it's recommended to also change the root password for additional security:
sudo passwd rootStart the configuration mode:
# Enter configuration mode
configure

# Show interfaces (or use 'ip a' like on Debian)
show interfaces
# or
ip a
Configure the interfaces for Cisco and Palo (as shown in the image):
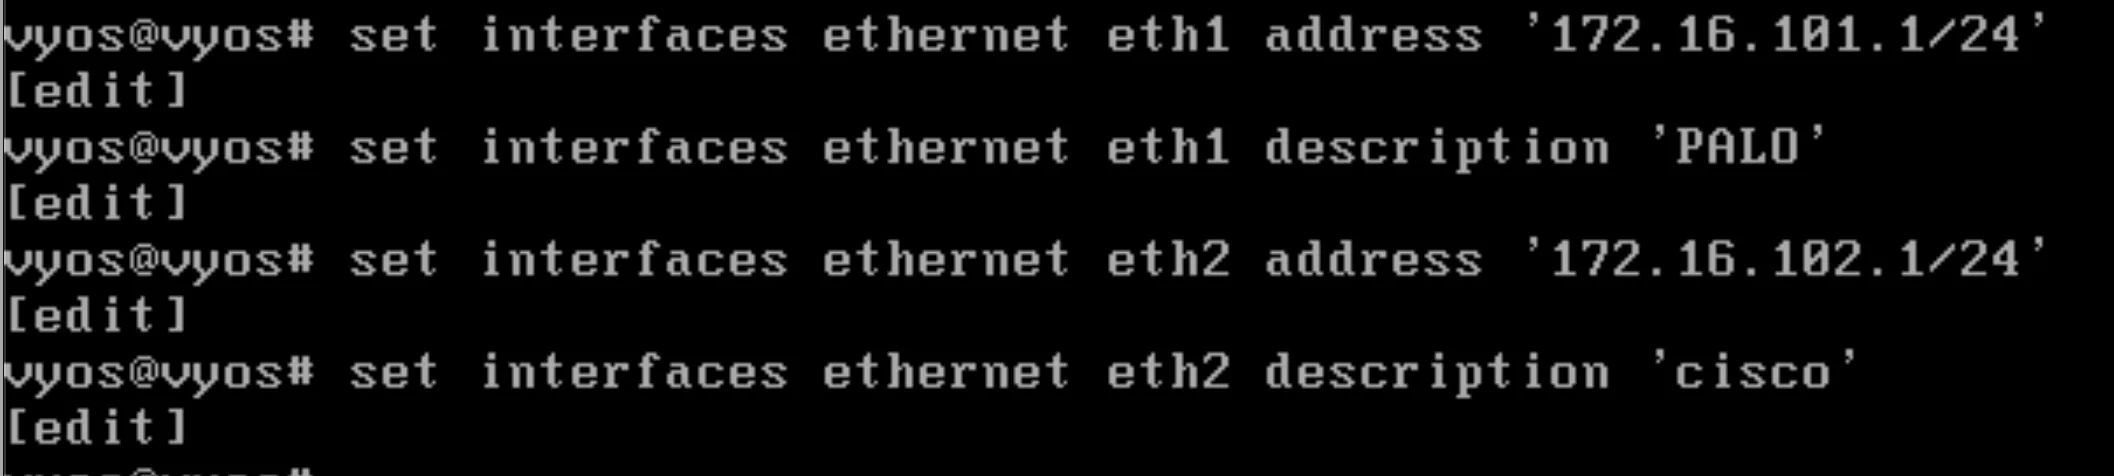
Configuration: DHCP, DNS, NAT, and Firewall
Configure DHCP for two networks (NET1 and NET2), DNS forwarding, NAT rules, and firewall
groups. Run these commands in configuration mode (configure):
# WAN - eth0 via DHCP
set interfaces ethernet eth0 address dhcp

# DHCP for Net1 (172.16.101.0/24)
	set service dhcp-server shared-network-name NET1 subnet 172.16.101.0/24 default-router '172.16.101.1'
	set service dhcp-server shared-network-name NET1 subnet 172.16.101.0/24 name-server '172.16.101.1'
	#set service dhcp-server shared-network-name NET1 subnet 172.16.101.0/24 domain-name 'CCDCTeam.com'
	set service dhcp-server shared-network-name NET1 subnet 172.16.101.0/24 lease '86400'
	set service dhcp-server shared-network-name NET1 subnet 172.16.101.0/24 range 0 start '172.16.101.10'
	set service dhcp-server shared-network-name NET1 subnet 172.16.101.0/24 range 0 stop '172.16.101.245'

	# DHCP for Net2 (172.16.102.0/24)
	set service dhcp-server shared-network-name NET2 subnet 172.16.102.0/24 default-router '172.16.102.1'
	set service dhcp-server shared-network-name NET2 subnet 172.16.102.0/24 name-server '172.16.102.1'
	#set service dhcp-server shared-network-name NET2 subnet 172.16.102.0/24 domain-name 'CCDCTeam.com'
	set service dhcp-server shared-network-name NET2 subnet 172.16.102.0/24 lease '86400'
	set service dhcp-server shared-network-name NET2 subnet 172.16.102.0/24 range 0 start '172.16.102.10'
	set service dhcp-server shared-network-name NET2 subnet 172.16.102.0/24 range 0 stop '172.16.102.245'

	# DNS forwarding
	set service dns forwarding cache-size '0'
	set service dns forwarding listen-address '172.16.101.1'
	set service dns forwarding listen-address '172.16.102.1'
	set service dns forwarding allow-from '172.16.101.0/24'
	set service dns forwarding allow-from '172.16.102.0/24'


	# NAT
	set nat source rule 100 outbound-interface name 'eth0'
	set nat source rule 100 source address '172.16.101.0/24'
	set nat source rule 100 translation address masquerade

	set nat source rule 101 outbound-interface name 'eth0'
	set nat source rule 101 source address '172.16.102.0/24'
	set nat source rule 101 translation address masquerade


	# FIREWALL

A firewall is only needed if you want to filter or protect traffic.
VyOS will route without any firewall rules by default.

You should apply a firewall on the WAN interface (eth0) to block
unsolicited inbound traffic, while allowing established and related
connections. LAN interfaces (eth1, eth2) typically do not require
firewall rules unless you want internal segmentation or restrictions.


	set firewall group interface-group WAN interface eth0
	set firewall group interface-group LAN interface eth1
	set firewall group interface-group LAN interface eth2

	set firewall group network-group NET-INSIDE-v4 network '172.16.101.0/24'
	set firewall group network-group NET-INSIDE-v4 network '172.16.102.0/24'
Configure Stateful Packet Filtering
With the new firewall structure, you have a lot of flexibility in how you group and order rules. Below are three alternative approaches you can consider.
Option 1: Global State Policies
This approach uses global, stateful policies that apply broadly and simplify rule management for typical deployments.
For more details and examples, see the VyOS quick start guide:
$). To enter configuration mode (#), use:
vyos@vyos$ configure
vyos@vyos#commitsaveChange Password
To change the password for the vyos user, use the following commands in configuration mode:
configure
set system login user vyos authentication plaintext-password metro123
commit
SSH Service Configuration
Configure SSH service to enable remote access to your VyOS router:
configure
set service ssh port 2244
set service ssh listen-address 172.20.240.102   # o mgmt IP
set service ssh disable-password-authentication   # opcional (keys only)
commit
save
Note: Replace 172.20.240.102 with your management IP address.
The disable-password-authentication option is recommended for enhanced security
when using SSH keys.