Project Highlights
This TrueNAS project documents the setup of a NAS server for lab storage, file sharing, and camera storage integration. It covers installing TrueNAS SCALE, preparing storage disks, creating pools and datasets, configuring SMB shares, mounting shares from Linux and macOS, and linking the NAS with UniFi Protect.
- Installed TrueNAS SCALE as a virtual NAS server with dedicated OS and storage disks.
- Prepared storage by wiping disks, formatting them, and creating a storage pool.
- Created datasets to organize shared storage.
- Configured users, permissions, and SMB shares for network access.
- Mounted SMB shares from Linux and connected from macOS clients.
- Integrated the NAS with UniFi Protect using a linked NAS account and selected storage share.
-
1
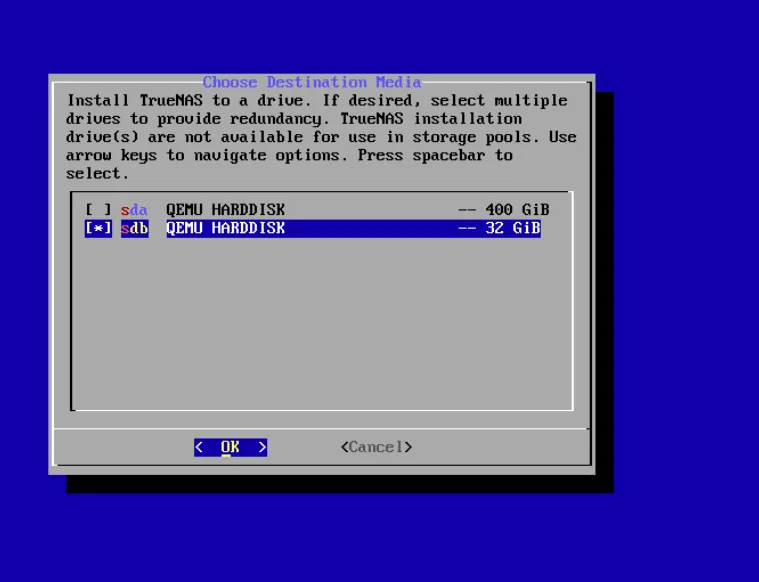
Download and Install TrueNAS SCALE
Download the ISO from this link and start the virtual machine with 8GB of RAM and 4 CPU cores. Add a 32GB hard drive for the operating system and another 400GB drive for storage. -
2
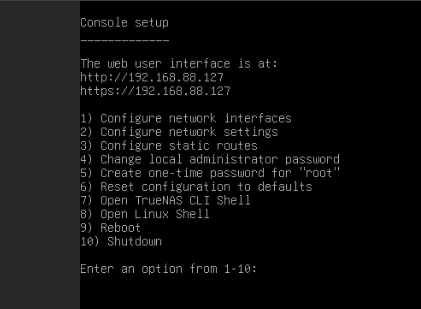
System Restart and Web Access
Restart the system and once it completes the boot process, access the web interface using the IP address displayed on the console. Log in with the usernametruenas_admin. -
3
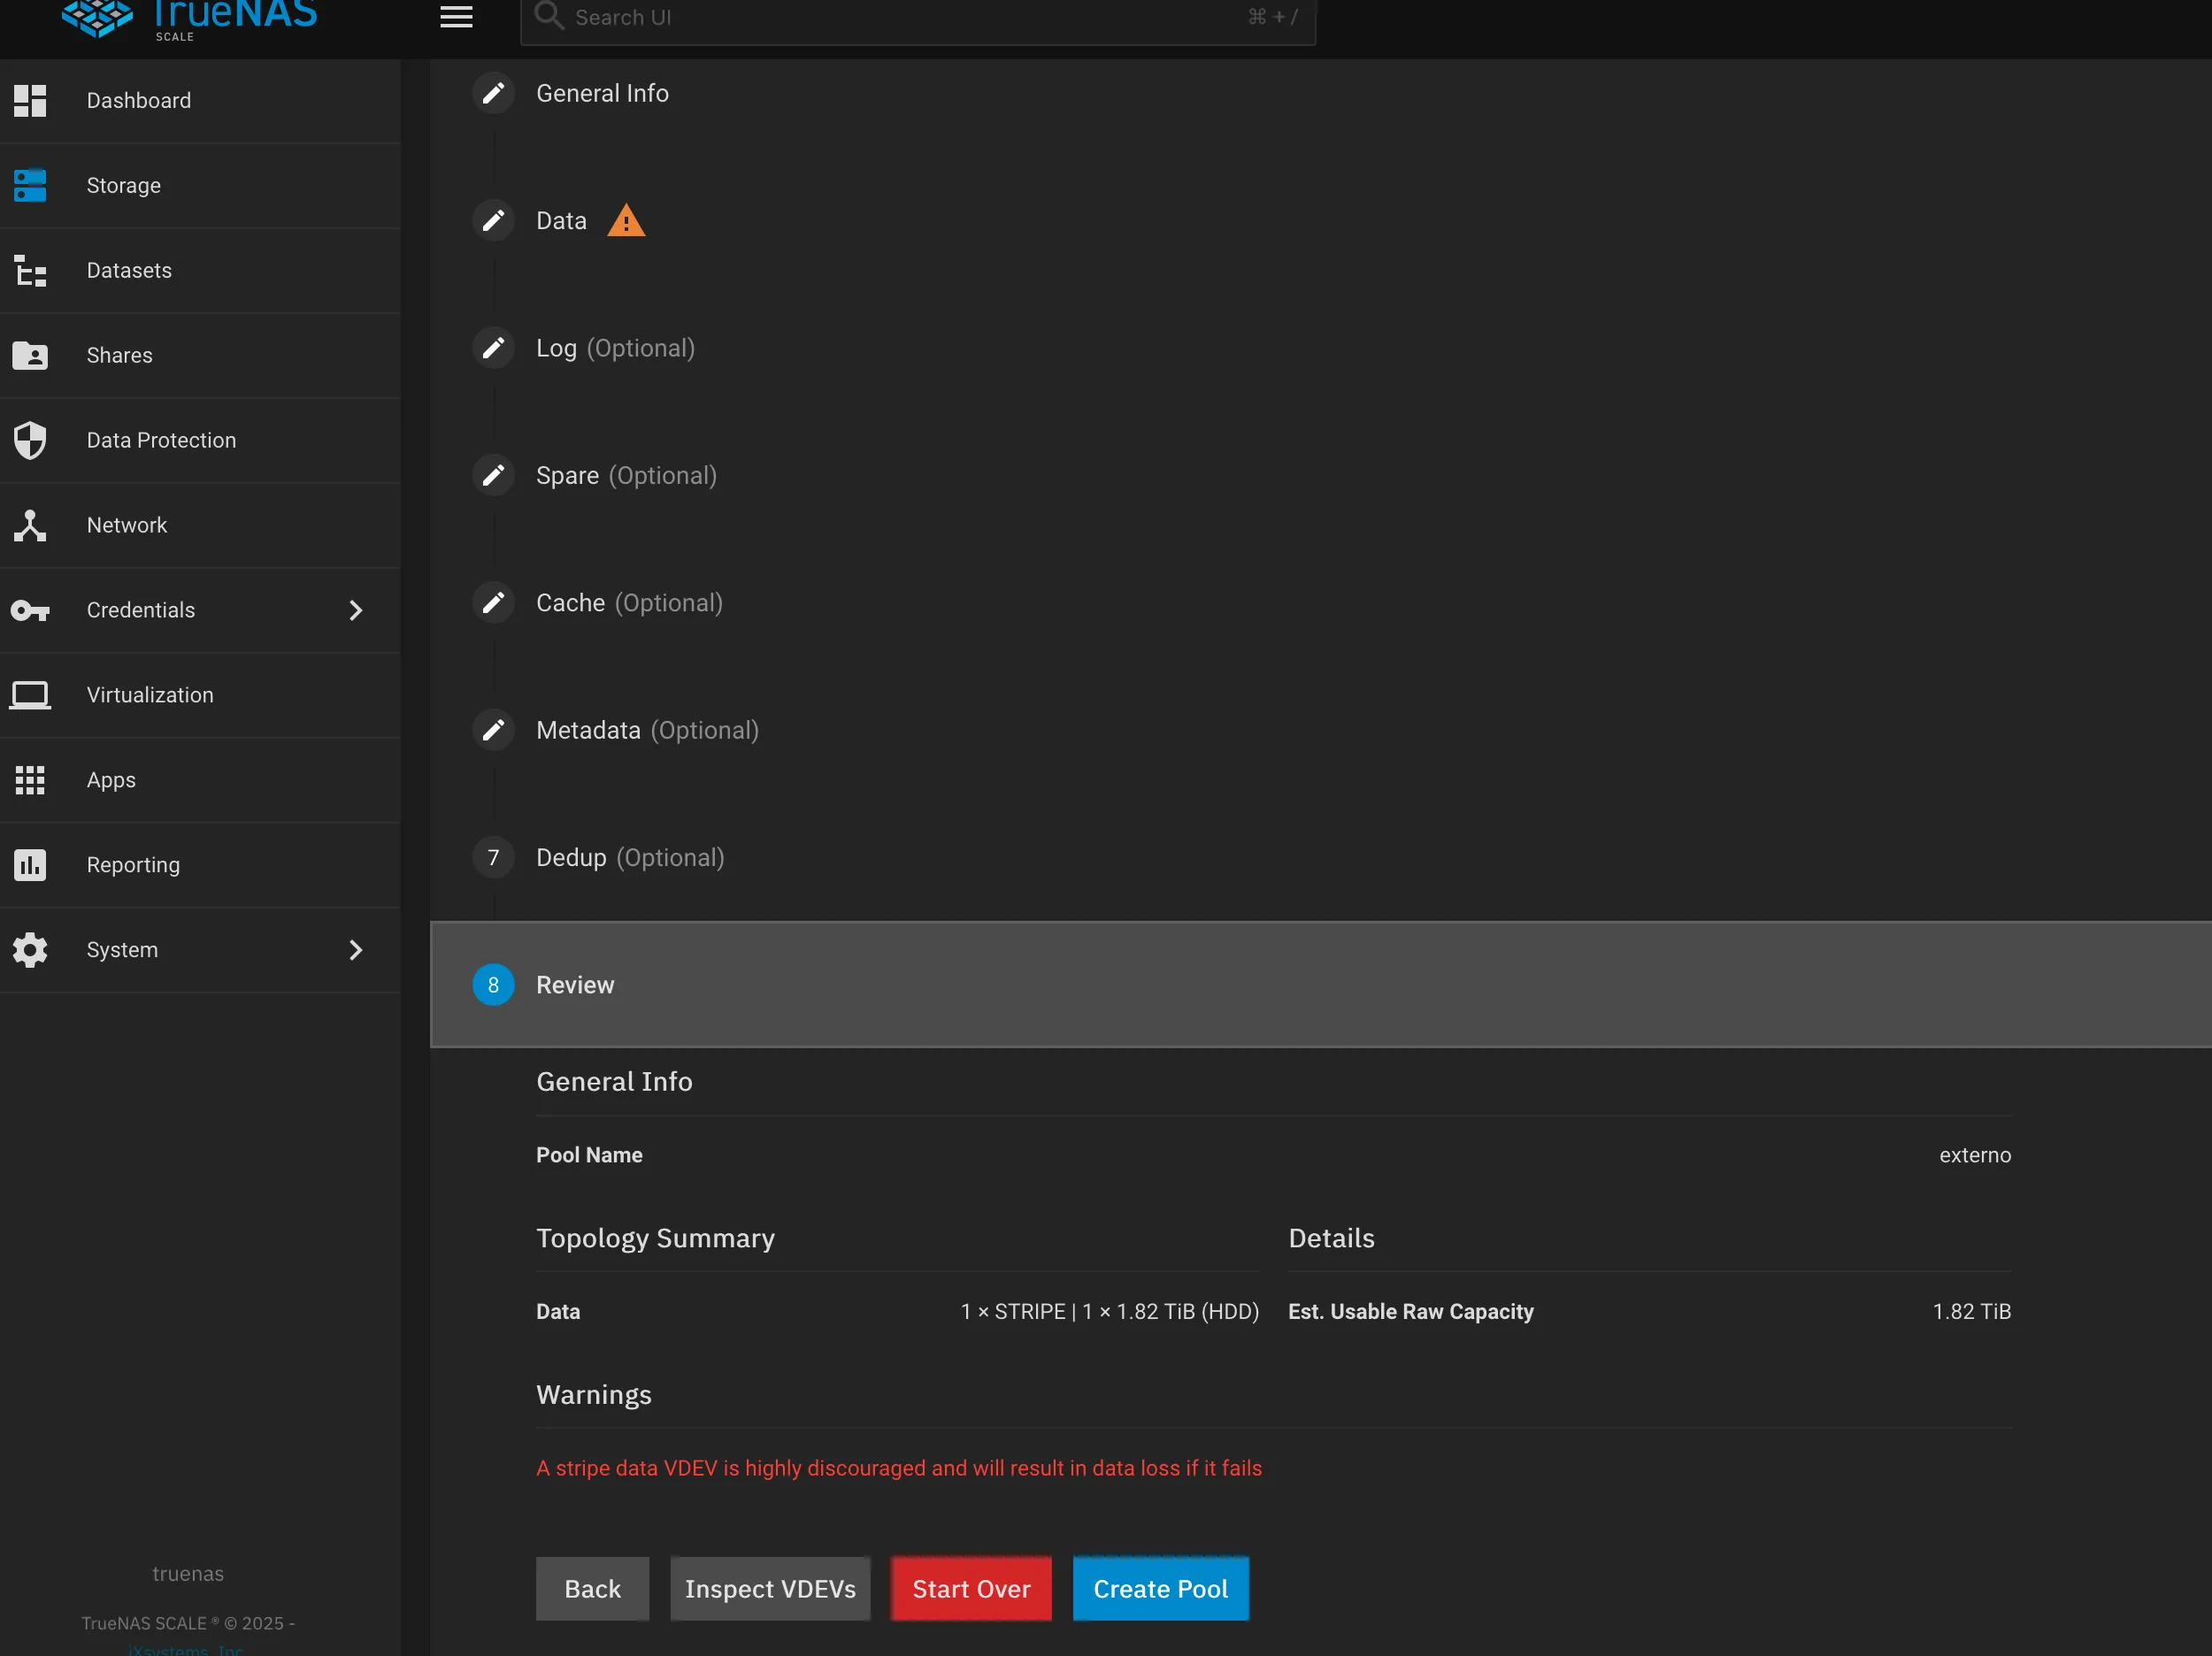
Prepare the Storage
Wipe and format the hard drive, then create a storage pool. -
4
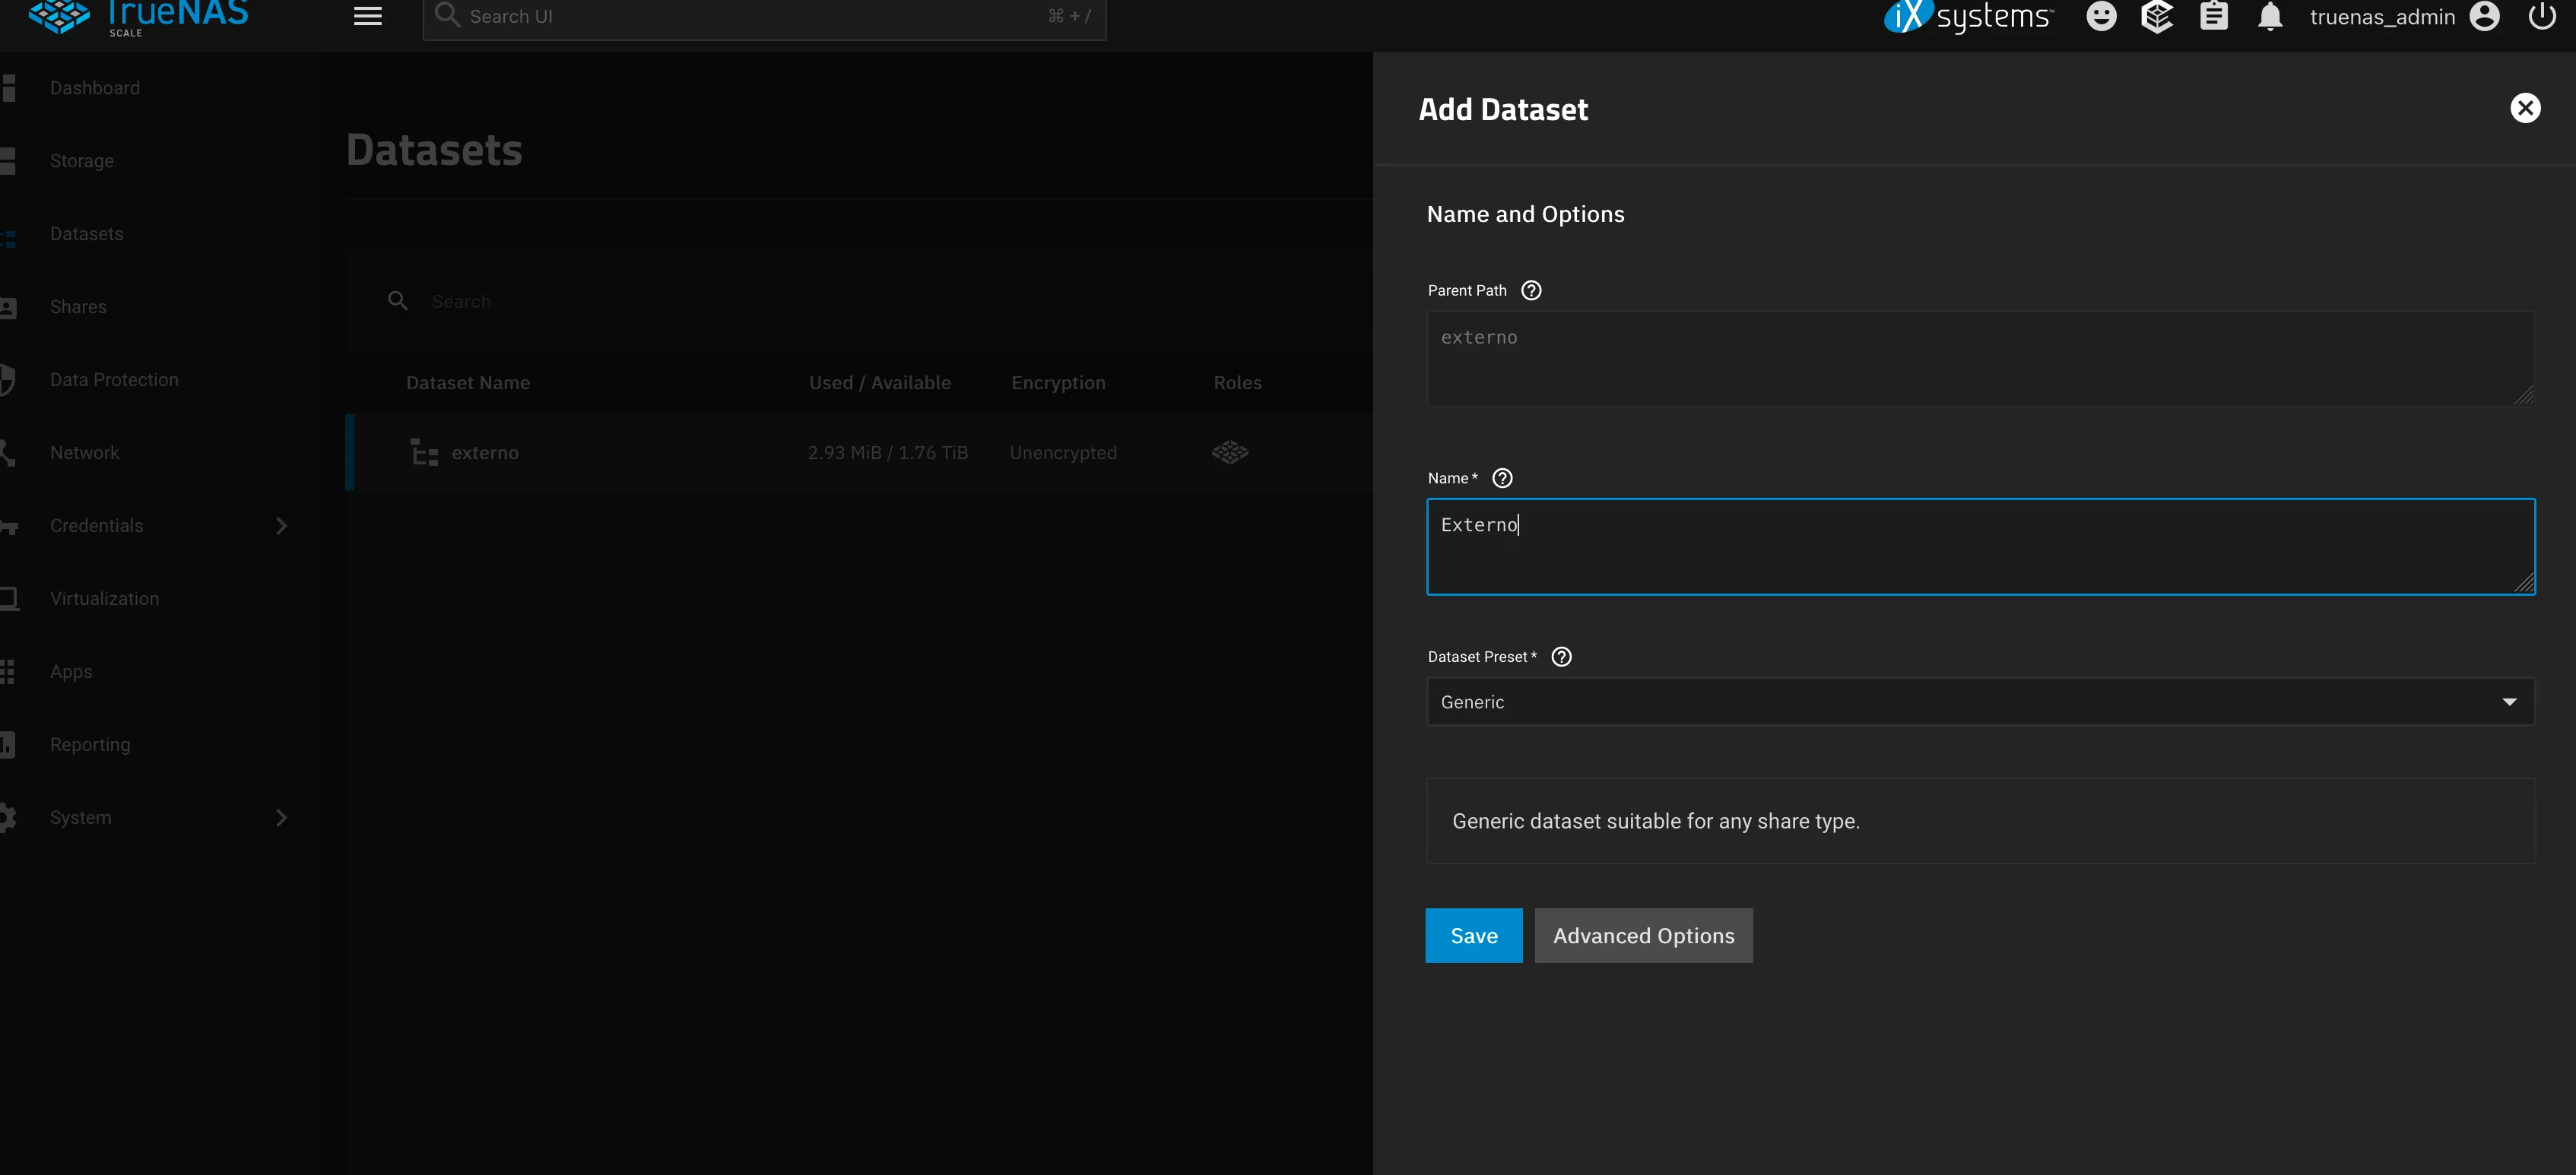
Create Datasets
Add datasets within the pool to organize your data efficiently. -
5
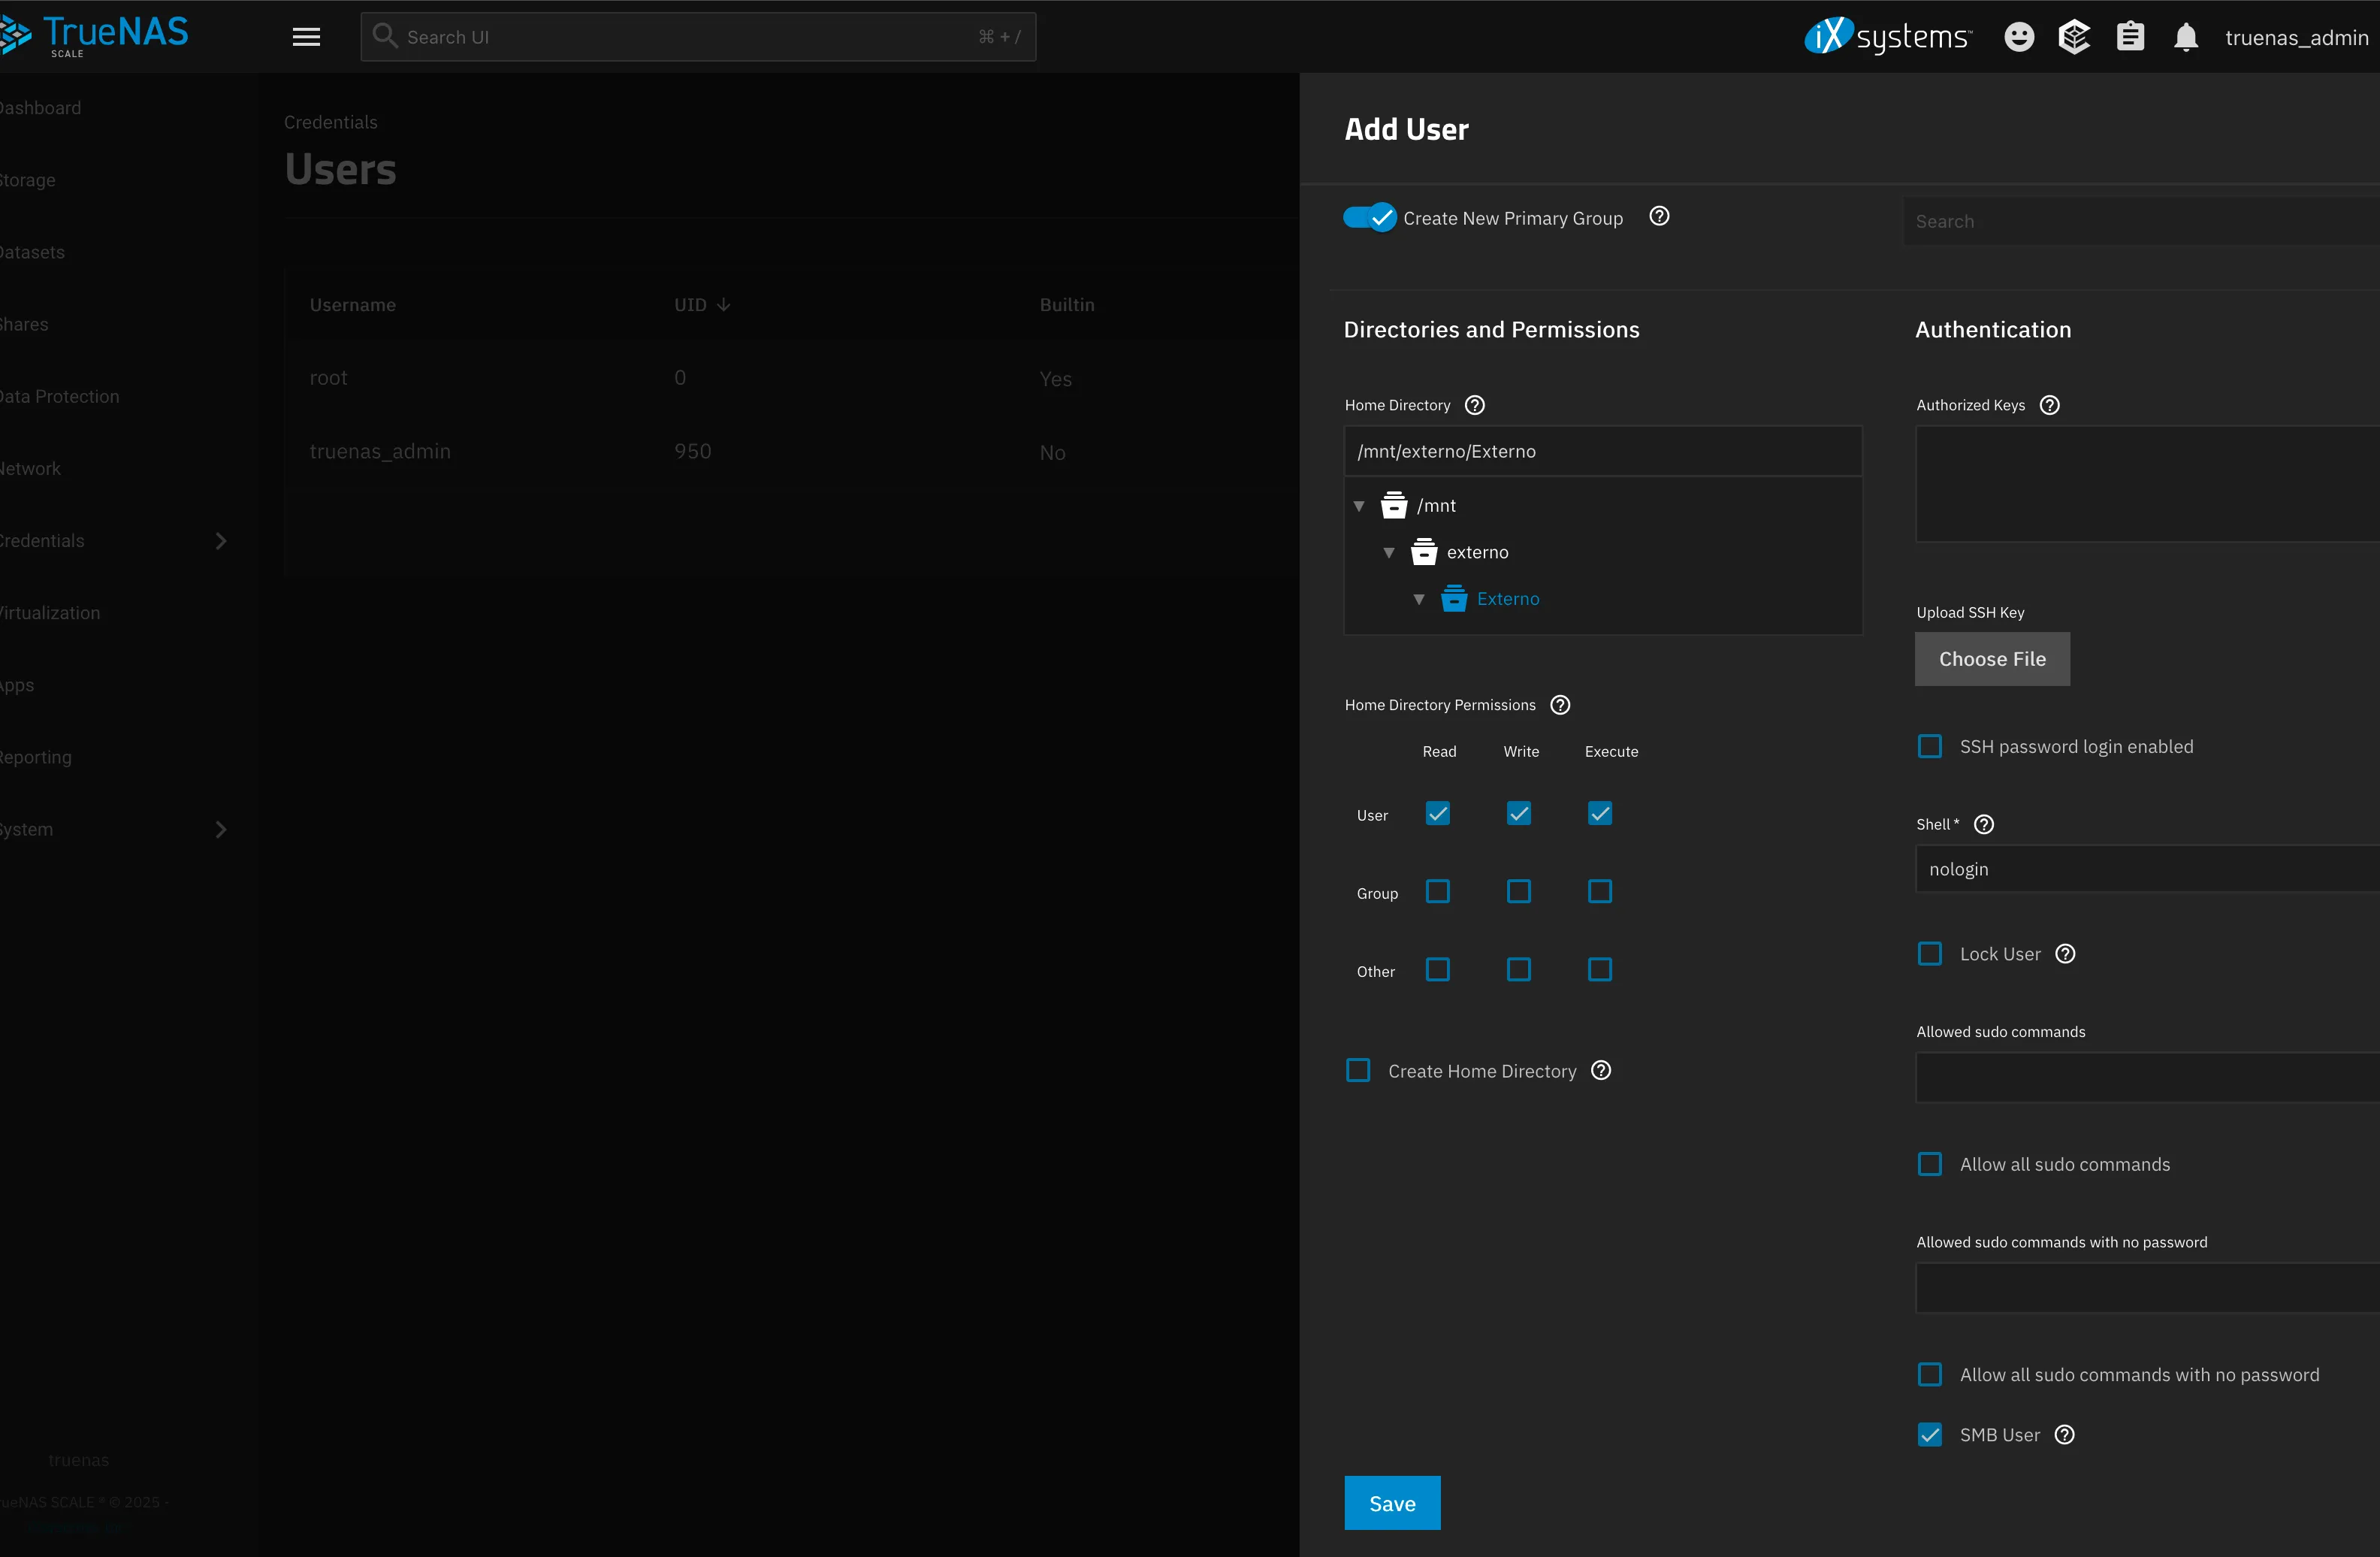
Add a User
Create a user account to manage access permissions for the shares. -
6
Configure SMB Share
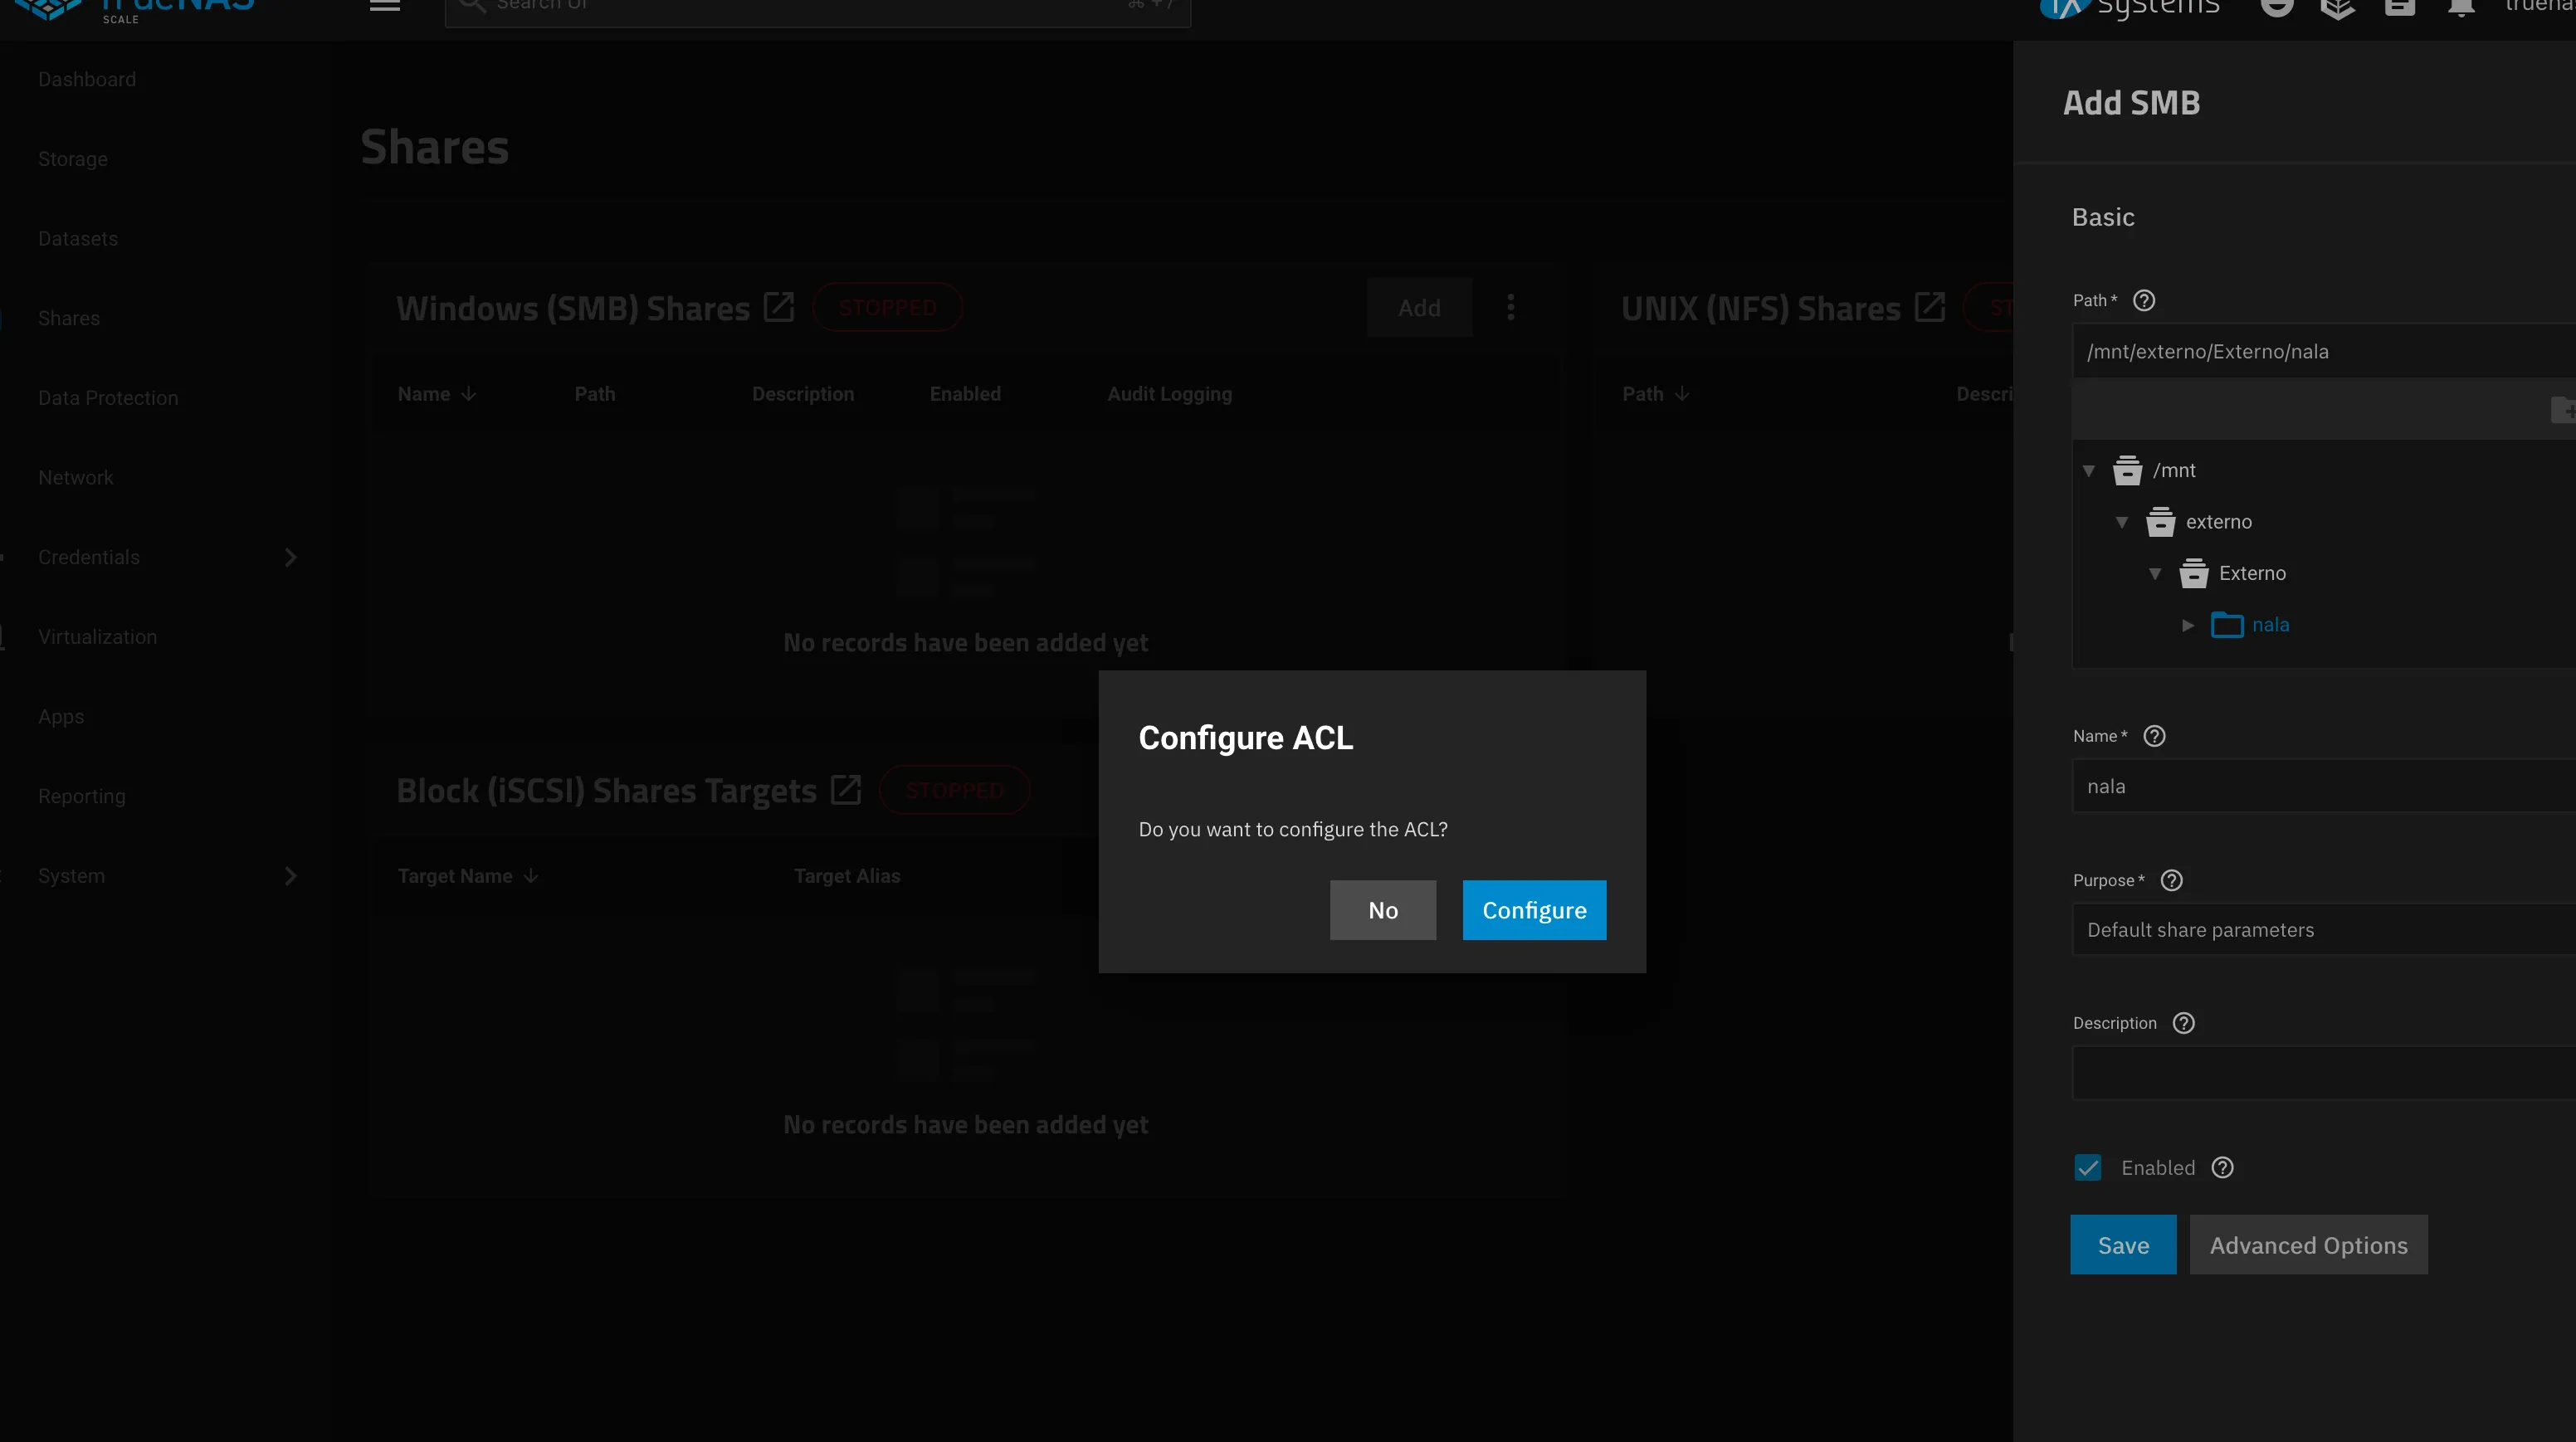
Navigate to the Shares section and set up a new SMB share.-
6.1
Advanced Options
Configure authentication, permissions, and network settings to secure the share.
-
6.1
-
7
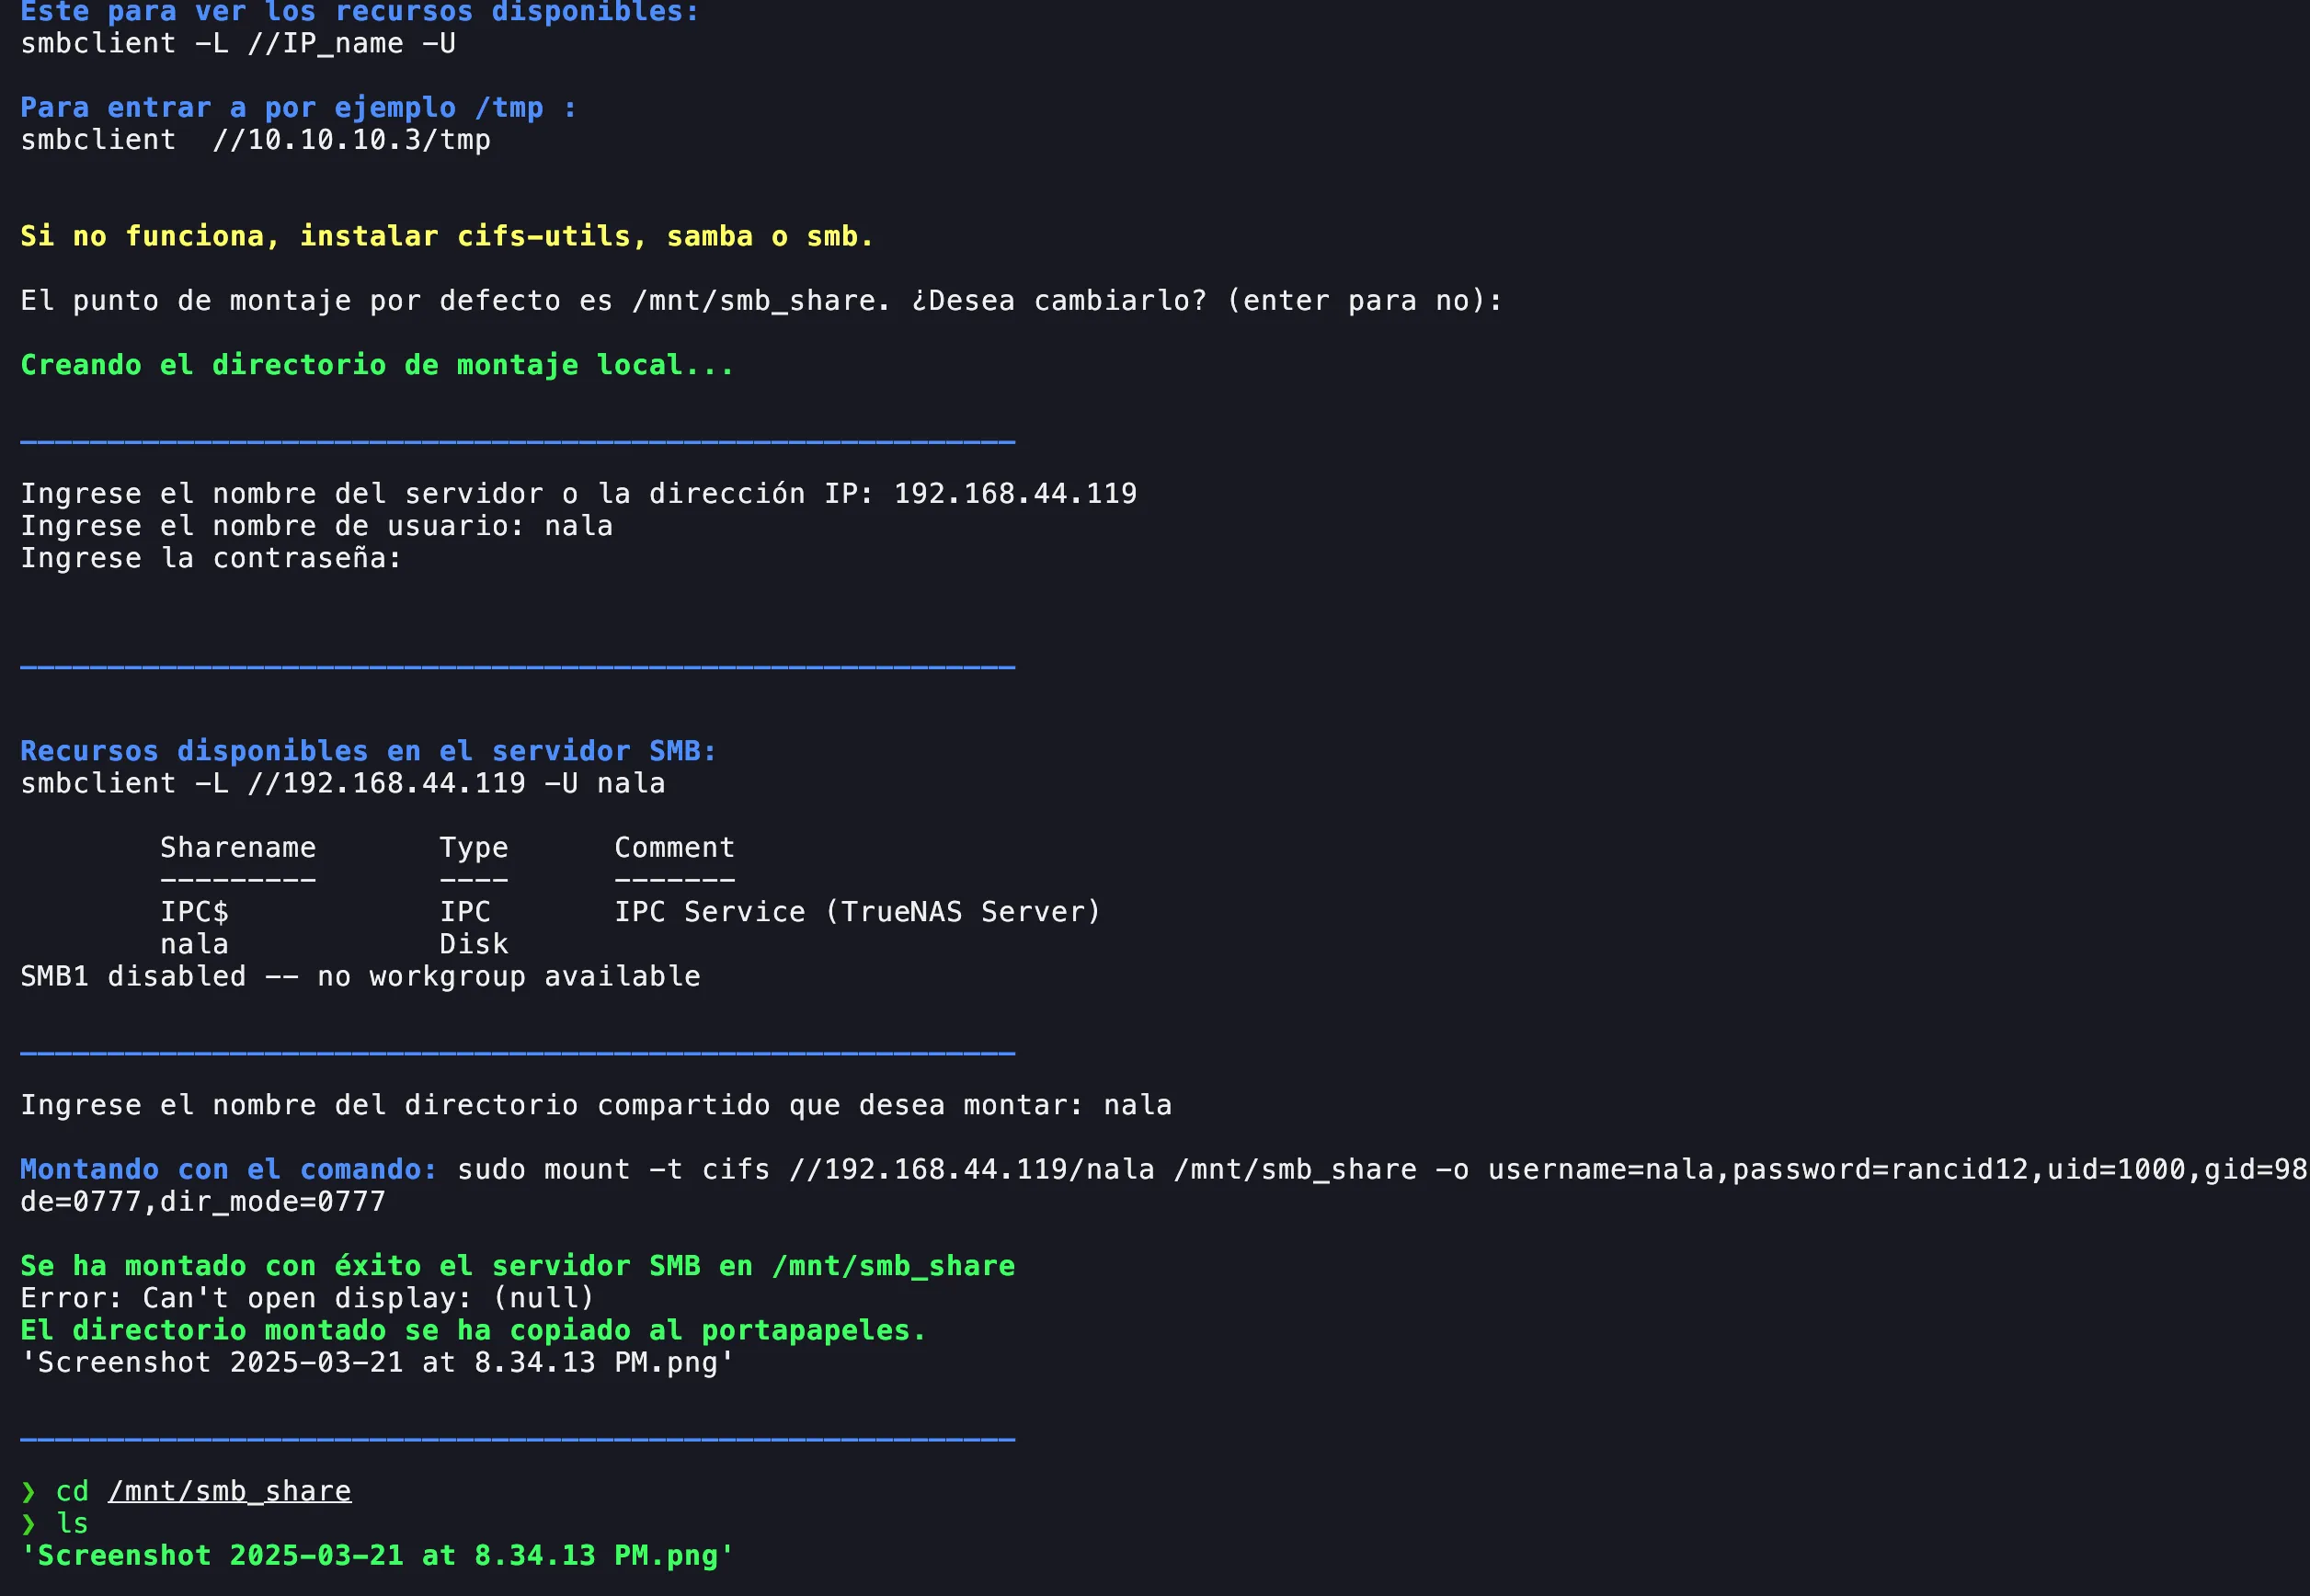
Mount on Linux
Use your msmb script to execute commands and mount the SMB share on your Linux system. -
8
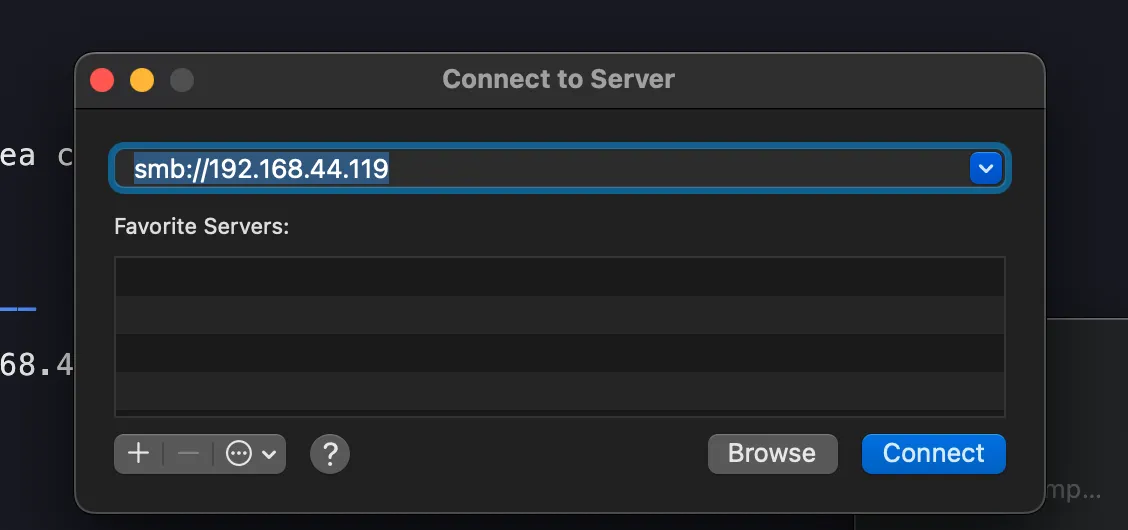
Connect via macOS
Optionally, access the SMB share from a macOS device. -
9
Verify Connectivity
Test access from all devices to ensure that the setup is working properly. -
10
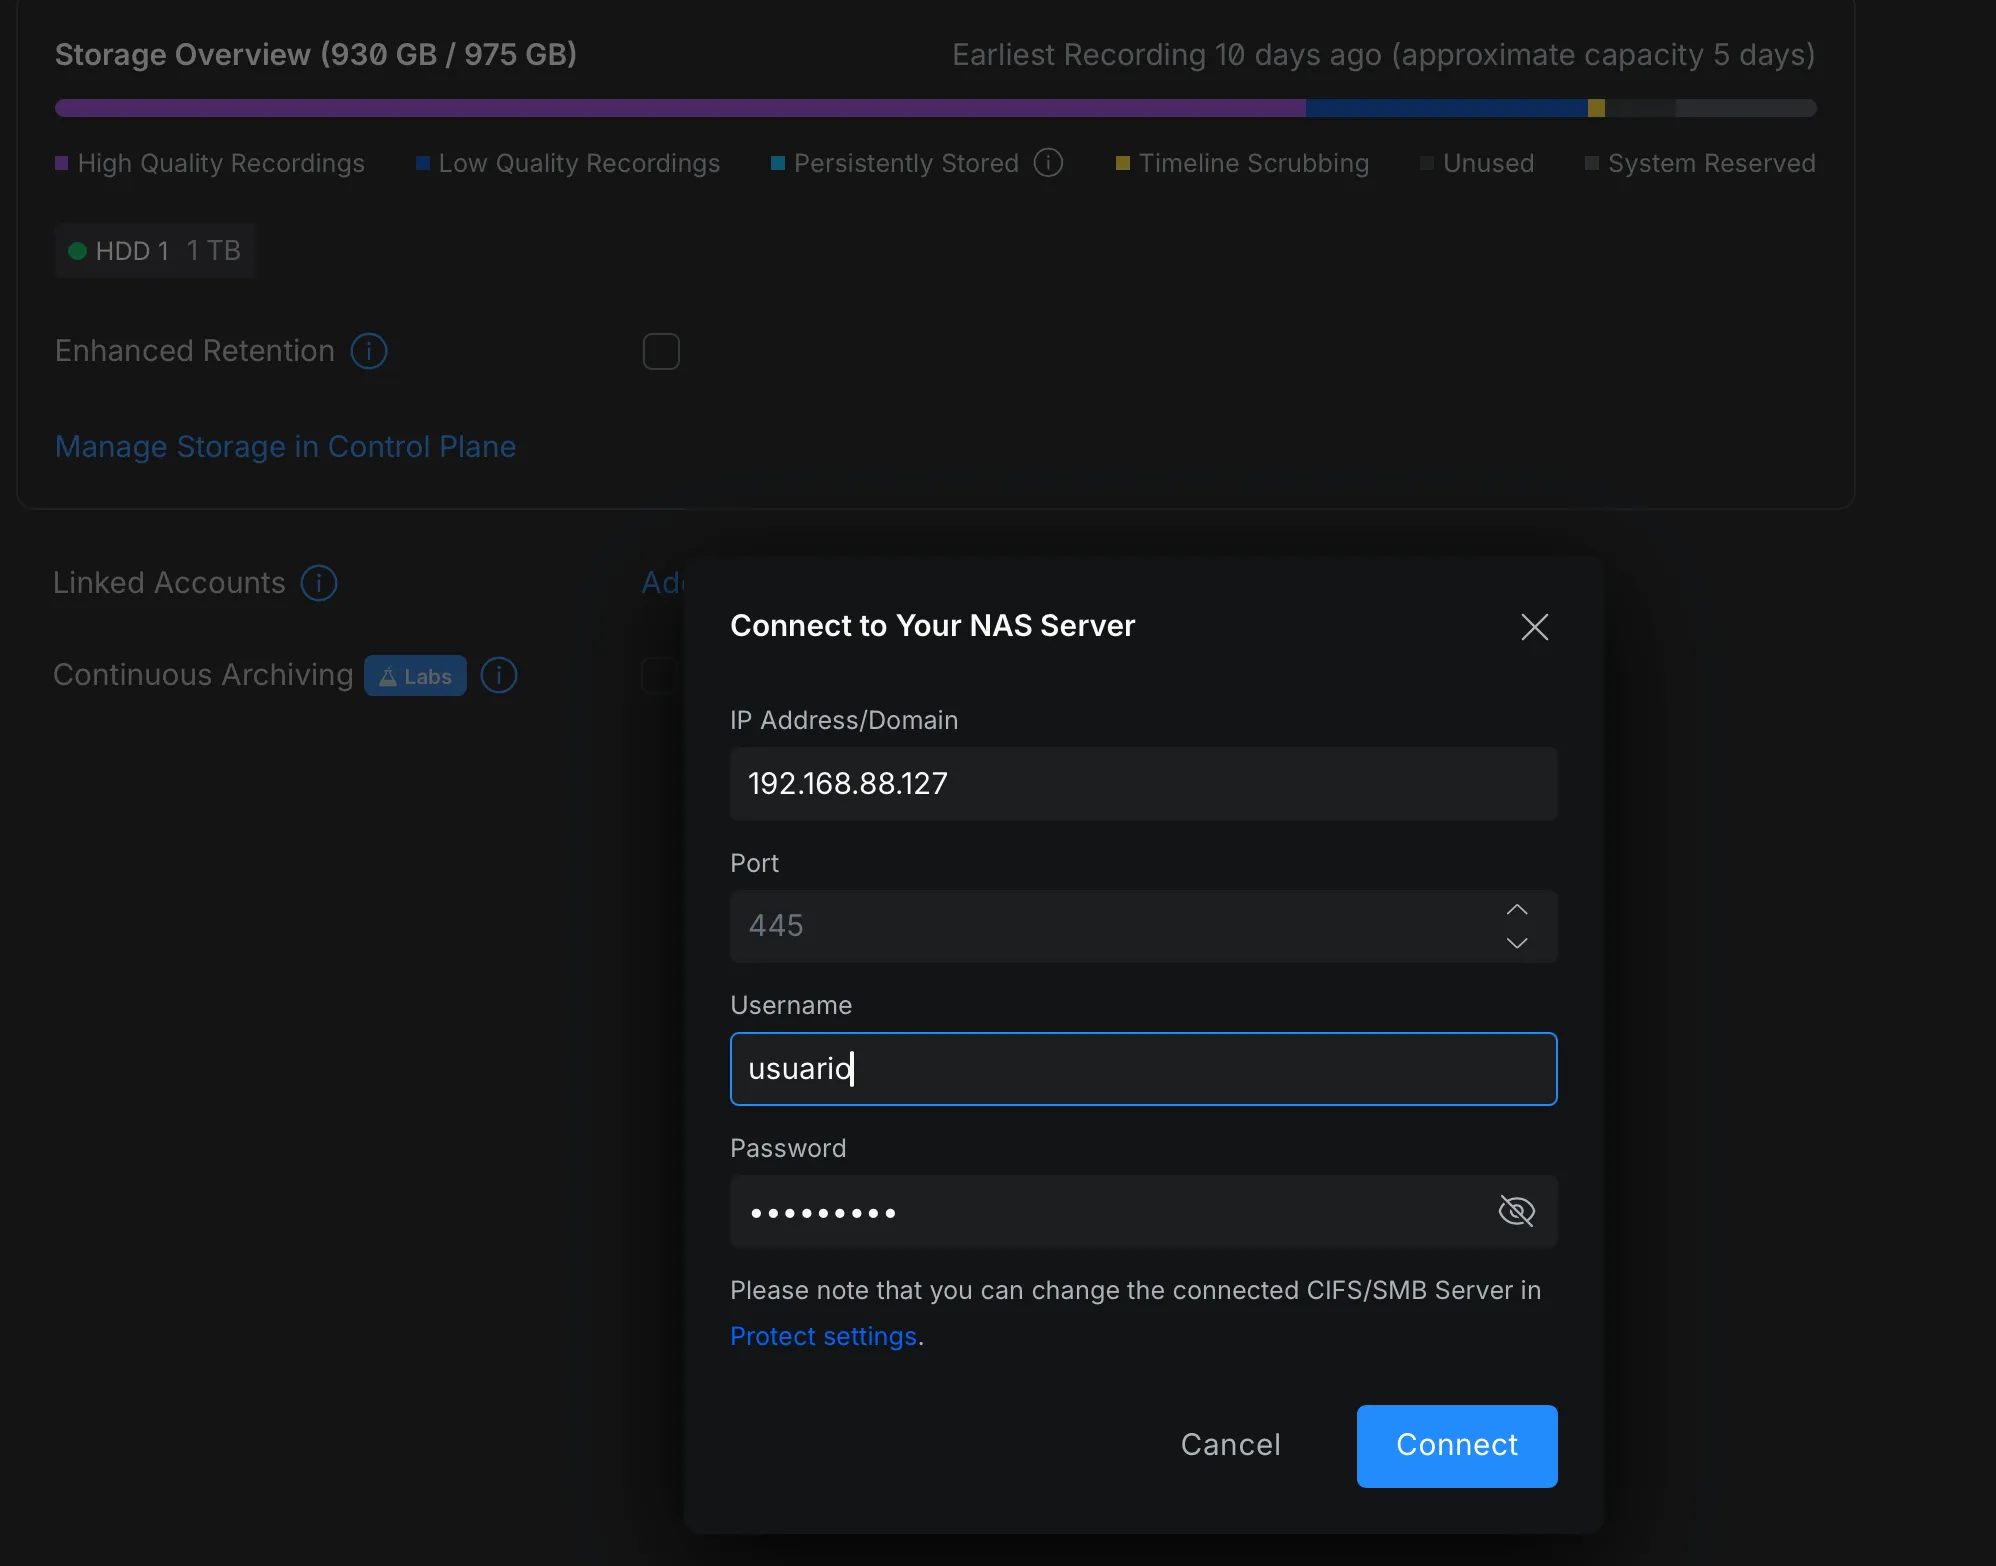
Integrate with UniFi Protect
To add the NAS to UniFi, go to Protect, navigate to the Storage section, and add a Linked account NAS. -
11
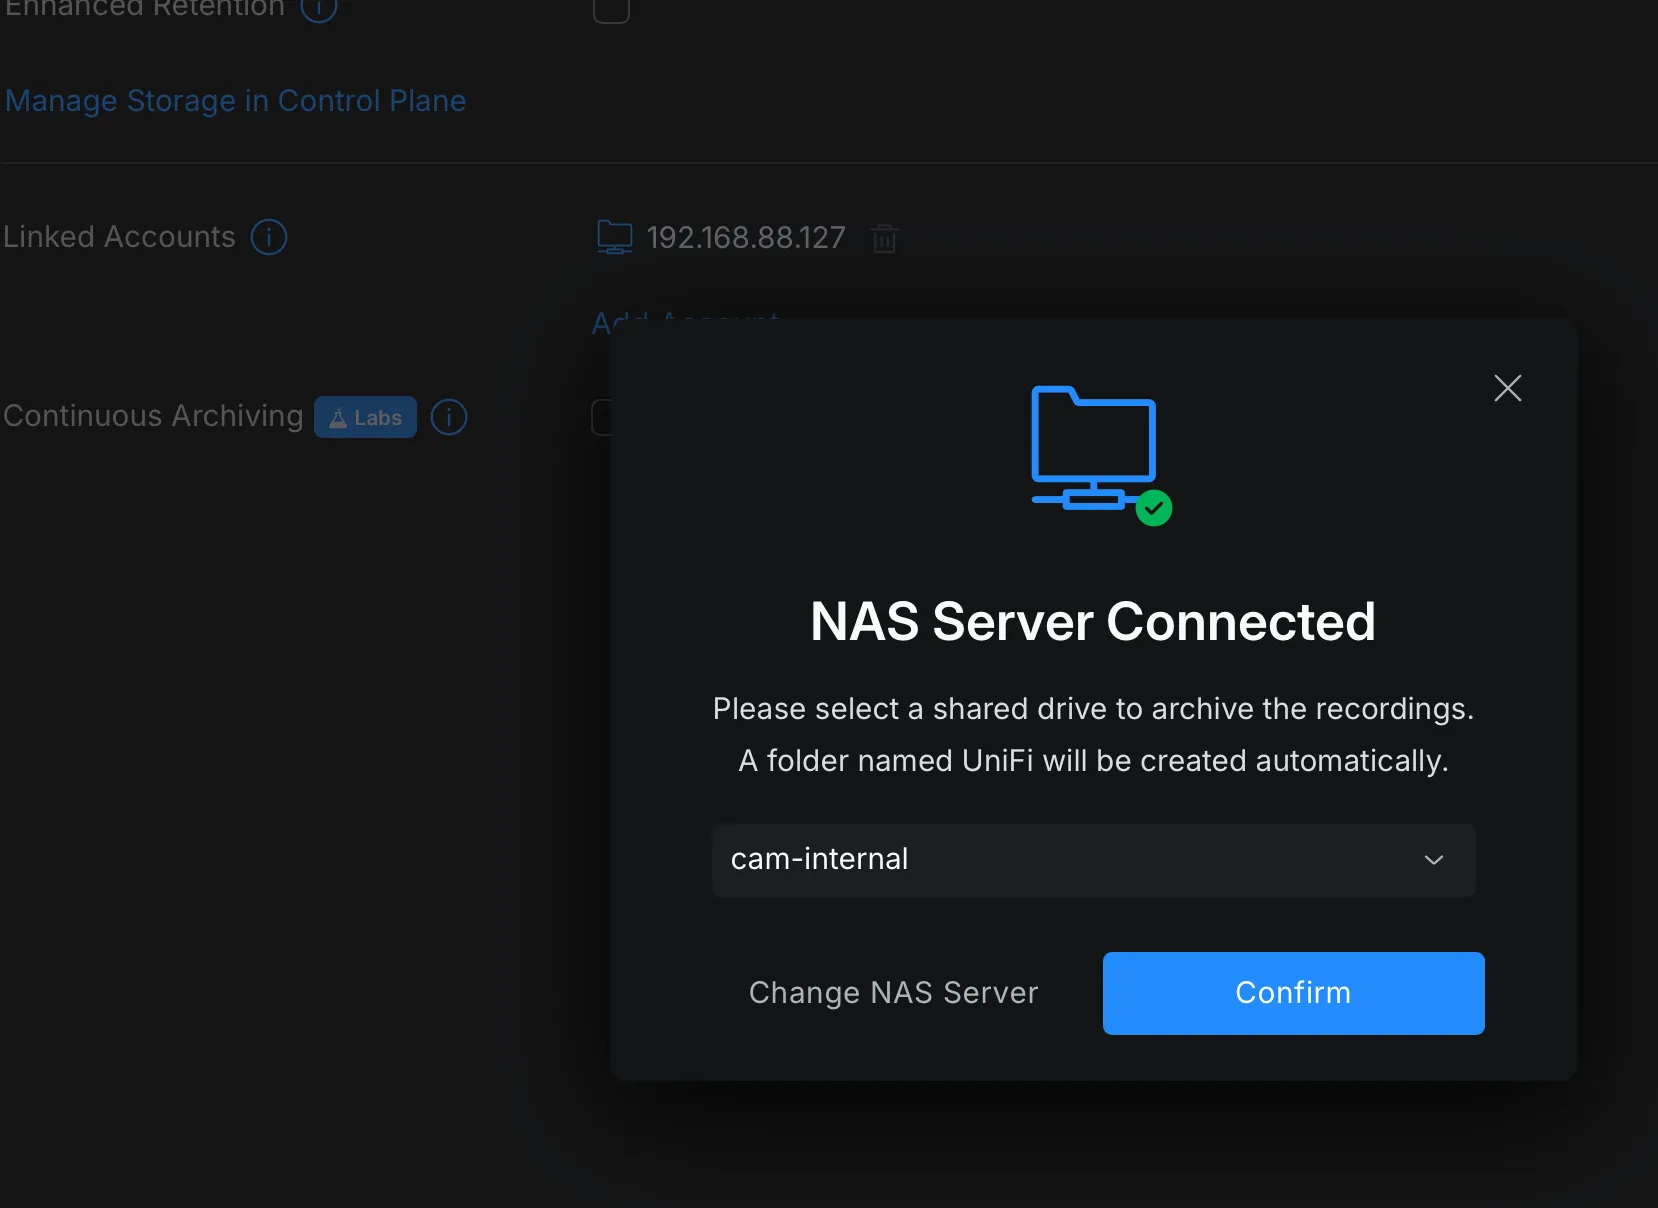
Configure Storage Share
After entering your server credentials, choose the specific share you created where you want to store the data.Ready!