This guide explains how to boot Kali Linux Live completely into RAM using the toram option.
By doing this, the entire OS runs from memory, allowing you to remove the USB drive after boot.
It is especially useful for:
- Portable pentesting without leaving traces on the drive
- Running Kali on systems without persistent storage
- Improved speed (RAM access is faster than USB)
- Working fully offline or in air-gapped environments
Whether you need a minimal setup or a full toolset, this guide helps you choose the right Kali ISO
and boot it efficiently with toram.
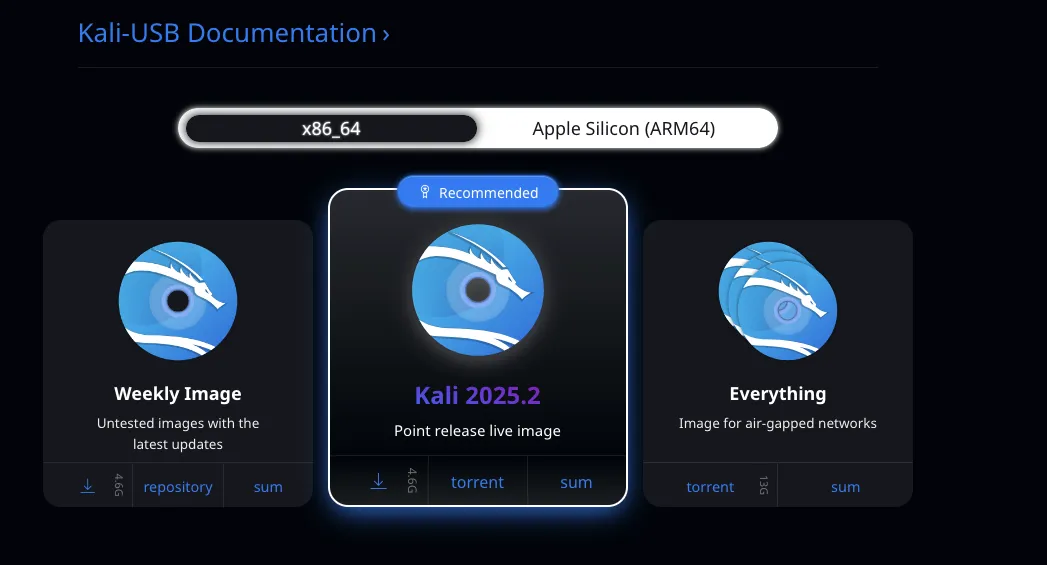
Choose Your Kali ISO
This guide helps you choose the right Kali Linux ISO image and how to boot it fully in RAM using the toram option. Useful for portable pentesting, offline use, or performance optimization.
🐉 Kali 2025.2 (Point release live image) – 4.6 GB
- Standard Live version.
- Includes essential tools.
- Can be easily used with
toram(loads into RAM). - Great for general use, portable pentesting, persistence, etc.
🧱 Kali “Everything” – 13 GB
- Contains all Kali tools.
- Designed for air-gapped networks (no downloads after).
- Much heavier.
- Not recommended for Live + toram unless you have 16–20 GB free RAM just for the ISO.
- Useful if you want everything locally without internet.
🔧 In GRUB, do this:
- Select the Live (amd64) option using arrow keys.
- Press e to edit.
- Find the line starting with:
linux /live/vmlinuz ... - At the end of that line, add:
toram - Then press F10 or Ctrl+X to boot.
✅ Verification:
- Run:
mount | grep /lib/live/mount -
If you see:
/dev/loop0 on /lib/live/mount/medium type iso9660 ...
→ toram did NOT work. - If you see little or nothing there → it loaded into RAM successfully.
- You can also try unmounting the USB to confirm.