Setting Up Squid Proxy with Docker and apt
Using Docker
Follow these steps to set up Squid Proxy using Docker:
1. Install Docker
sudo apt install docker.io
2. Pull Squid Image
docker pull ubuntu/squid
3. Verify Image
docker images
REPOSITORY     TAG       IMAGE ID       CREATED      SIZE
ubuntu/squid   latest    feec1ad0ab0a   5 days ago   213MB
4. Run Squid Container
sudo docker run -d --name squid \
  -p 3128:3128 \
  ubuntu/squid:latest
5. Access Container
sudo docker exec -it squid bash
apt update && apt install -y nano
6. Configure Squid
squid -k reconfigure
sudo docker restart squid
nano /etc/squid/squid.conf
Using apt
Alternatively, you can install Squid directly:
1. Install Squid
apt install squid squid-openssl squidclient
2. Update Configuration
# Add to the beginning of /etc/squid/squid.conf
http_access allow all

# SSL Bump config
http_port 3129 ssl-bump cert=/etc/squid/ssl_cert/myCA.pem key=/etc/squid/ssl_cert/myCA.key generate-host-certificates=on dynamic_>

sslcrtd_program /usr/lib/squid/security_file_certgen -s /var/lib/ssl_db -M 4MB
sslcrtd_children 5

# ACLs
acl step1 at_step SslBump1
acl OpenAI ssl::server_name .openai.com .chat.openai.com .openaiapi.com .auth0.com .sentry.io

# Correct ssl_bump order
ssl_bump splice OpenAI
ssl_bump peek step1
ssl_bump bump all

# Optional: avoid caching OpenAI
cache deny OpenAI
3. Optimize Cache
# Add below http_port 3128 in squid.conf
# RAM cache 8GB
cache_mem 8192 MB
maximum_object_size_in_memory 1024 KB

# Disk cache 200GB
cache_dir ufs /var/spool/squid 200000 16 256
maximum_object_size 65536 KB
minimum_object_size 0 KB
4. Initialize Cache
sudo rm -rf /var/spool/squid/*
sudo squid -z

sudo systemctl restart squid
sudo /usr/sbin/squid -k reconfigure
5. Check Cache Usage
squidclient -h localhost -p 3128 mgr:info
squidclient -h localhost -p 3128 mgr:storedir
SSL Certificate Setup
To enable SSL Bump, follow these steps:
cd /etc/squid/ssl_cert
rm myCA.crt myCA.key myCA.pem
openssl genrsa -out myCA.key 4096
openssl req -new -x509 -days 3650 \
  -key myCA.key -out myCA.crt \
  -subj "/C=ES/ST=State/L=City/O=Org/CN=Squid-CA"
cat myCA.crt myCA.key > myCA.pem
chown proxy:proxy myCA.*
chmod 600 myCA.key myCA.pem
chmod 644 myCA.crt
systemctl restart squid
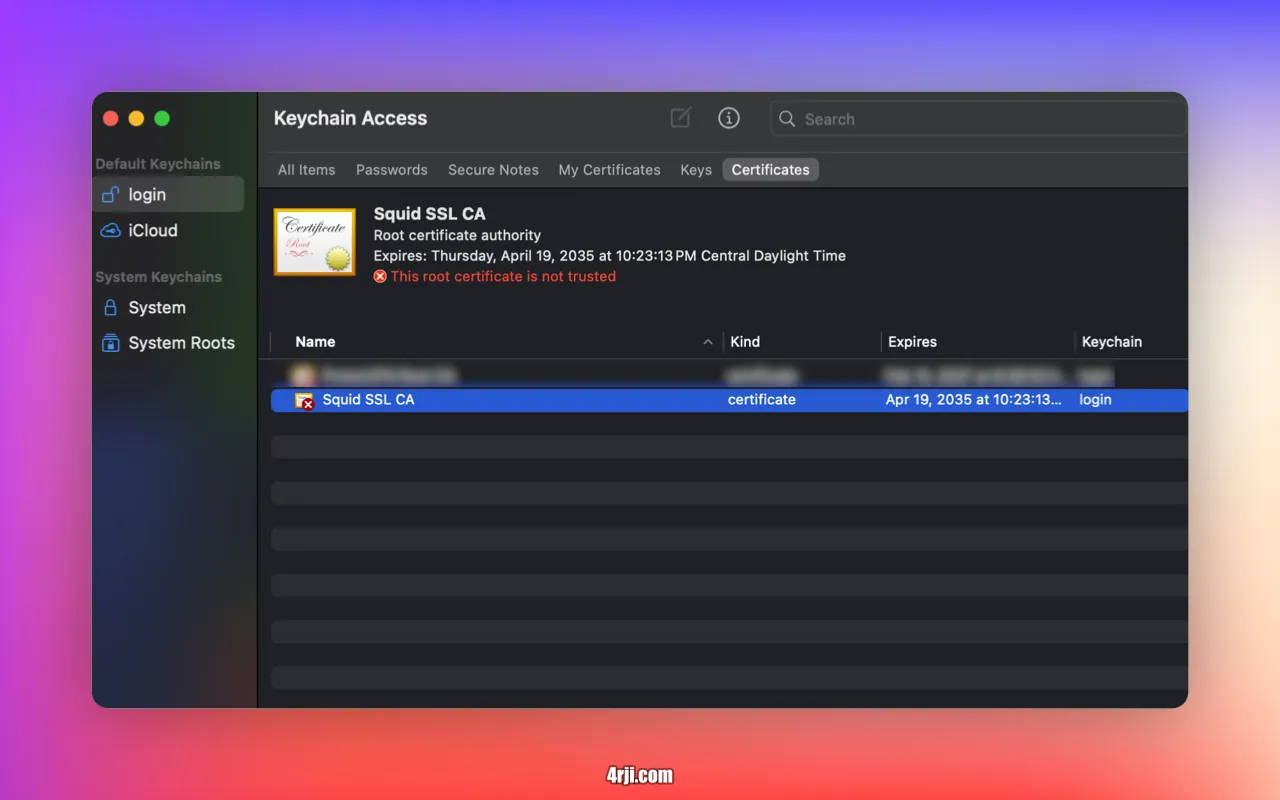
5. Install Certificate on Clients
sudo cp /etc/squid/ssl_cert/myCA.pem ~
scp squid:myCA.pem .
# Import it into macOS Keychain

6. Accept Certificate on Squid Server
sudo cp /etc/squid/ssl_cert/myCA.pem /usr/local/share/ca-certificates/squid-ca.crt
sudo update-ca-certificates
7. Verify Setup
curl -x http://127.0.0.1:3129 https://example.com
Arch Linux Client Configuration
Follow these steps to configure your Arch Linux client:
1. Install Required Packages
sudo pacman -S p11-kit ca-certificates-utils
2. Add Your CA to the System Trust Store
sudo trust anchor --store /ruta/a/myCA.pem
3. Regenerate Bundles for Legacy Applications
sudo update-ca-trust extract
4. Define HTTP and HTTPS Proxies
cat <<EOF | sudo tee /etc/profile.d/proxy.sh
export http_proxy="http://IP_SQUID:3128"
export https_proxy="http://IP_SQUID:3129"
EOF
sudo chmod +x /etc/profile.d/proxy.sh
source /etc/profile.d/proxy.sh
5. Preserve Proxy Variables for sudo
echo 'Defaults env_keep += "http_proxy https_proxy"' | sudo tee /etc/sudoers.d/99-proxy
6. Verify Proxy Configuration
curl -I https://4rji.com
Restart your session to ensure applications work correctly with the proxy settings
Monitoring Proxy Usage
To view logs and currently active machines, run these commands:
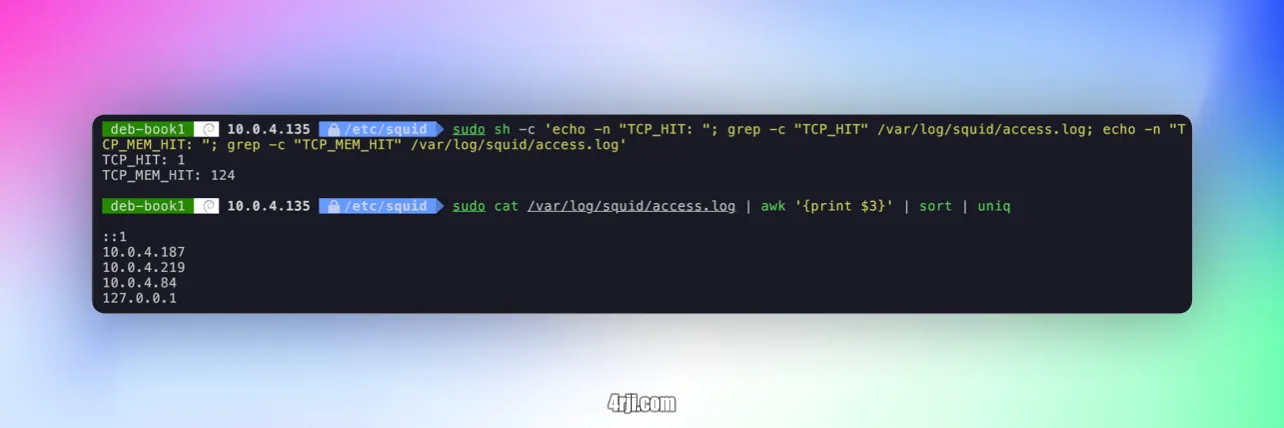
1. Check Cache Hit Statistics
sudo sh -c 'echo -n "TCP_HIT: "; grep -c "TCP_HIT" /var/log/squid/access.log; echo -n "TCP_MEM_HIT: "; grep -c "TCP_MEM_HIT" /var/log/squid/access.log'
TCP_HIT: 1
TCP_MEM_HIT: 124
2. List Active Client IP Addresses
sudo cat /var/log/squid/access.log | awk '{print $3}' | sort | uniq

::1
10.0.4.187
10.0.4.219
10.0.4.84
127.0.0.1