Project Highlights
This pfSense project documents the deployment of an
open-source firewall and router inside a virtualized lab environment. It focuses on
installing pfSense as a FreeBSD-based VM, assigning WAN and LAN interfaces, configuring
the LAN gateway address, and enabling web-based administration for network security
testing.
- Deployed pfSense from ISO as a virtual firewall/router.
- Configured the VM using FreeBSD as the guest operating system type.
- Assigned WAN and LAN interfaces from the pfSense console menu.
- Configured the LAN gateway address for the internal network.
- Enabled DHCP and web configuration access for lab management.
- Built a foundation for firewall, routing, and VPN testing in a home lab.
“Guardians of Your Network Galaxy”
PFsense is a free, open-source firewall and router software that provides advanced security features to protect your network from external threats. It’s easy to install and configure, offering enterprise-grade performance with features like VPN, traffic shaping, and intrusion detection, all in one powerful platform. Ideal for businesses, homes, and educational institutions looking for reliable, customizable security solutions.
-
1
Just deploy the iso, with FreeBSD as Guest OS
-
2
“Install following the default steps.”
“Set the LAN and WAN by pressing ‘Enter’ in the menu, then simply follow the instructions.”
-
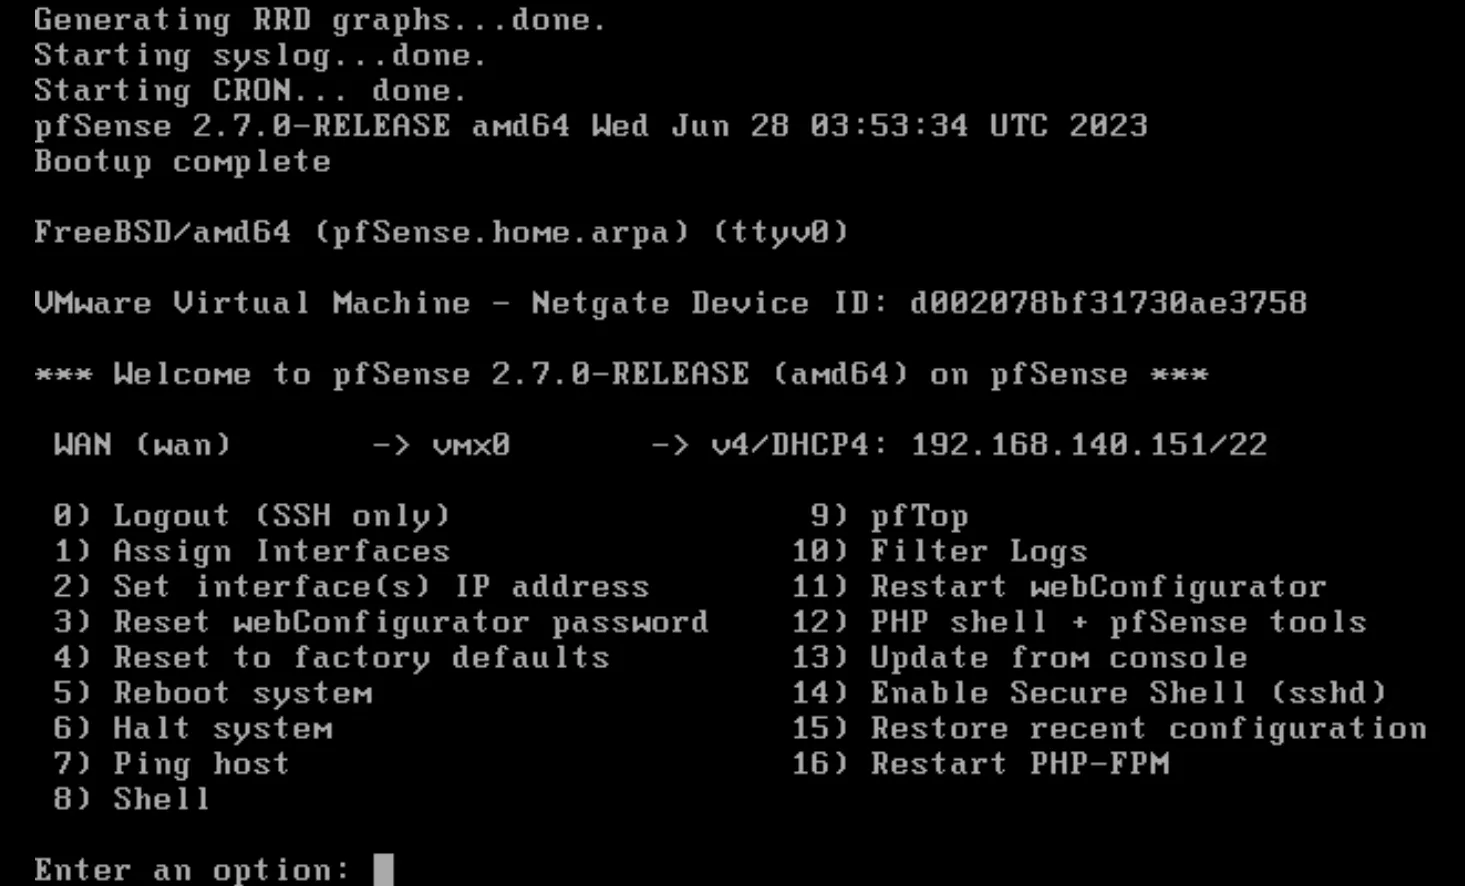
3
“When you see the next configuration menu, this is where you’ll need to set up the IPs.”
-
4
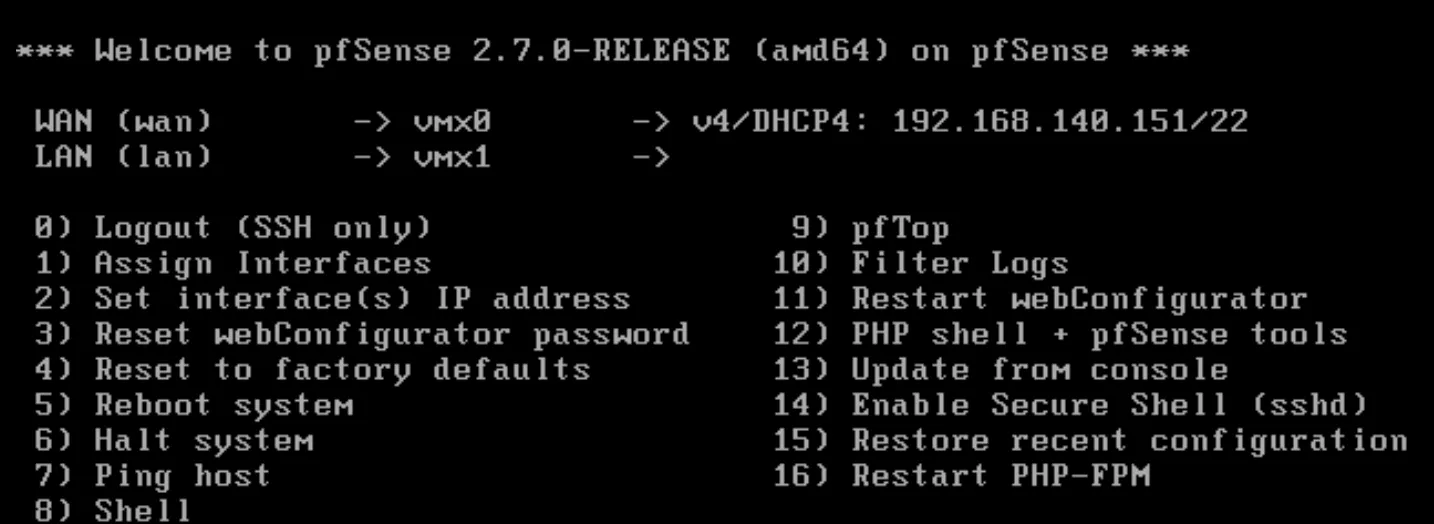
Press 1 to set the interfaces
Press 1, then n, then set the vmx0 for wan and vmx1 for lan
-
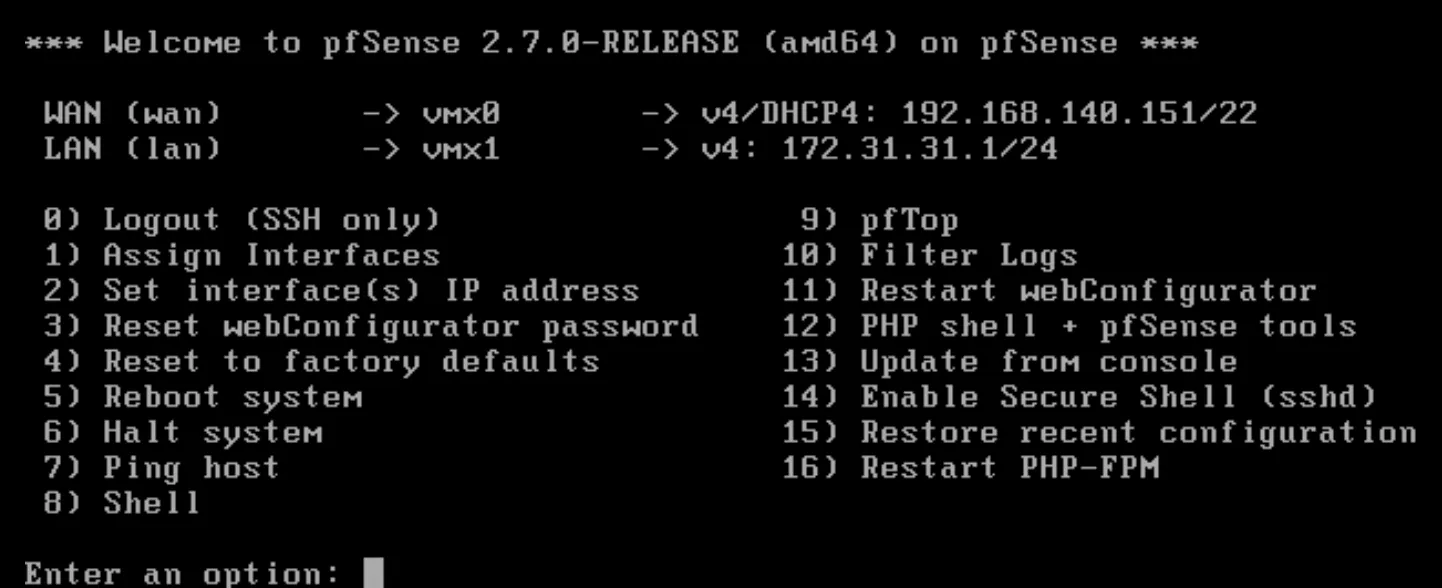
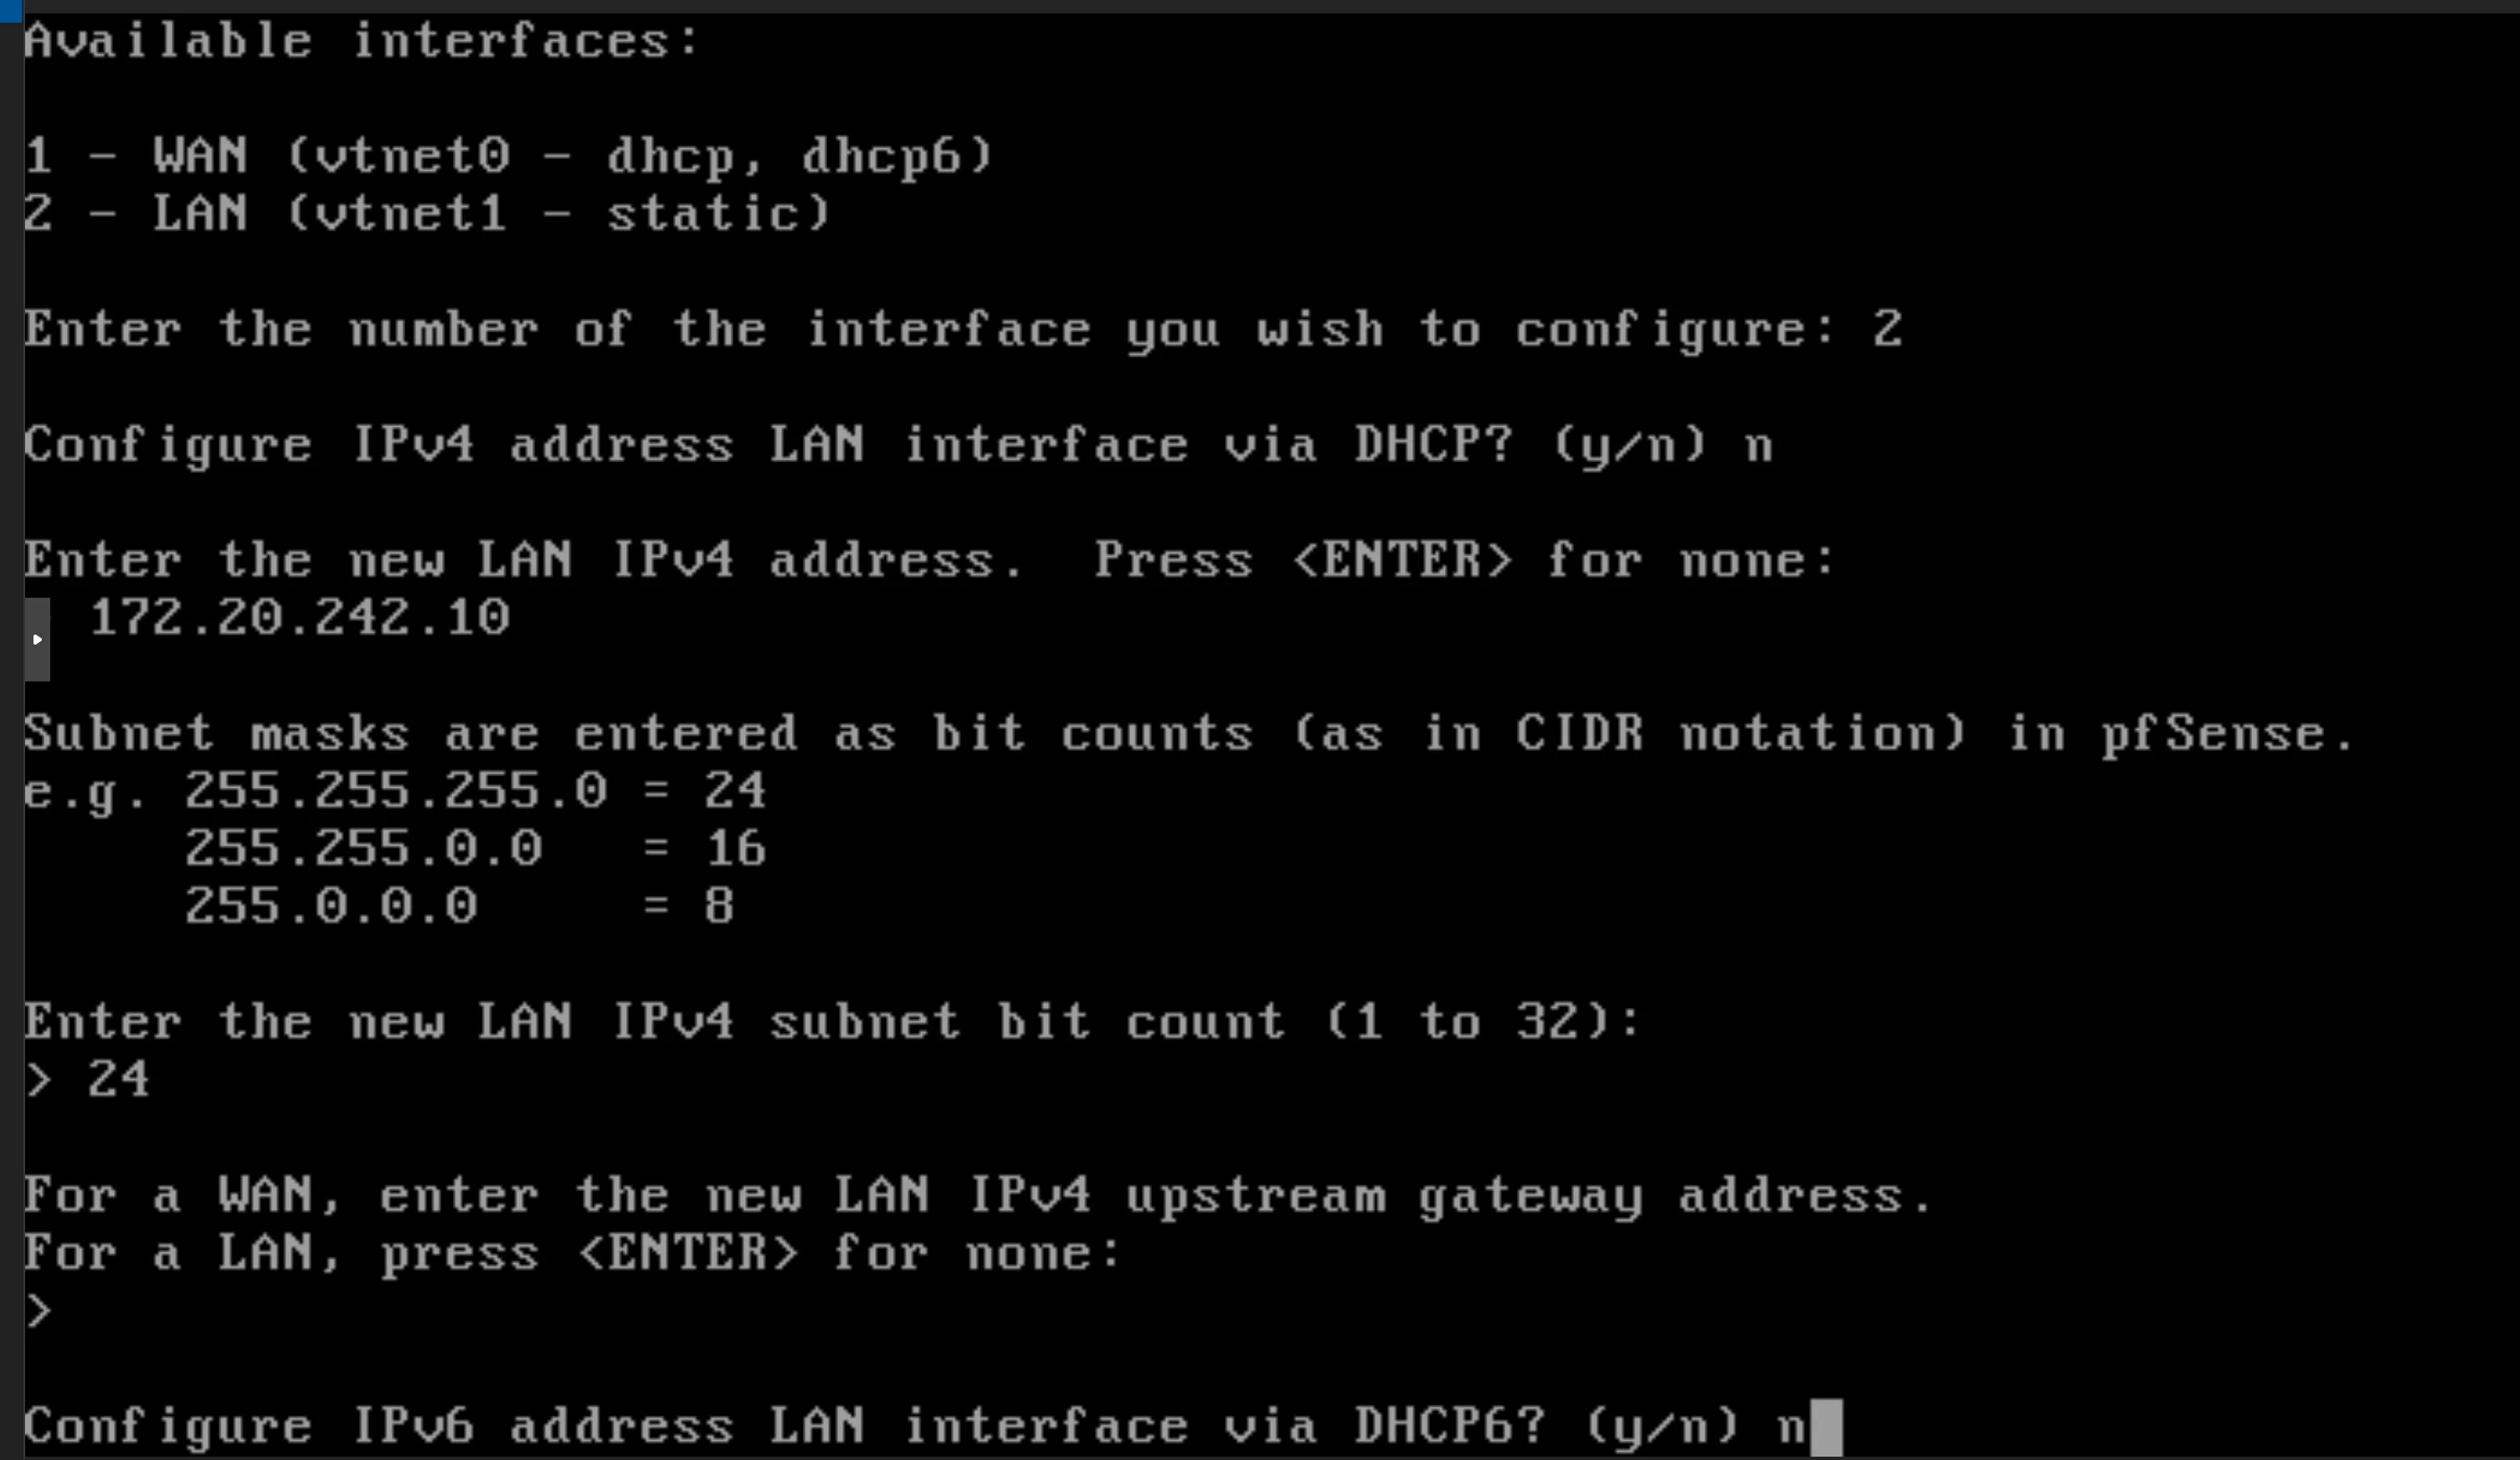
5
Press 2 to set the IP address
Press 2, then 2, n for dhcp, in the new LAN ipv4 address is the address for the gateway (172.31.31.1), then enter for none, not ipv6, and y for dhcp and y for web configuration.
-
6
Access the pfSense Web GUI
Open a web browser and navigate to the LAN IP address you configured (e.g., https://172.31.31.1). Log in with the default credentials (username: admin, password: pfsense) to complete the configuration.