Project Highlights
This OpenStack project documents the setup and initial
configuration of a private cloud lab. It focuses on organizing cloud resources through
projects and users, uploading images, creating tenant networks, launching instances,
configuring routers, assigning floating IPs, and managing security groups.
- Configured OpenStack projects, users, roles, and access scope.
- Uploaded cloud images such as Debian qcow2 for instance deployment.
- Created tenant networks, subnets, gateways, and DHCP settings.
- Launched virtual machine instances with selected flavors, networks, and SSH key pairs.
- Configured routers to connect internal networks to the public network.
- Allocated and associated floating IPs for external instance access.
- Managed security groups and rules for controlled network exposure.
You can now access OpenStack.
Lets configure the OpenStack.
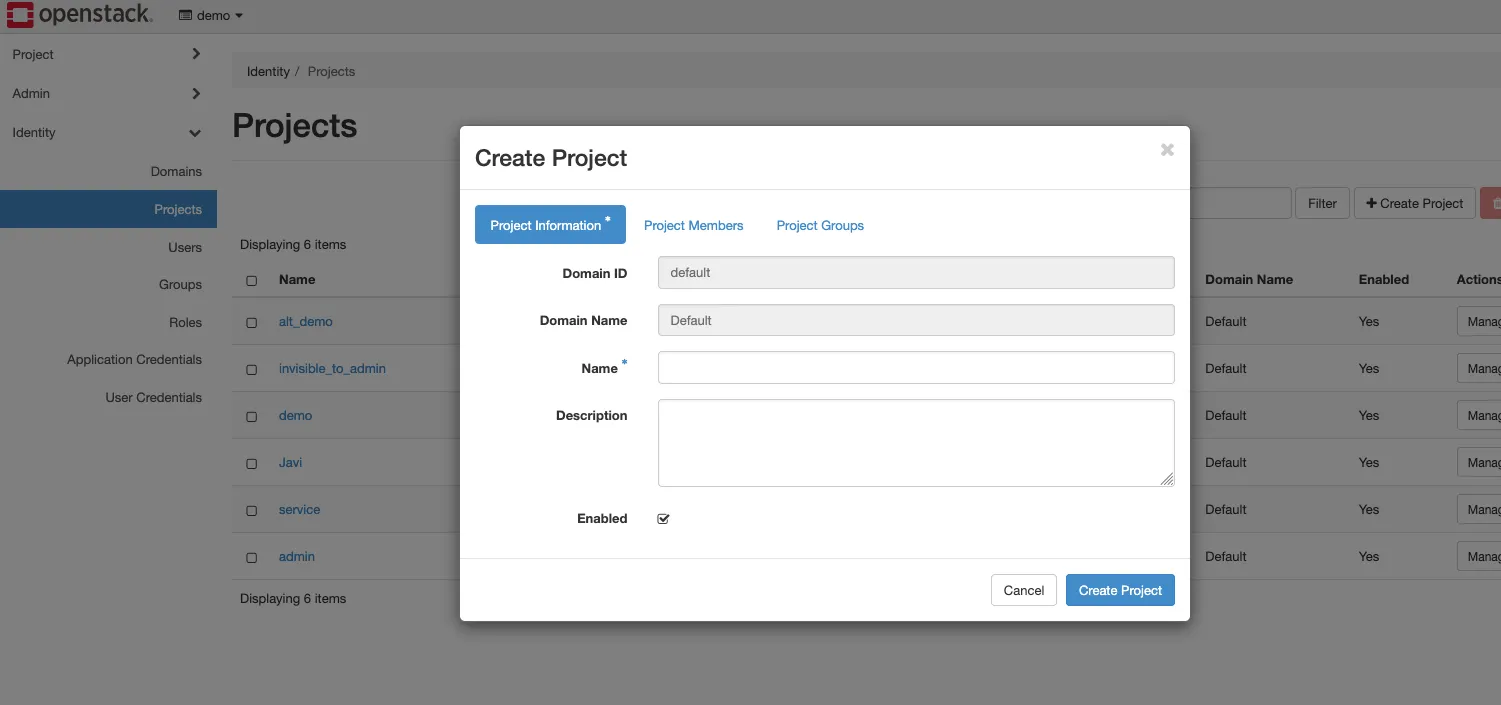
1. Create a New Project
- Project (formerly “Tenant”): Logical container for users and resources.
- Multi-tenancy: Isolates compute, storage, and network from other projects.
- Identity & Access: Keystone enforces per-project roles and RBAC.
- Resource Quotas: Set limits on vCPUs, RAM, volumes, floating IPs.
- Networking Isolation: Neutron networks, routers, and security groups scoped per project.
- Policy Scope: All services (Compute, Block Storage, Images, Orchestration) tag resources with the project as owner.
How to reach the project creation screen?
- Identity (in the sidebar menu)
- Projects
- + Create Project
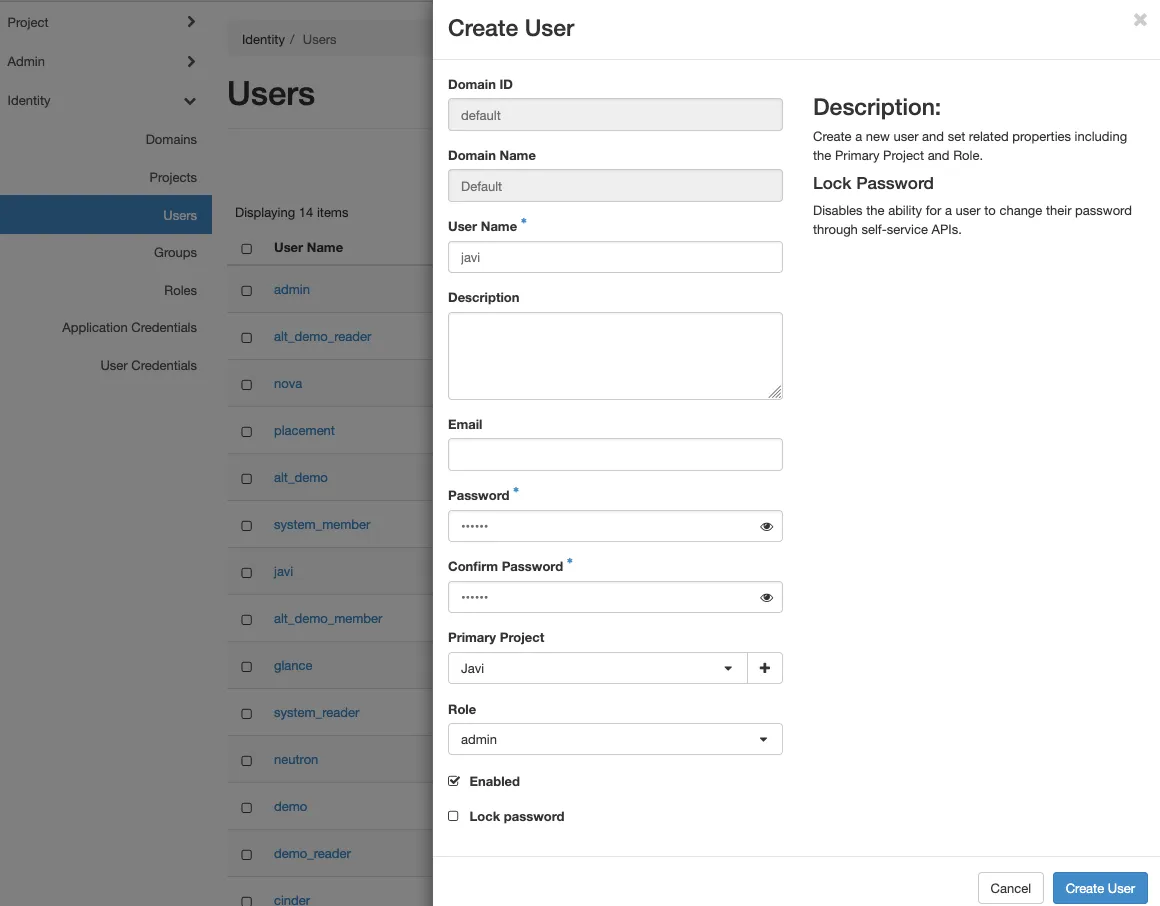
2. Now create a user
- Identity (in the sidebar menu)
- Users
- When creating the user, set Primary Project to the project you created earlier.
- Assign the admin role to the user.
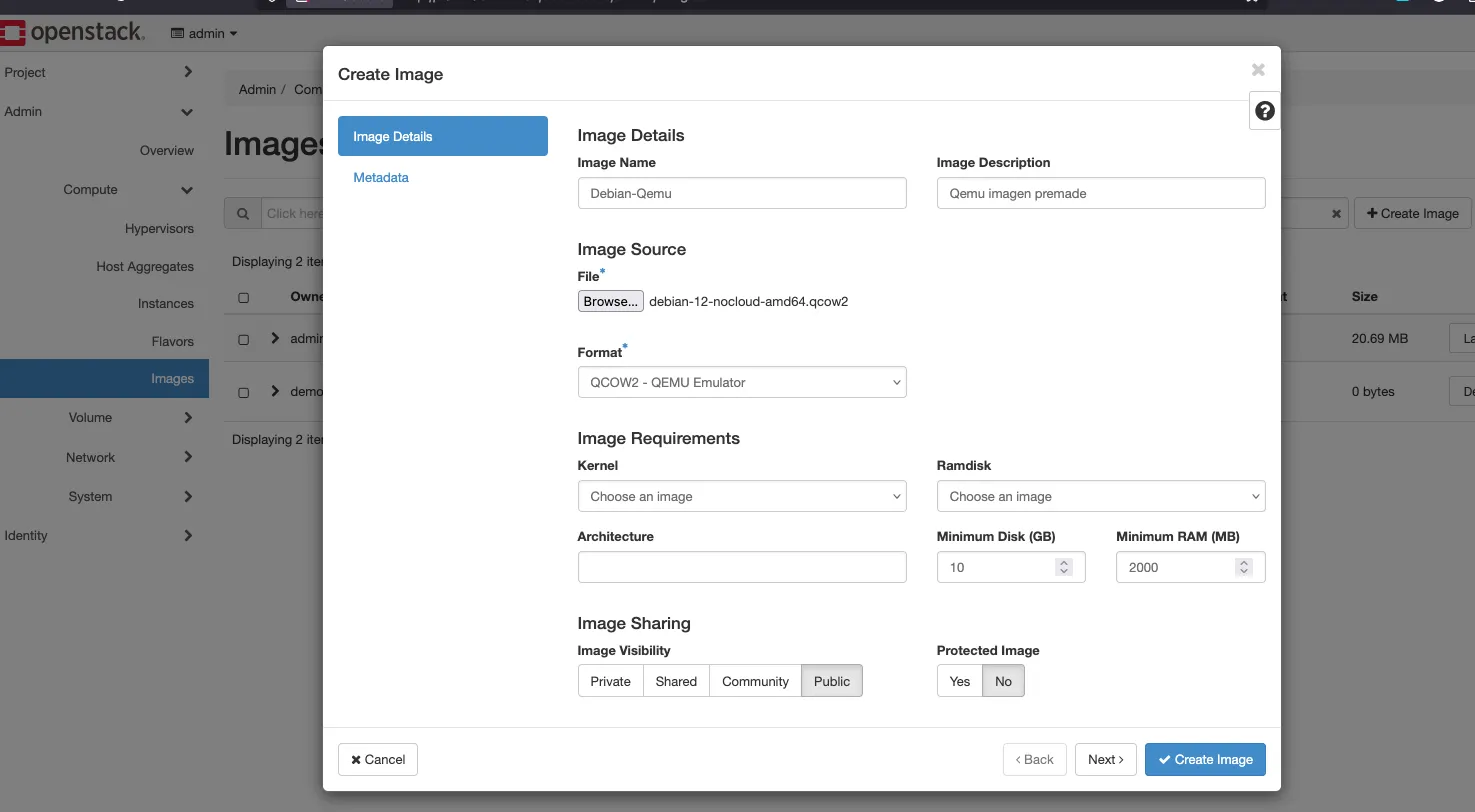
3. Now create an image
- Download an image. In this example, we use Debian 12 in qcow2 (QEMU) format.
- Go to your Project.
- Navigate to Compute → Images.
- Click + Create Image.
Log out and log in with the new user
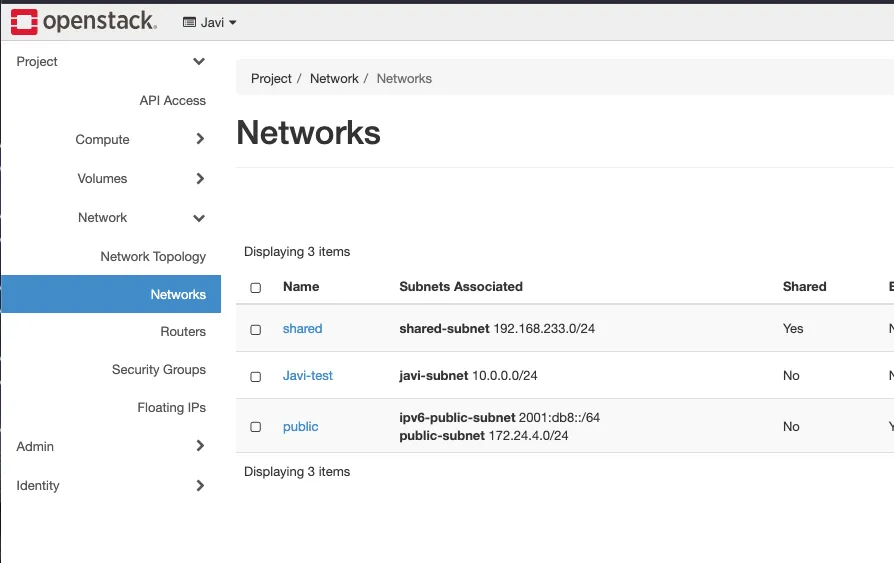
4. Networking
- Go to - Project - Network topology - Create network.
- Set the name of the network name.
- Set the subnet name.
- Set the subnet Network Address 10.0.0.0/24.
- Set the gateway IP 10.0.0.1.
- Enable DHCP.
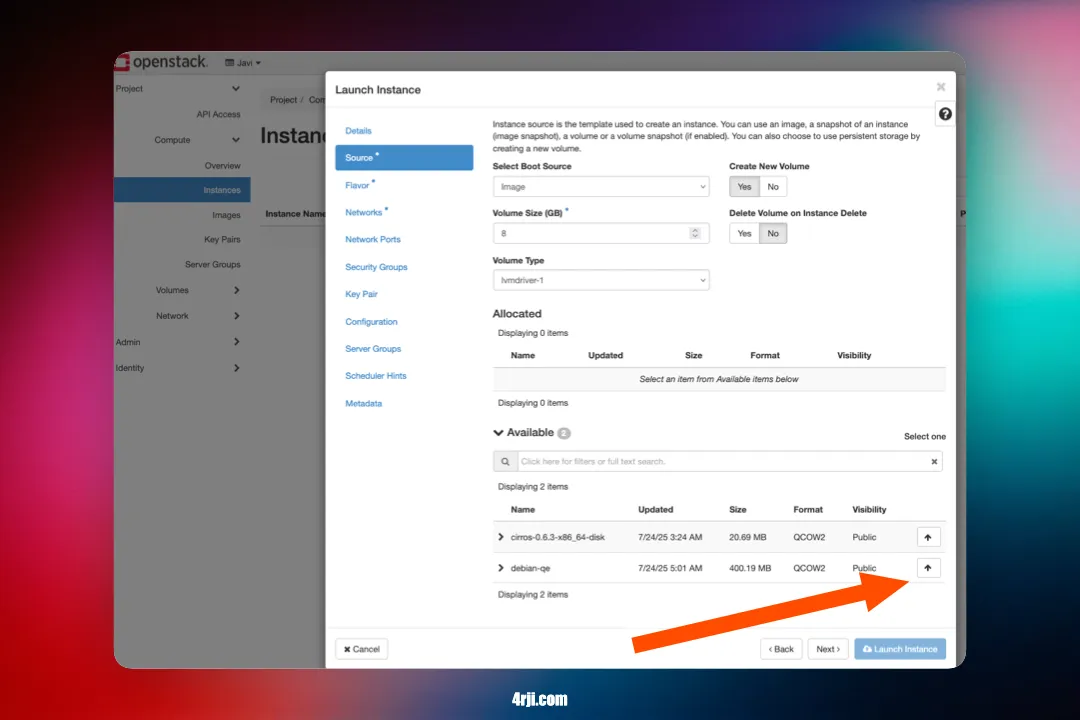
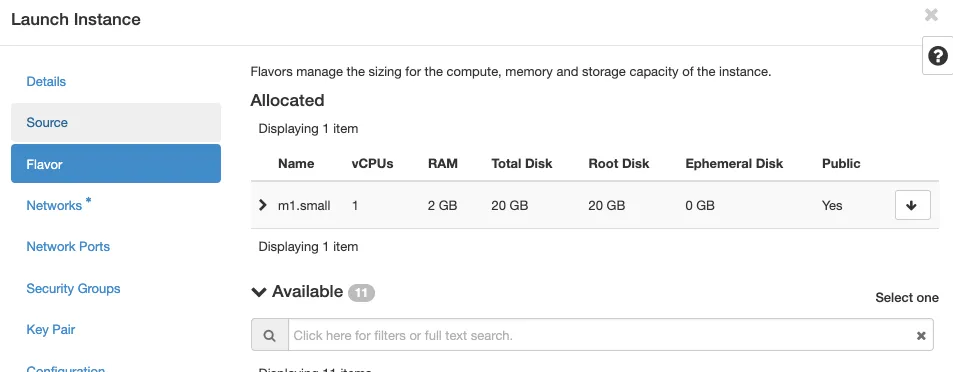
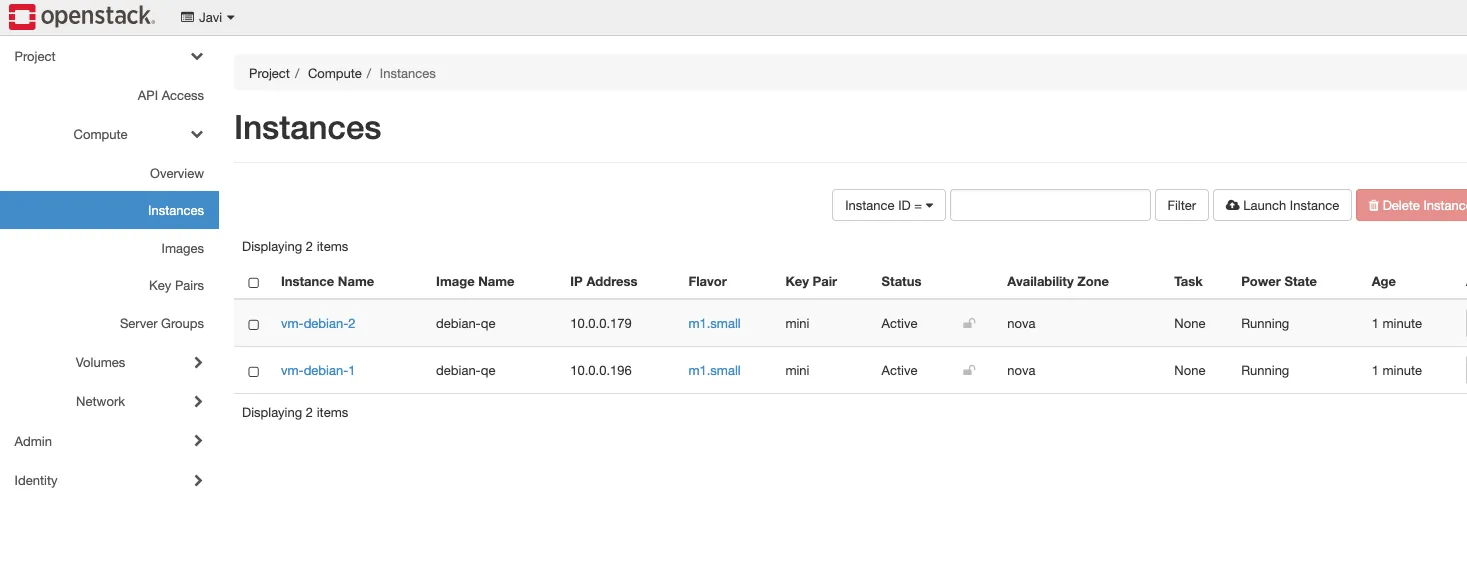
4. Create virtual machine
- Go to - Project - Instances - Launch Instance.
- Set the name of the instance.
- Set the Count (in this screenshot 2).
- Click on the arrow to select ubuntu 22.04.
- Click on the arrow to select the flavor (Ram, Cpu, Disk).
- Click on the arrow to select the network we created before.
- Click on the arrow to select the key pair (here import your ssh public key).
- In Configuration we can uploud custom scripts for animation, like installing package, create users, etc.
- click on launch instance.
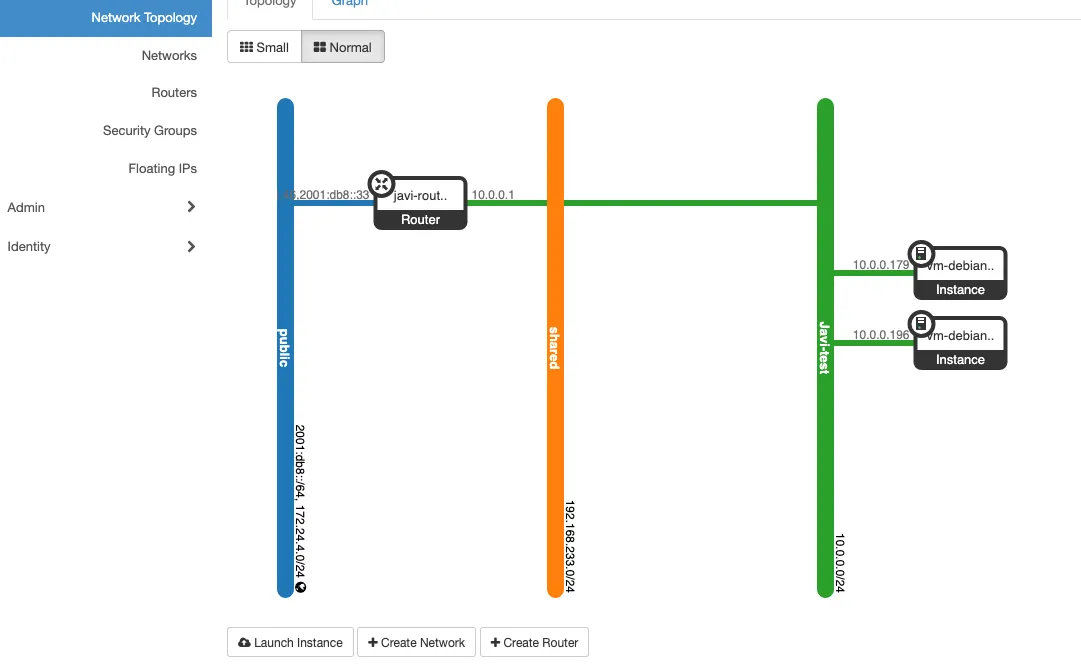
5. Create a router
- Go to - Project - Network topology - routers, create router.
- Router name.
- External network name to public.
- click on the router created and click on add interface.
- Click on subnet and select the subnet we created before.
- Submit
We should have a router connected like this:
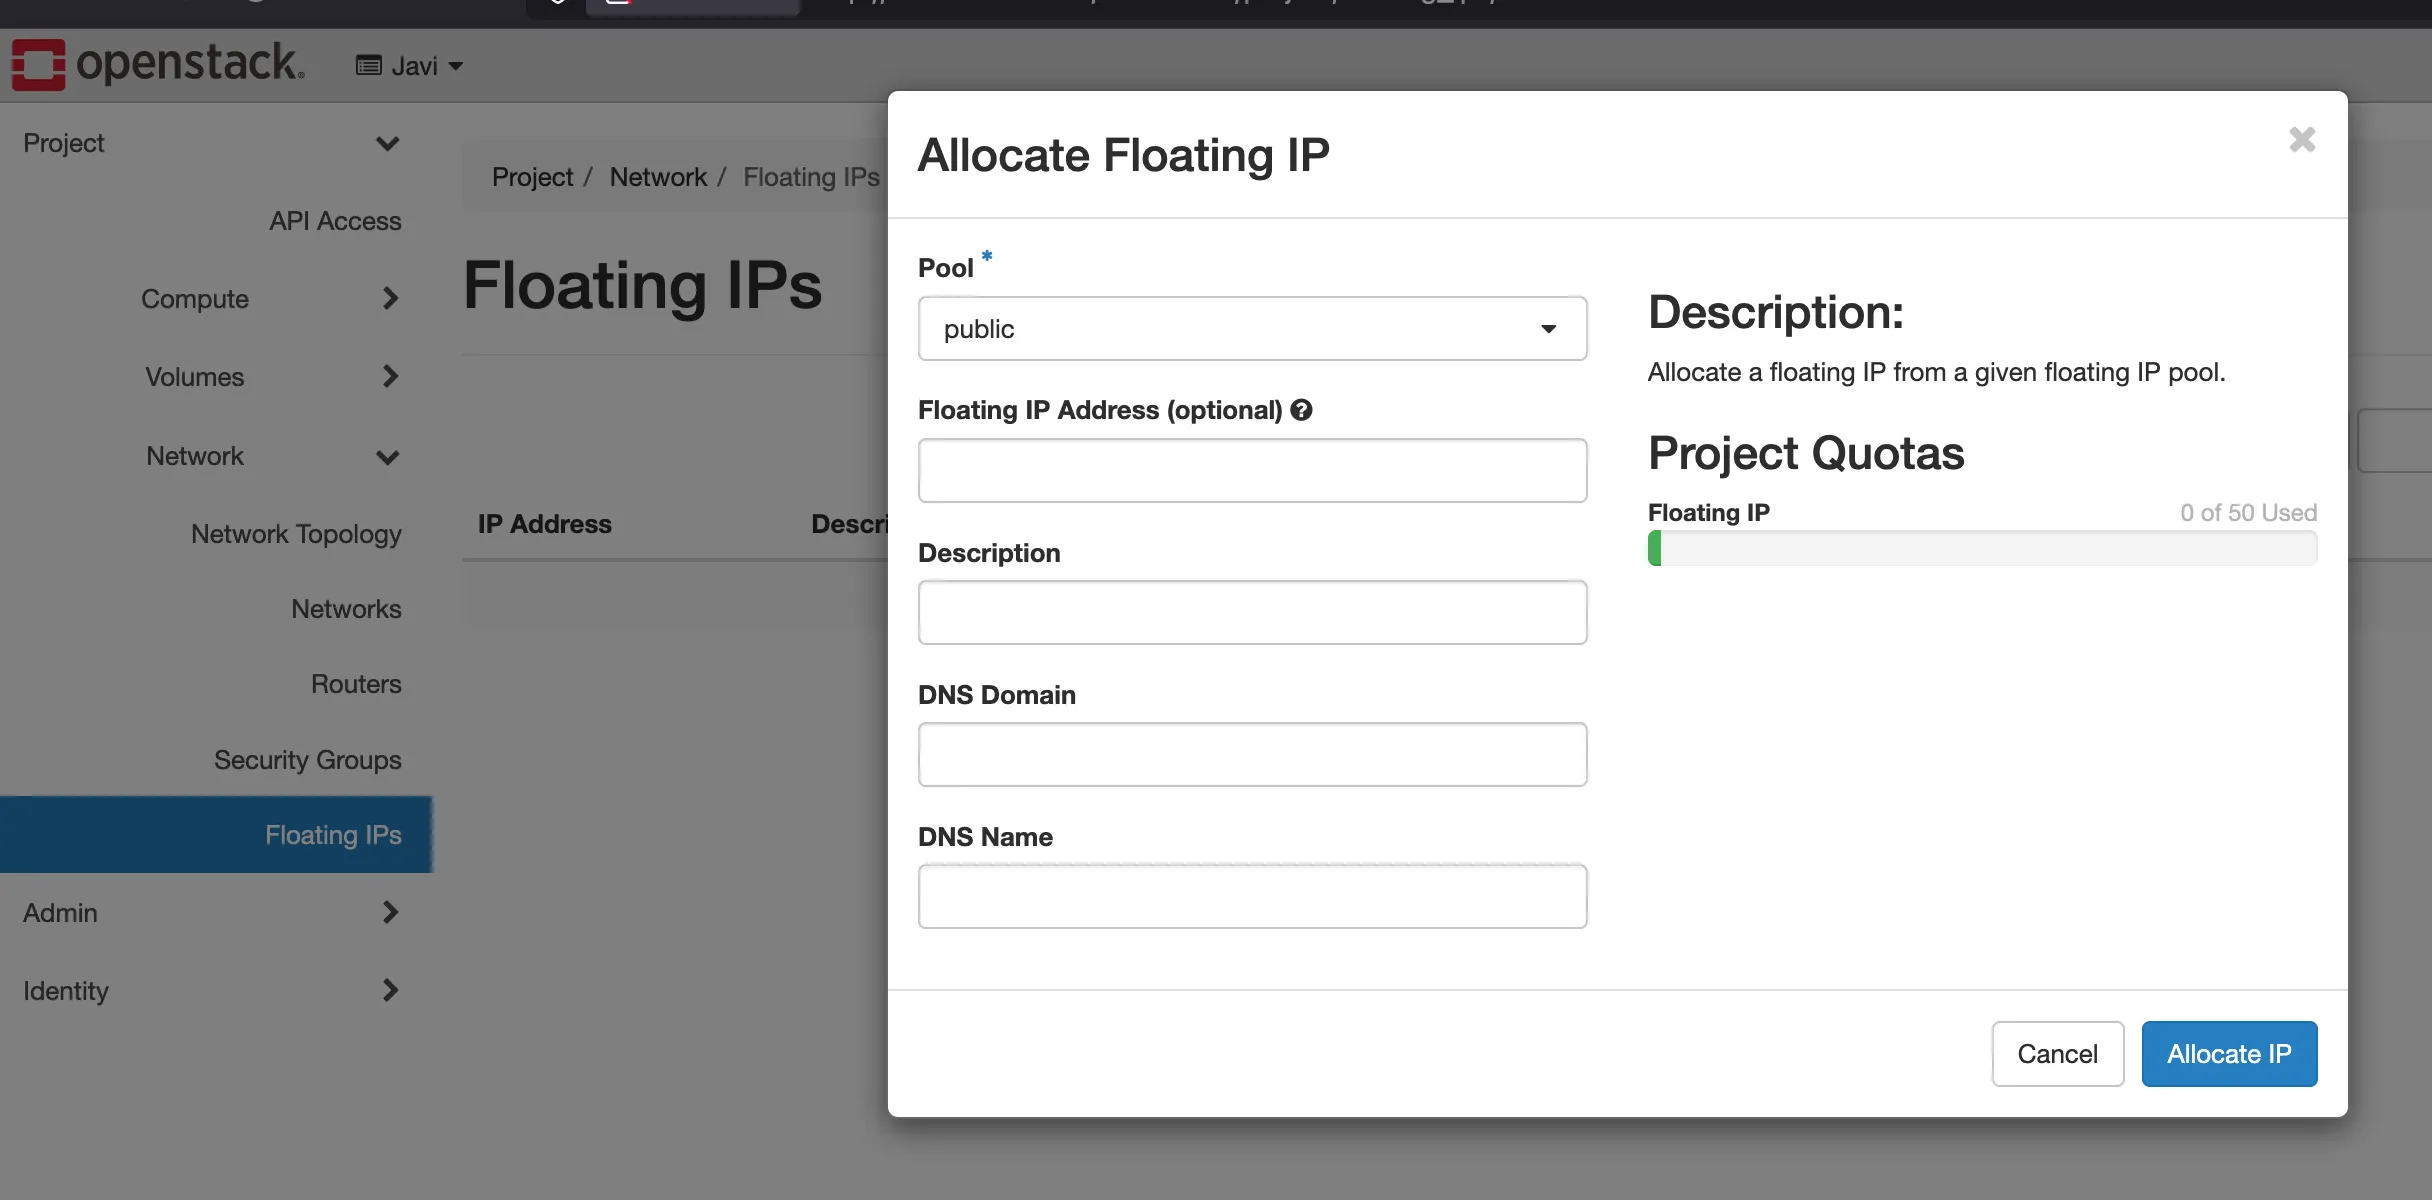
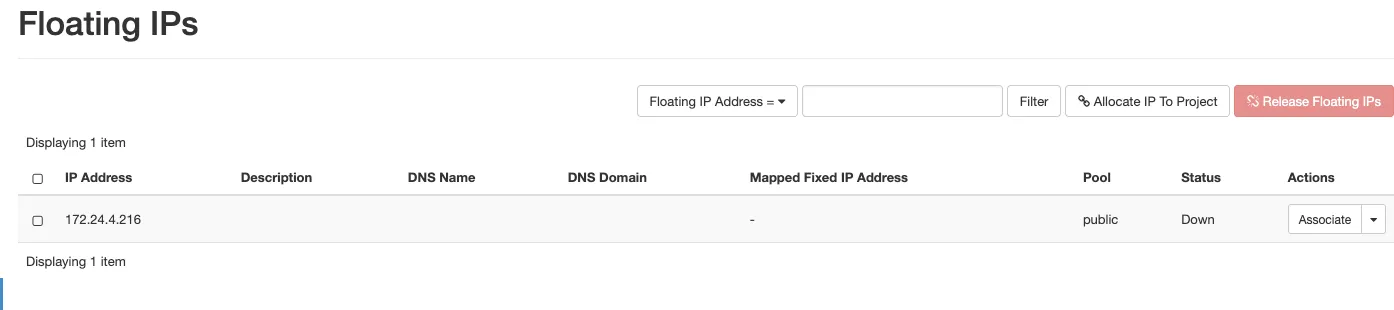
6. Allocate floating ip
- Go to - Project - Network topology - floating ips.
- click on allocate floating ip.
- Dont click anything else, just click on allocate floating ip.
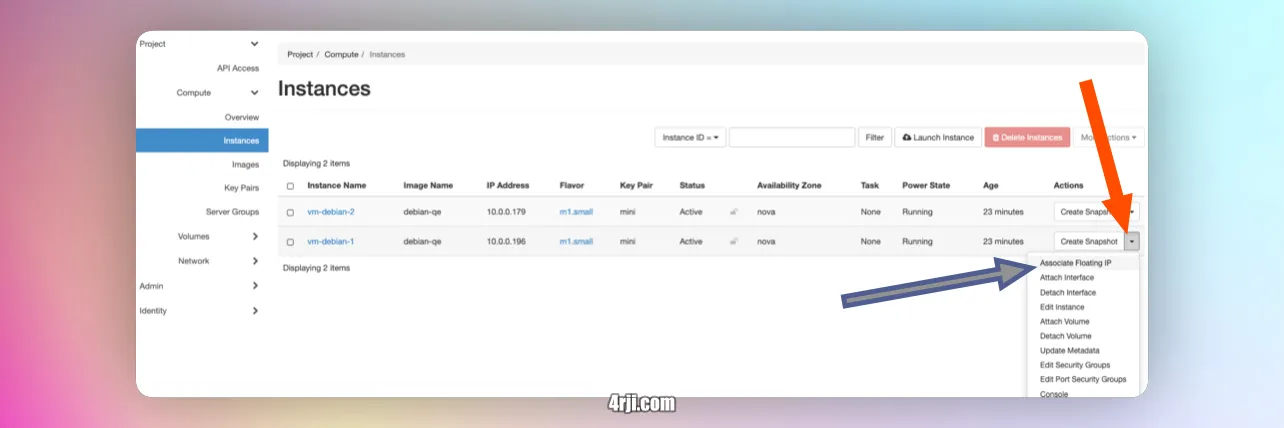
- Now we can assign the floating ip to the instance.
- Go to - Project - Compute - Instances - Instances.
- Click on the instance and click on the floating ip.
- Click on Ip address and select the Ip address we allocated before.
- Click on associate
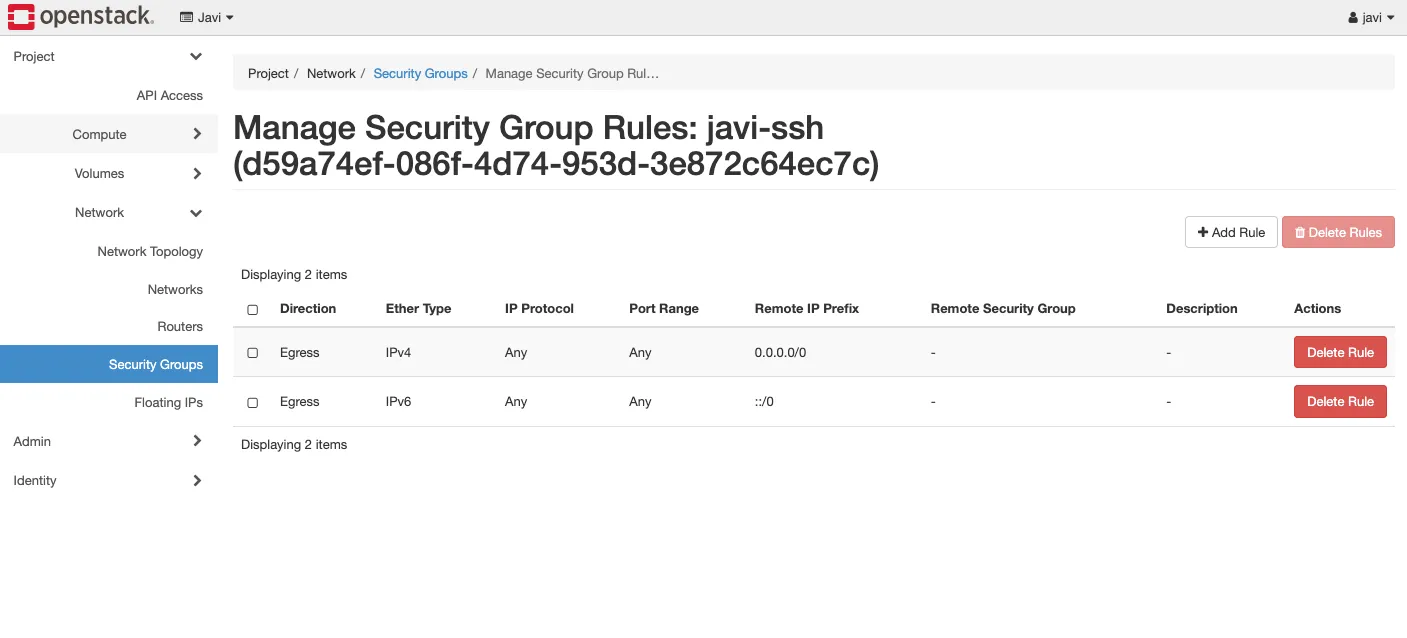
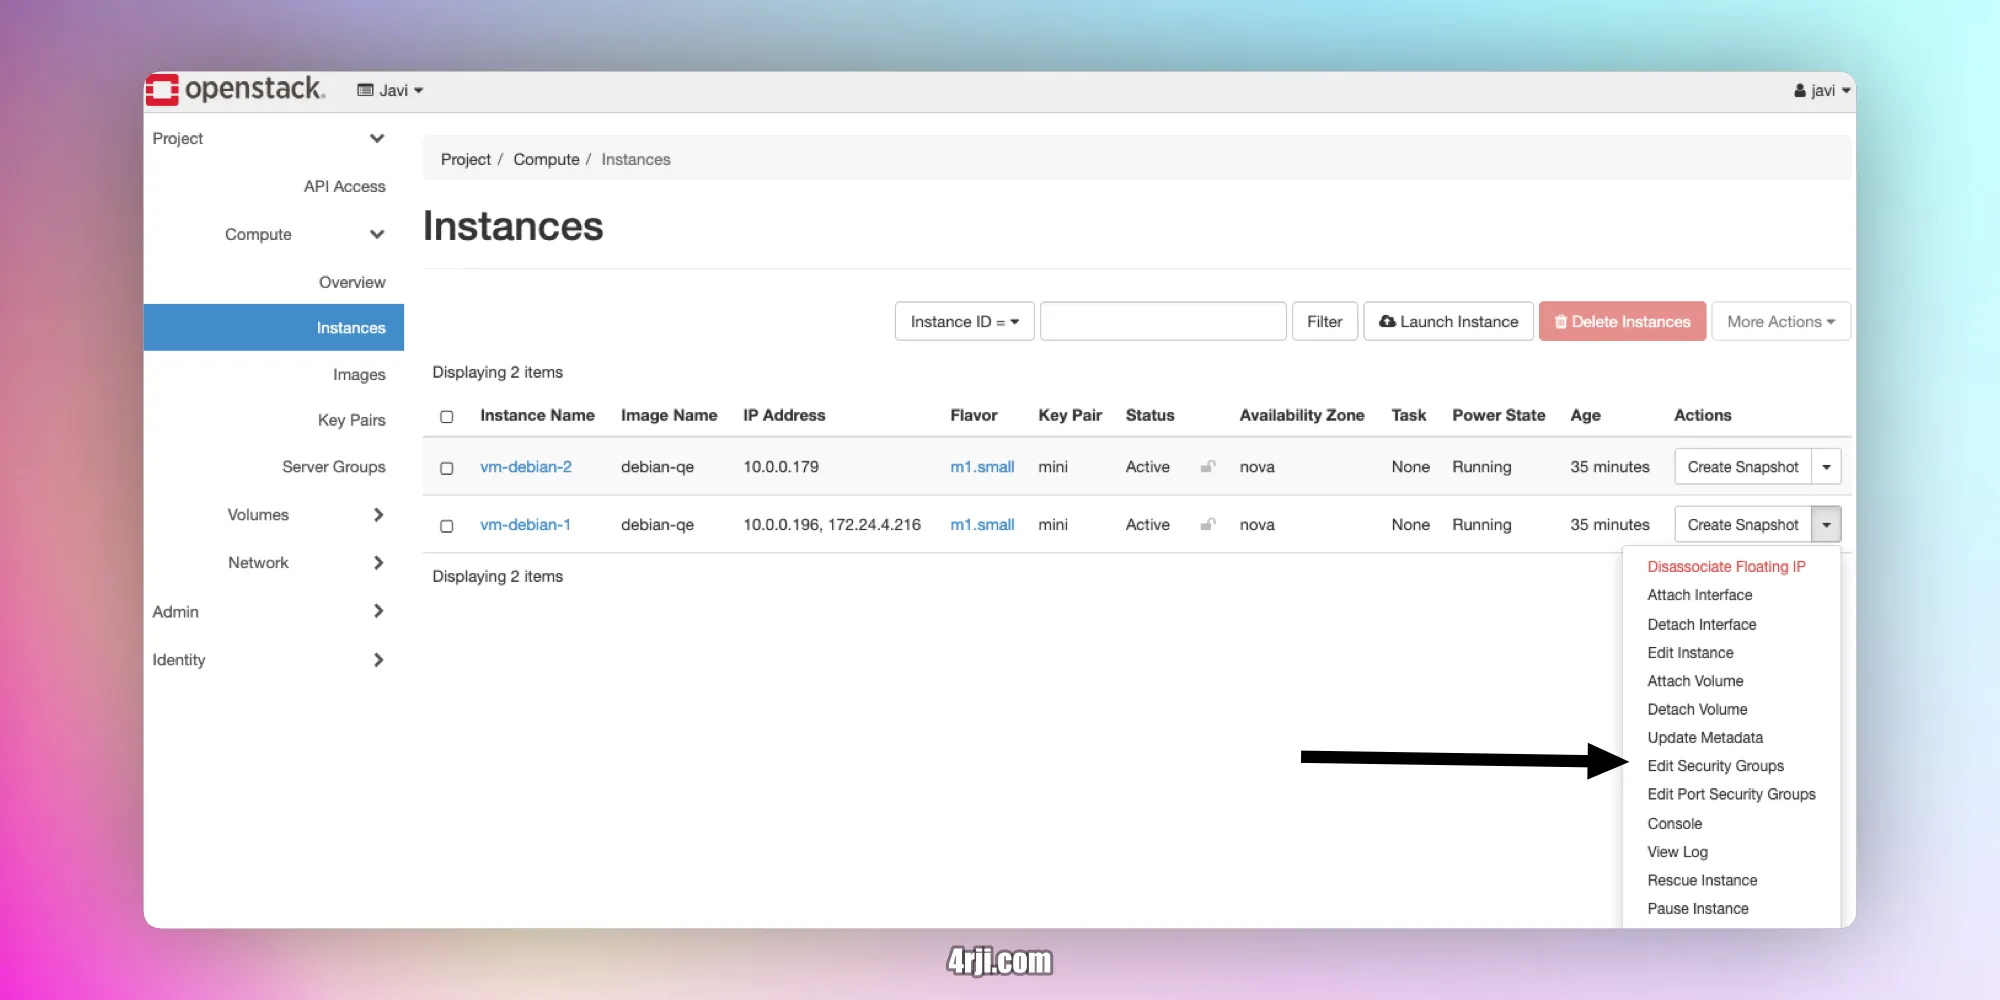
7. Security groups
- Go to - Project - Network topology - security groups.
- Click on manage rules to visualize the rules.
- Lets go back to security groups and click on create security group.
- Set the name of the security group. (ssh)
- click on create security group.
- in the new menu, click on add rule.
- here just set the Port to 22 and the remote ip to CIDR0.0.0.0/0 (all ips).
- click on add rule.
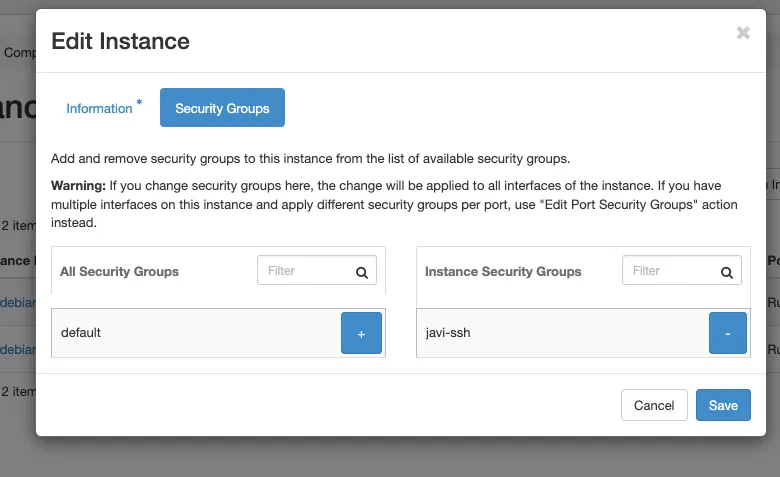
- go to proyect - compute -instances and click on edit security groups.
- remove the default security group and add the one we created before.
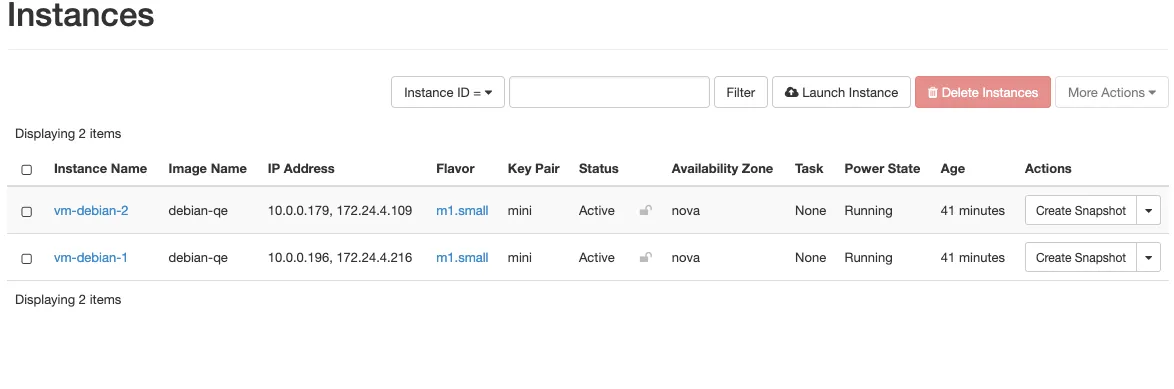
- You can do the same with the other vm, also allocate floating ip to the other vm. same steps from before.
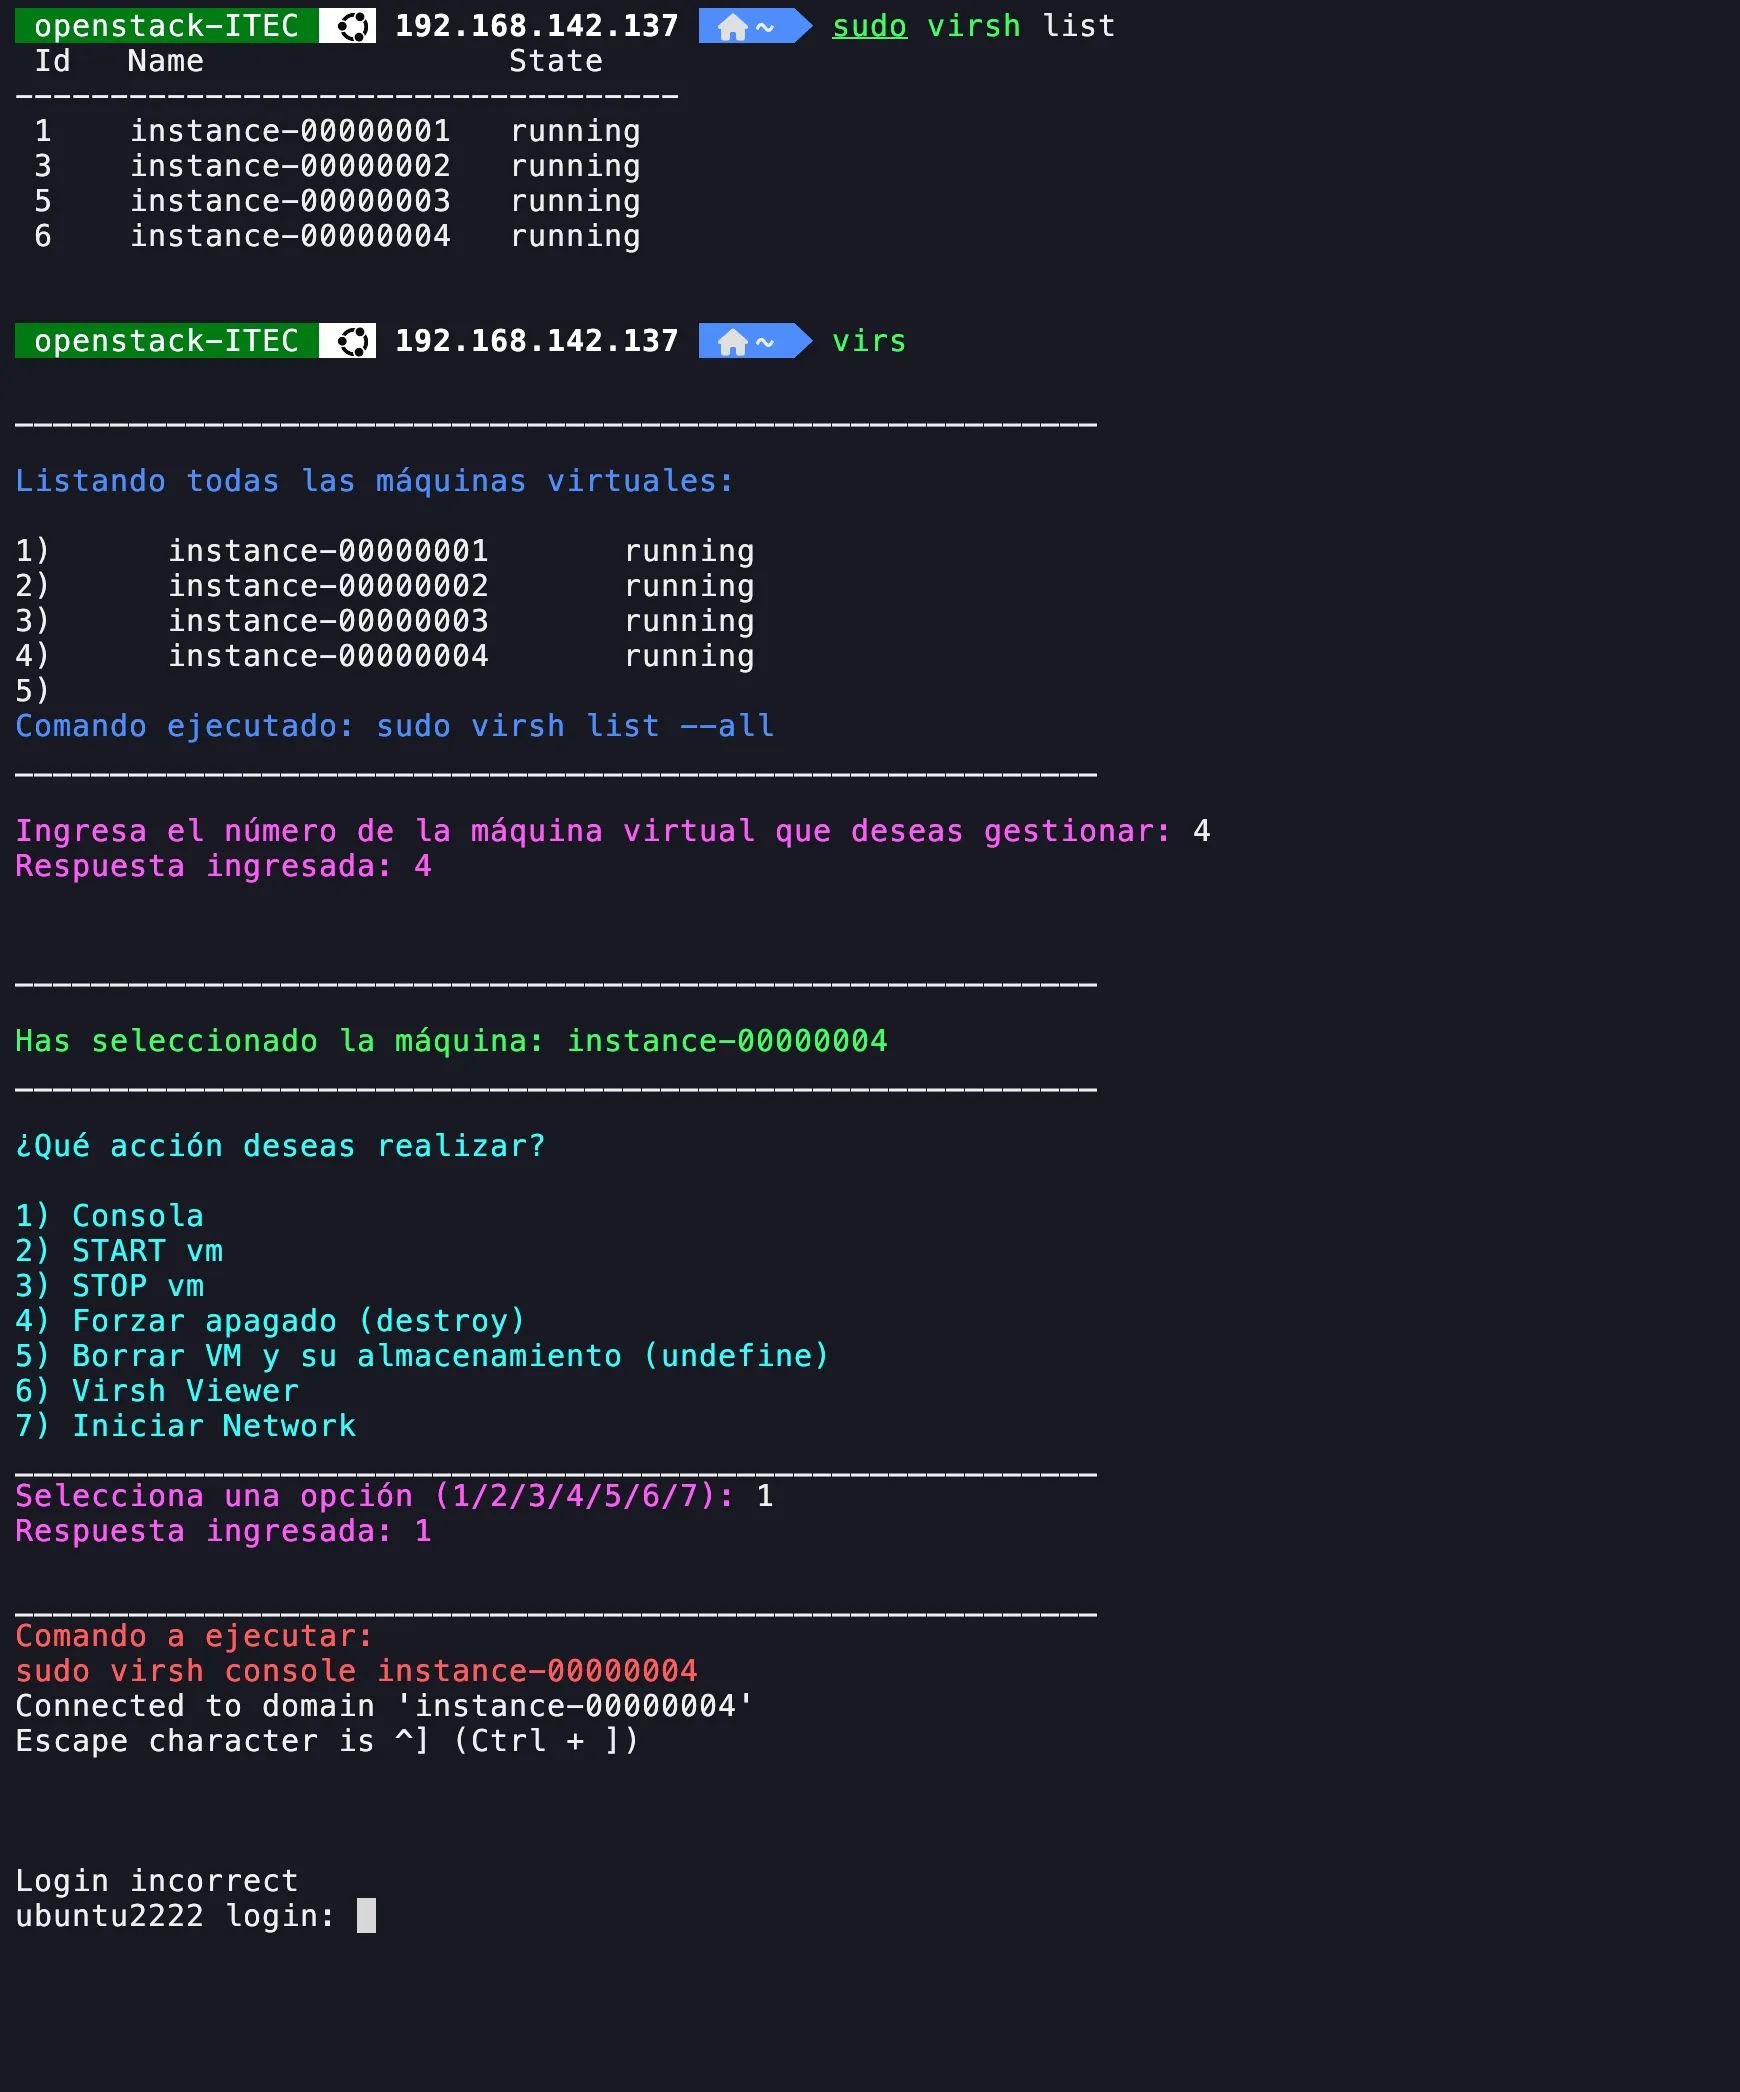
6. Access throught console via virsh
- Install virsh.
- Run virsh list --all
- Run virsh console
Screenshot shows the virsh console and one script I created to manage vms with virsh, call virs (available here
github.com/4rji)