How to Get Internet via DNS Using SSH and Proxy (Port 1080)
🔧 Deploy Debian Server on DigitalOcean
sudo apt update
sudo apt install iodine
sudo systemctl stop systemd-resolved
sudo systemctl disable systemd-resolved
Also check the firewall rules:
🚀 Start the Iodine Server
sudo iodined -f -P carp -b PUBLIC-IP 172.16.0.1 tunel.midominio.com
#to start the iodine server in my c2 server using tunel.midominio.com (doesnt matter):
sudo iodined -f -P carp 172.16.0.1 tunel.midominio.com
📡 Client Side (must match tunel.midominio.com)
sudo iodine -P carp PUBLIC-IP tunel.midominio.com
#to connect to my c2 server:
sudo iodine -P carp -T A c2.4rji.com tunel.midominio.com
#or use the script:
iodine-connect
==============================================
Starting iodine against tunel.midominio.com...
==============================================
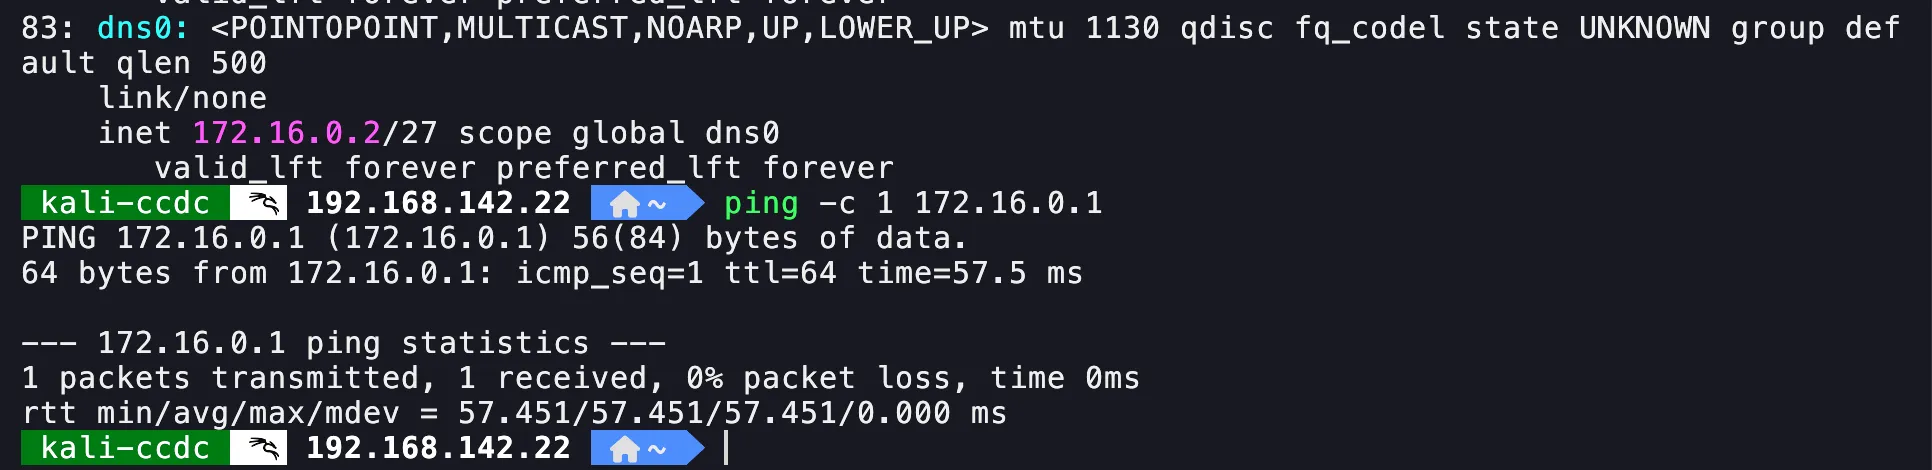
Opened dns0
Opened IPv4 UDP socket
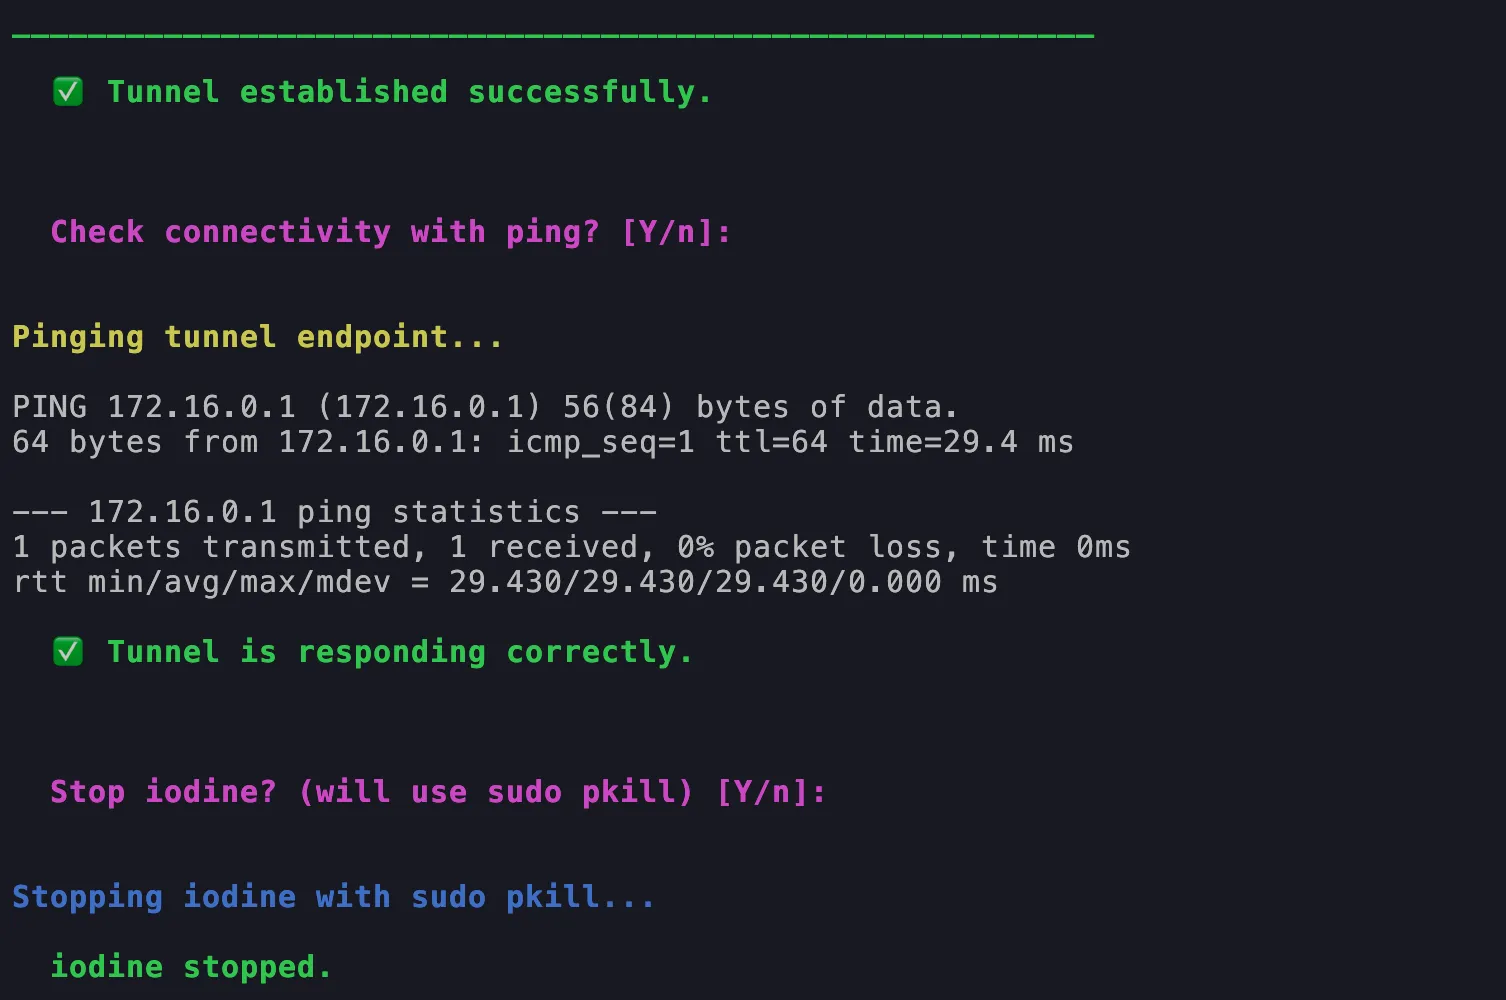
We can see in the image that the interface is created and the tunnel is established:
Also we can ping the server: 172.16.0.1
🔐 Connect to the Server via SSH Proxy
ssh -D 1080 root@172.16.0.1
ssh -fN -D 1080 root@172.16.0.1 -i id_ed25519
🌍 Verify Internet over DNS
proxychains curl https://ifconfig.me
ProxyChains-3.1 (http://proxychains.sf.net)
|DNS-request| ifconfig.me
|S-chain|-<>-127.0.0.1:1080-<><>-4.2.2.2:53-<><>-OK
|DNS-response| ifconfig.me is 34.160.111.145
|S-chain|-<>-127.0.0.1:1080-<><>-34.160.111.145:443-<><>-OK
64.231.136.130%
Or use:
curl --socks5-hostname 127.0.0.1:PORT https://ifconfig.me
This will show the public IP of the VPS, not your local IP.
🕵️ Monitor DNS Traffic
tcpdump -ni eth0 udp port 53
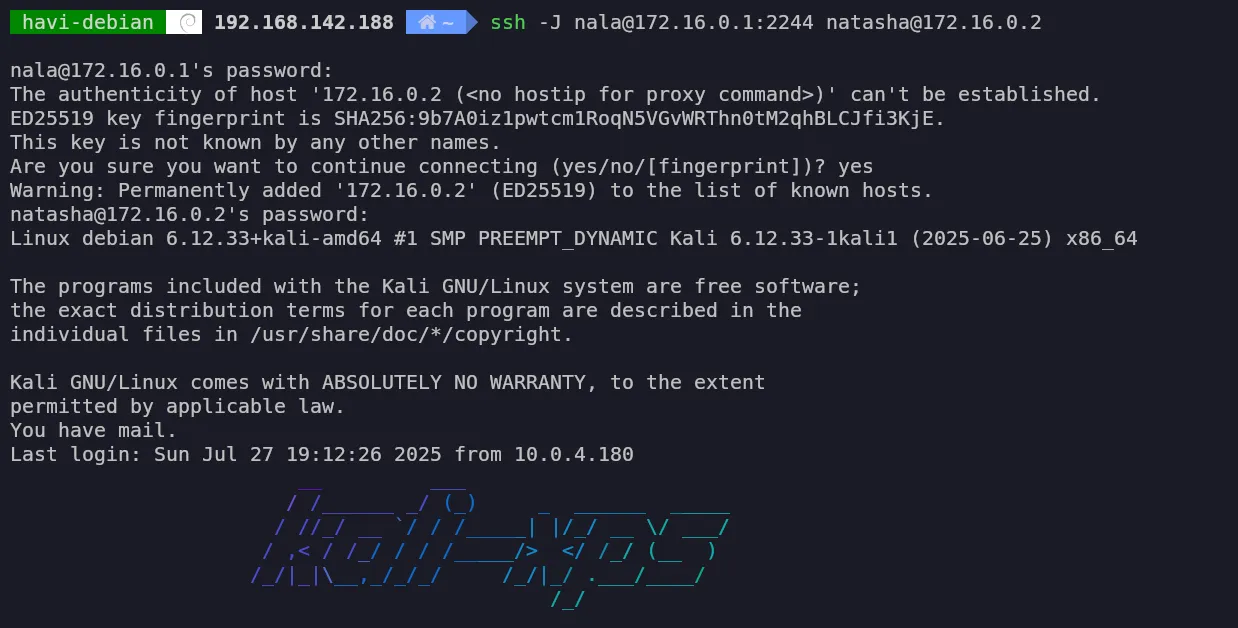
Jump into another server
From host 172.16.0.1 to host 172.16.0.2
🧹 Clean Up
sudo pkill iodined
sudo ip link delete dns0