Problem:
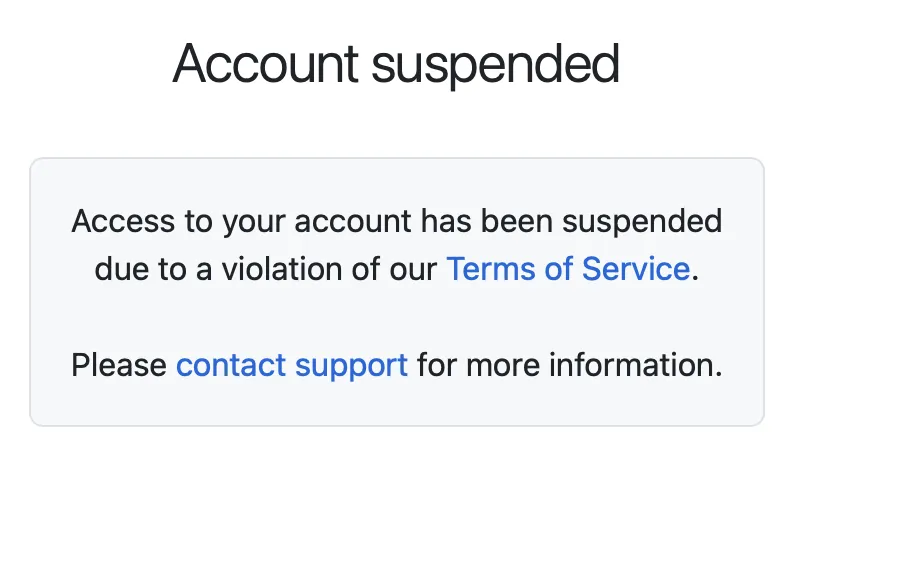
After my Github account was suspended without any reason, I realized I could not rely on third parties for my work and code. I decided to implement an open-source GitHub alternative (Gitea). I had thought about doing this before but always found it too complicated; however, this time it took me less than 30 minutes.
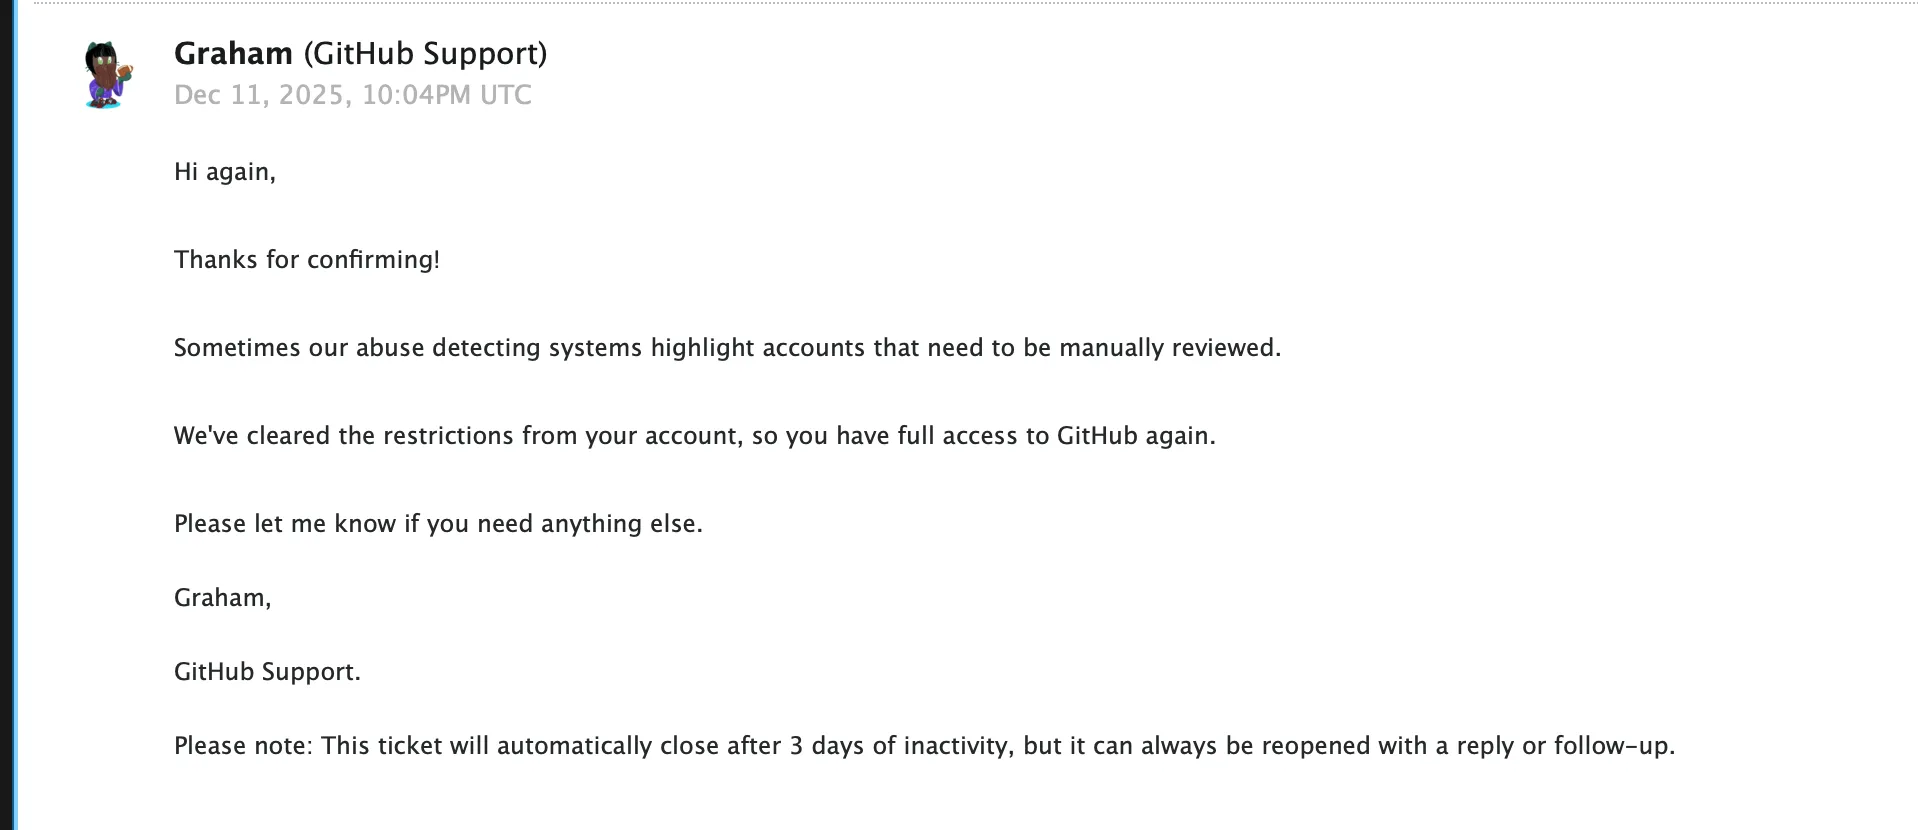
After several days, my account was reinstated, but being in the middle of the CCDC competition, I couldn't afford to lose days of work. My current solution is not only robust but also ensures my code is safe across my TWO separate repositories.
How It Works
Setting up a self-hosted Gitea infrastructure is about more than just hosting code; it's about ensuring availability and full control. This guide covers deploying Gitea via Docker, exposing it securely through Cloudflare Tunnels, and configuring a redundant "Sync-Push" workflow across multiple servers.
By configuring multiple Git remotes, you can ensure that every commit is pushed to both your primary server and a secondary backup instance automatically, keeping your development environment resilient to hardware or network failures.
-
1
Infrastructure Deployment
First, set up your network exposure using a Cloudflare Tunnel. Once the tunnel is ready, download the Gitea Docker configuration and launch the environment:
docker compose up -dNavigate to
http://localhost:3000 or your cloduflare tunnel urlto access the installation screen and create your primary administrator account.
-
2
Security & URL Configuration
To finalize the setup, you must configure Gitea to recognize its public domain and disable open registration for security. Edit the configuration file:
nano ./gitea/gitea/conf/app.iniUpdate the Disable Registration after you create your first account:
ROOT_URL = https://gitea.4rji.com

[service]
DISABLE_REGISTRATION = true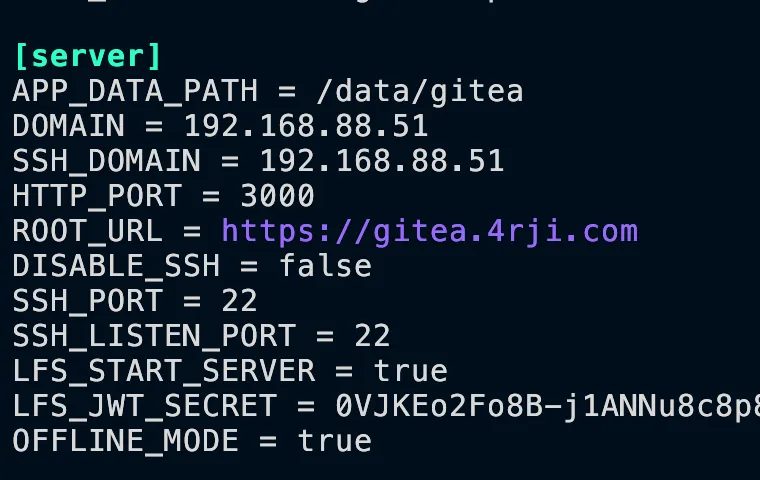
-
3
Enabling Redundancy
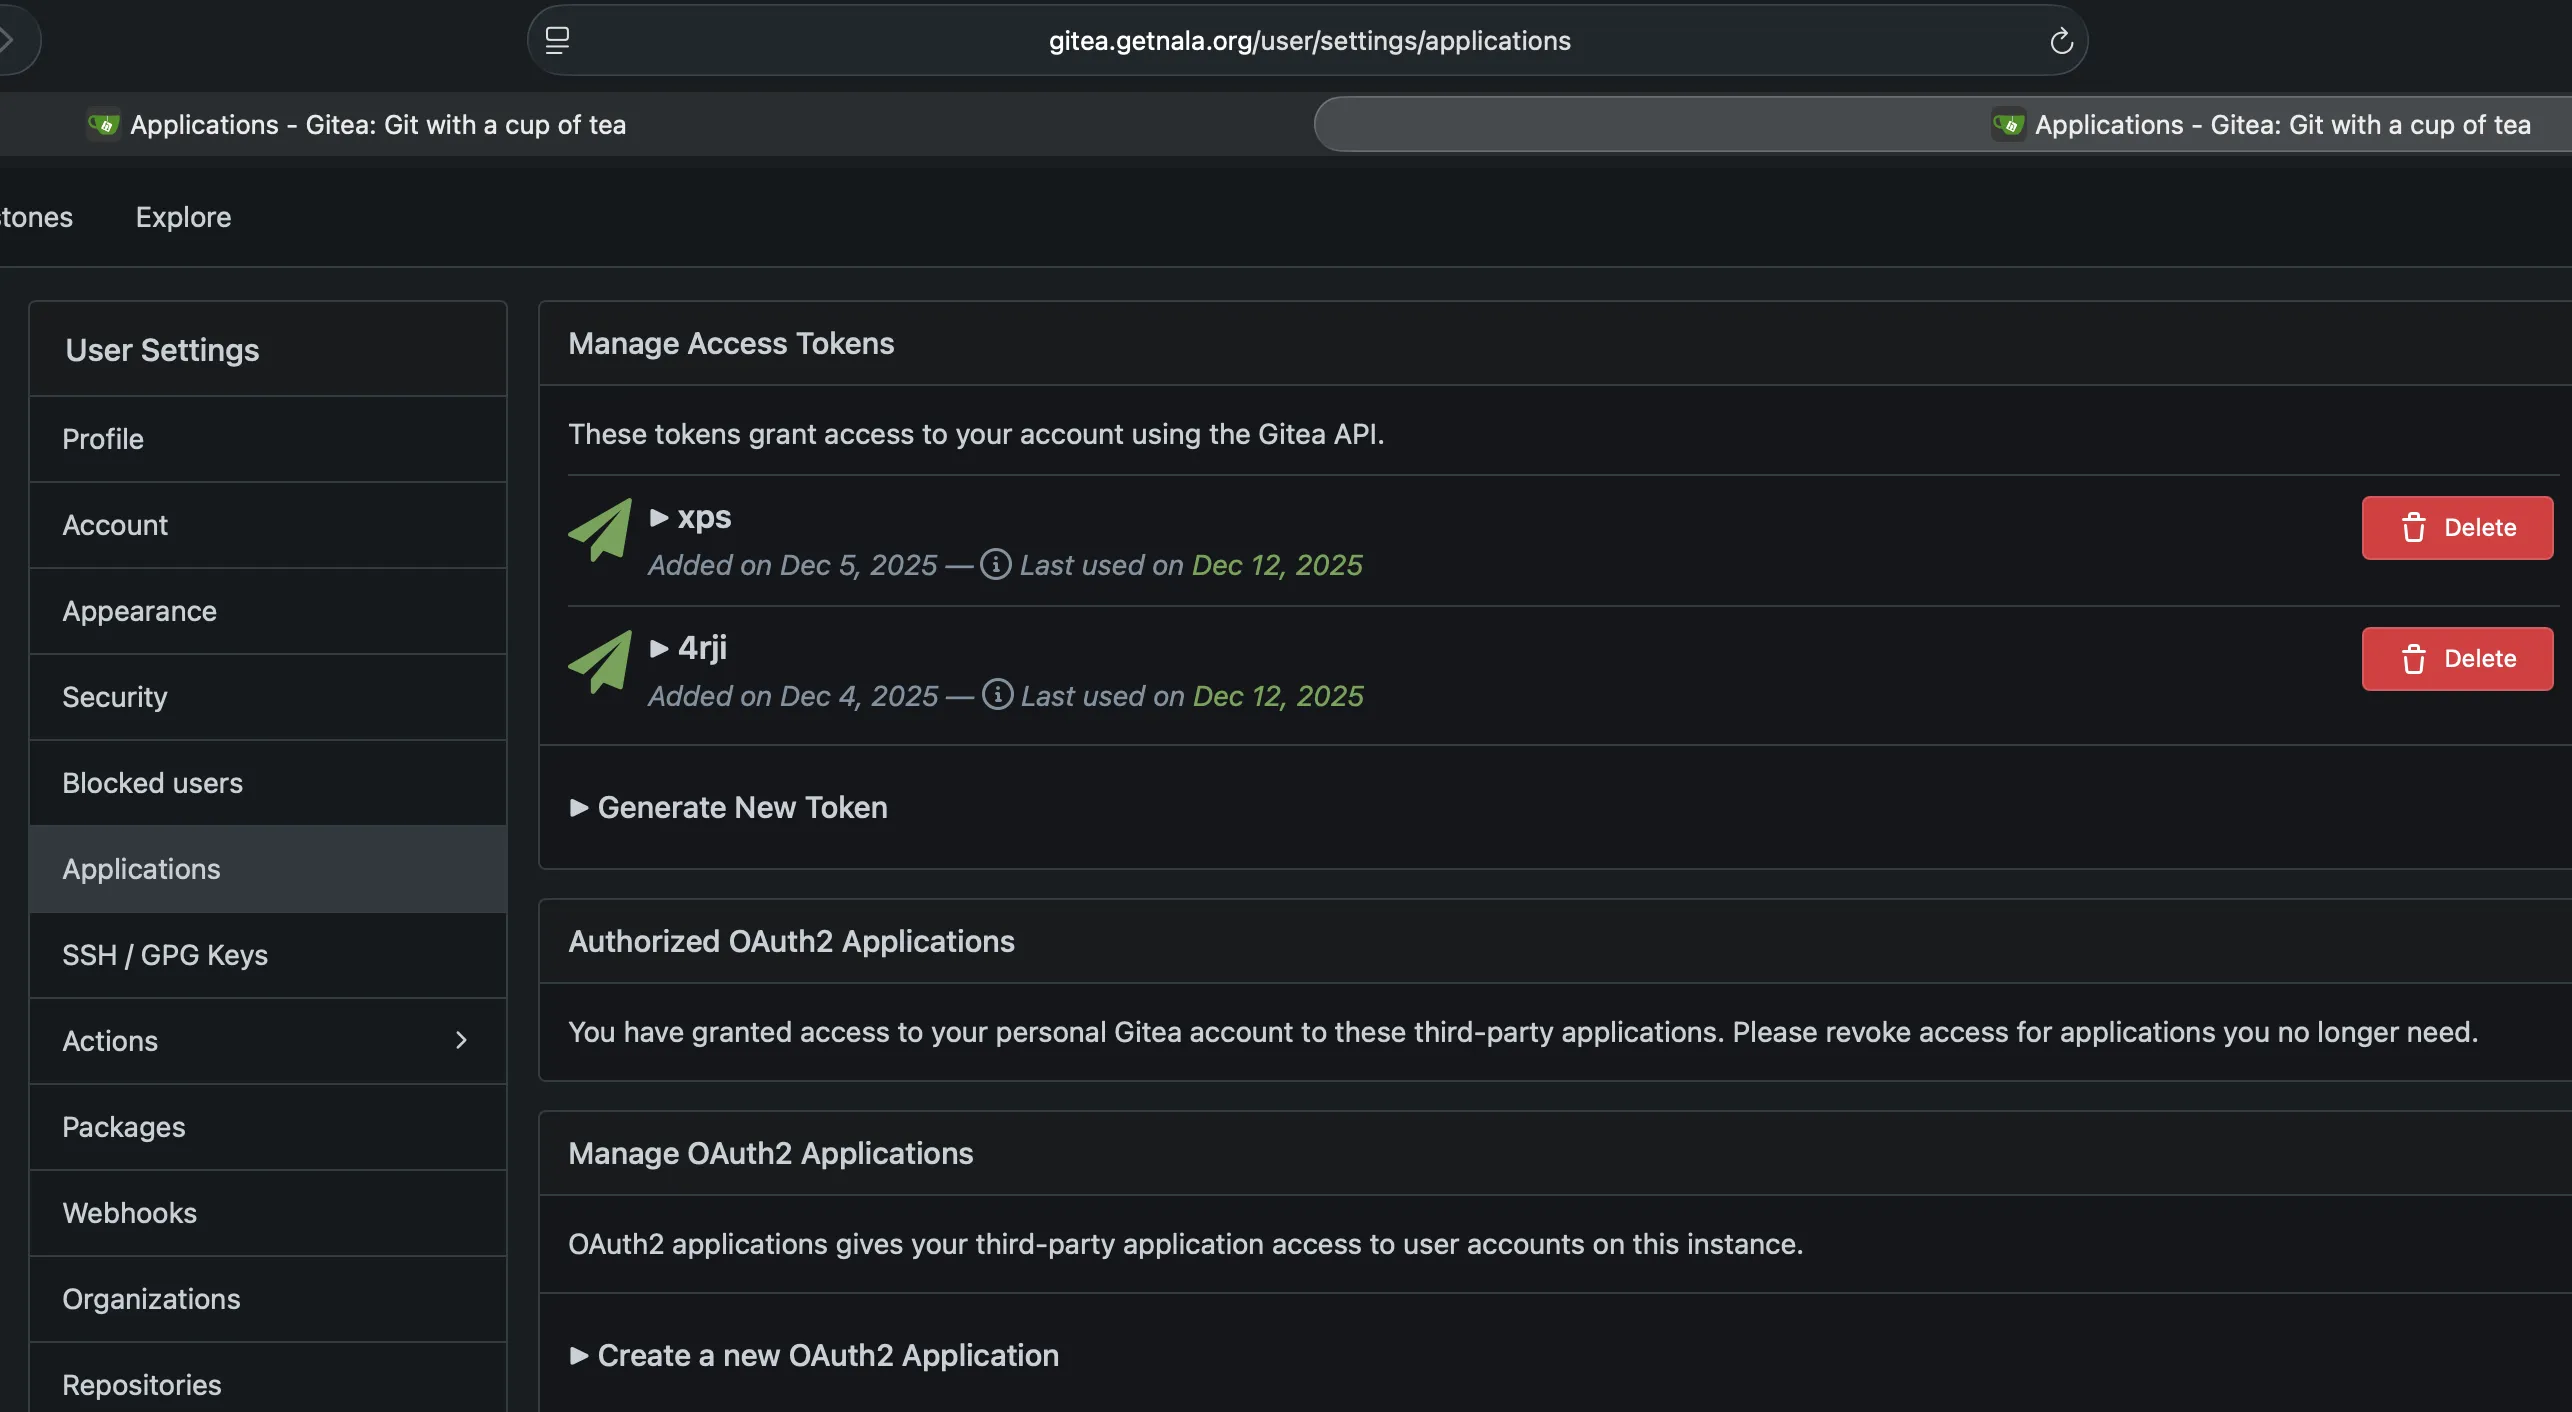
Repeat the previous steps on a second server. This will act as your secondary instance. For convenience, you should generate an App Token on both servers to use as your password during Git operations, avoiding the need for manual credentials on every sync.
-
4
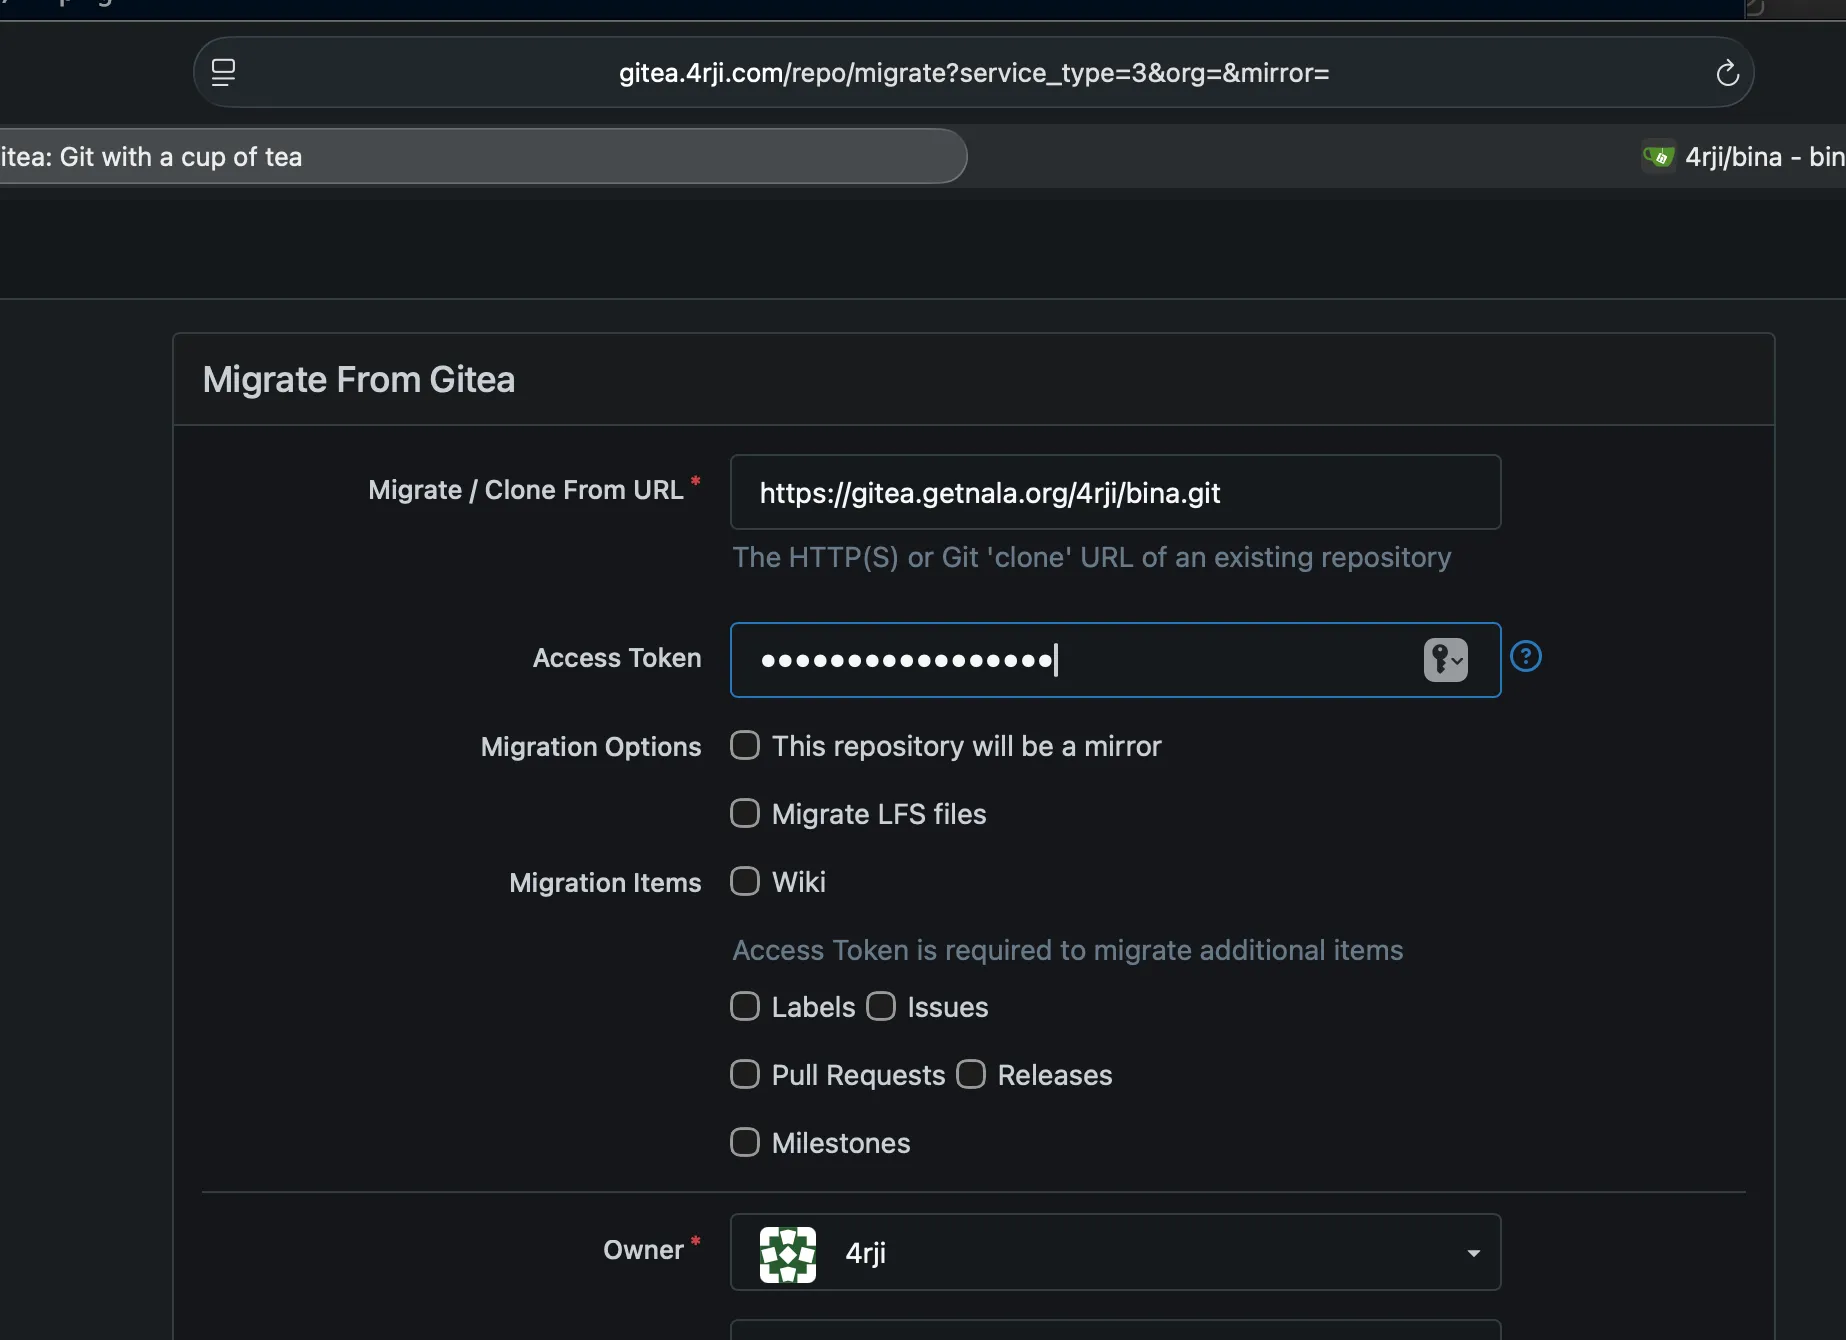
Repository Migration & Initial Setup
After creating a repository on one server, perform a migration of it on the other to ensure both instances have the same starting point.
Once the migration is complete, clone the repository to your local machine and prepare it for multi-remote configuration by removing the original remote:
git clone https://gitea.4rji.com/4rji/$FOLDER.git
git remote remove origin
-
5
Configuring Multi-Remote Push
Add both the primary and backup servers as your remote destinations:
git remote add origin http://192.168.88.51:3000/4rji/$FOLDER.git
git remote add backup http://192.168.3.5:3000/4rji/$FOLDER.git
Verify your remotes are correctly configured to point to both local IPs for speed:
git remote -v
backup  http://192.168.3.5:3000/4rji/$FOLDER.git (fetch)
backup  http://192.168.3.5:3000/4rji/$FOLDER.git (push)
origin  http://192.168.88.51:3000/4rji/$FOLDER.git (fetch)
origin  http://192.168.88.51:3000/4rji/$FOLDER.git (push)
Finally, perform the initial push to sync both servers:
git push origin main
git push backup main
-
6
Automated Synchronization Workflow
With both servers configured, you can stage and commit your changes as usual. To manually push to both, run:
git add .
git commit -m "update message"
git push origin main
git push backup main
To make this process automatic and seamless, use the
gcomscript:./gcom "your commit message" -
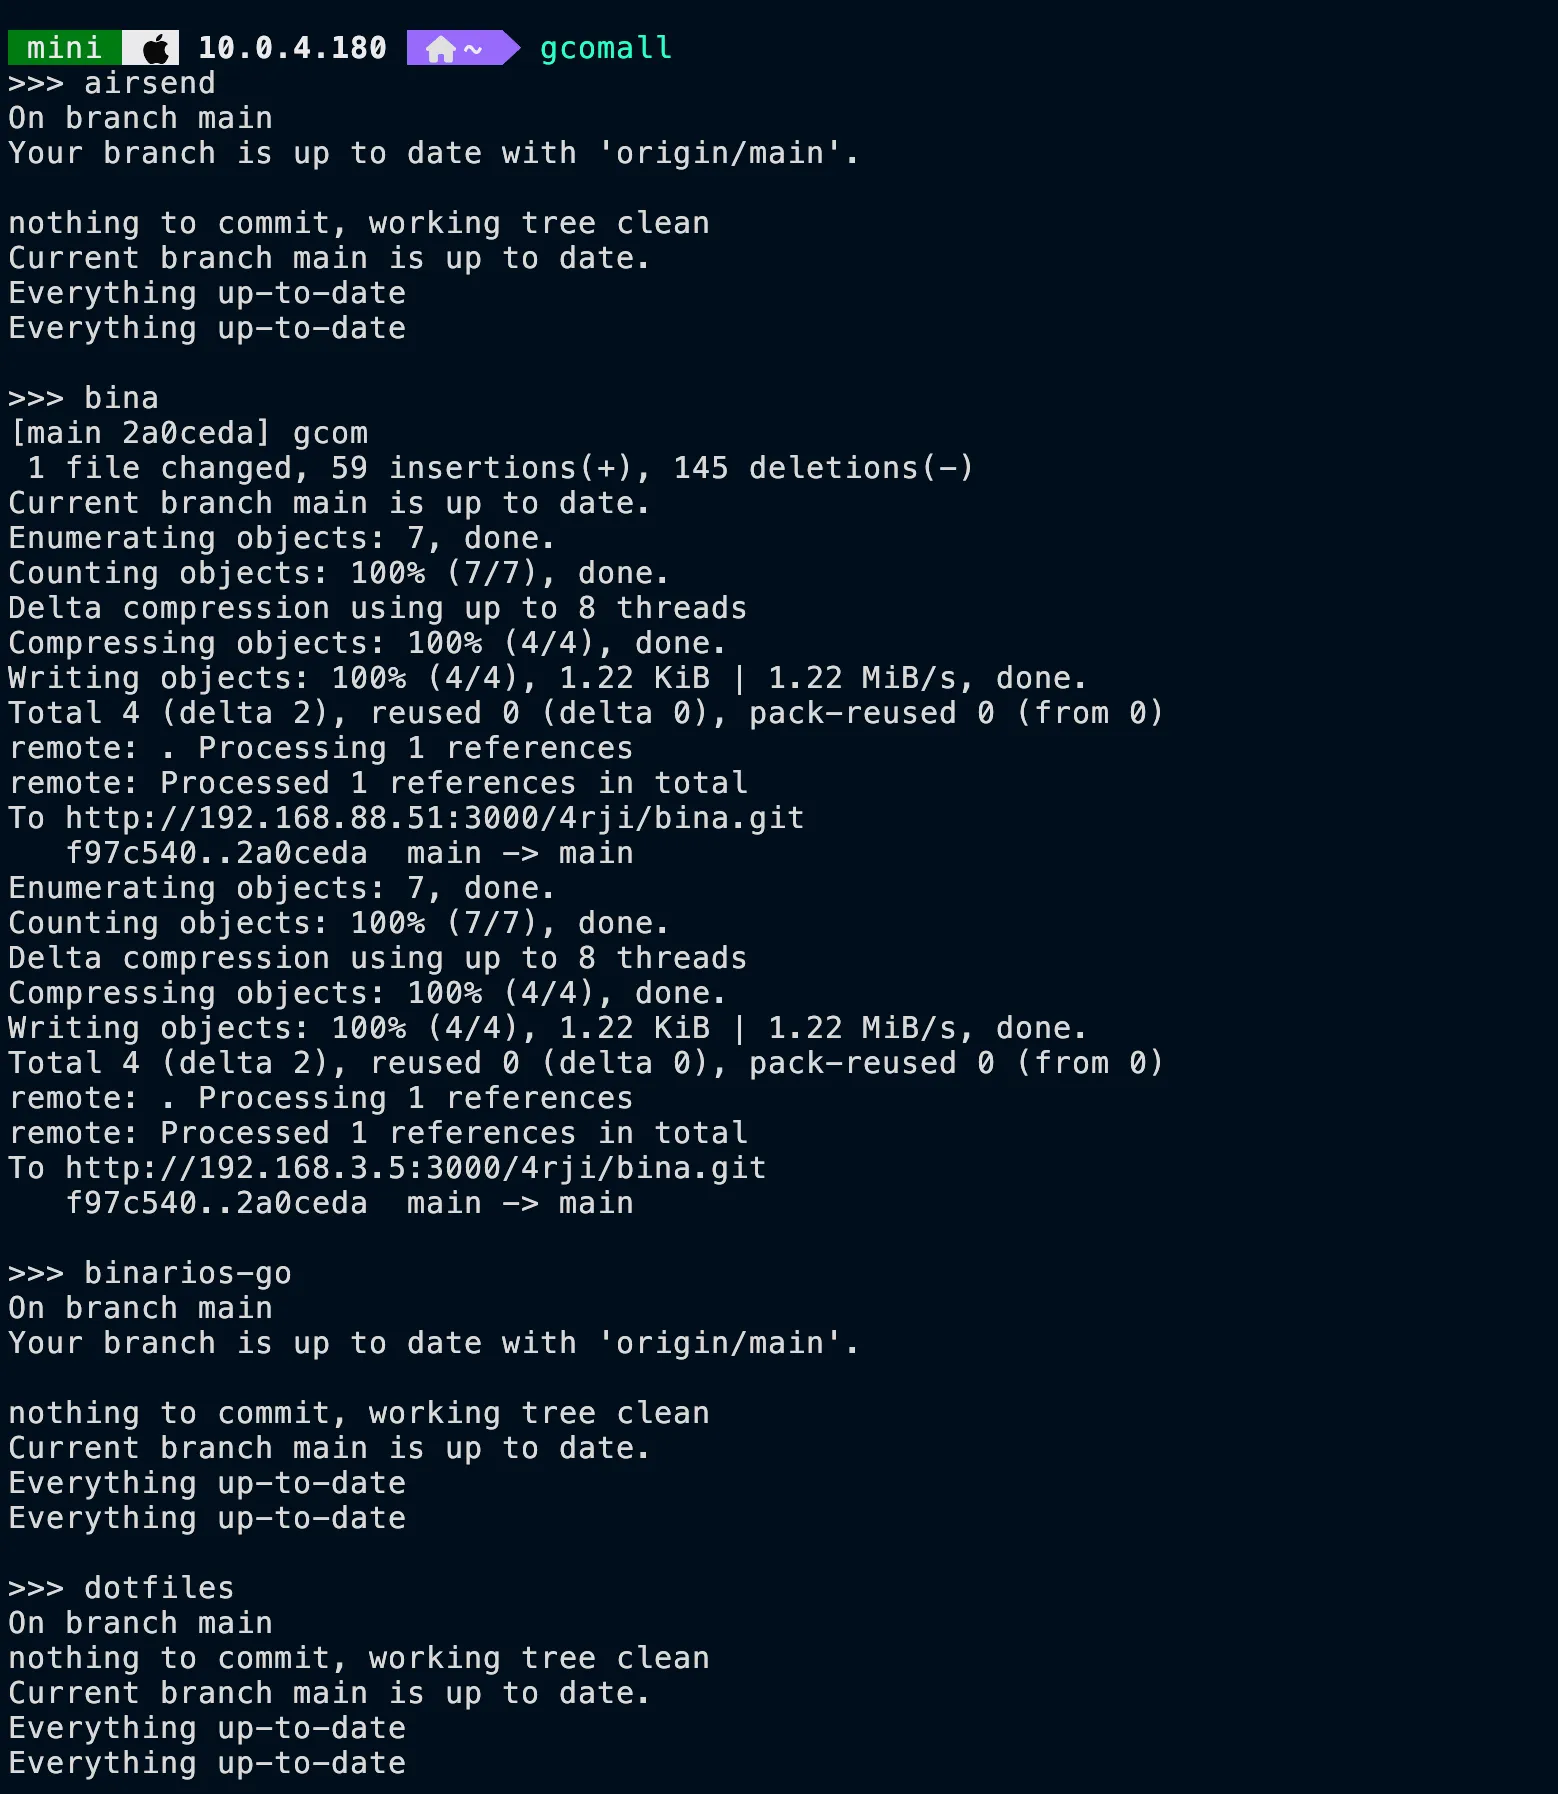
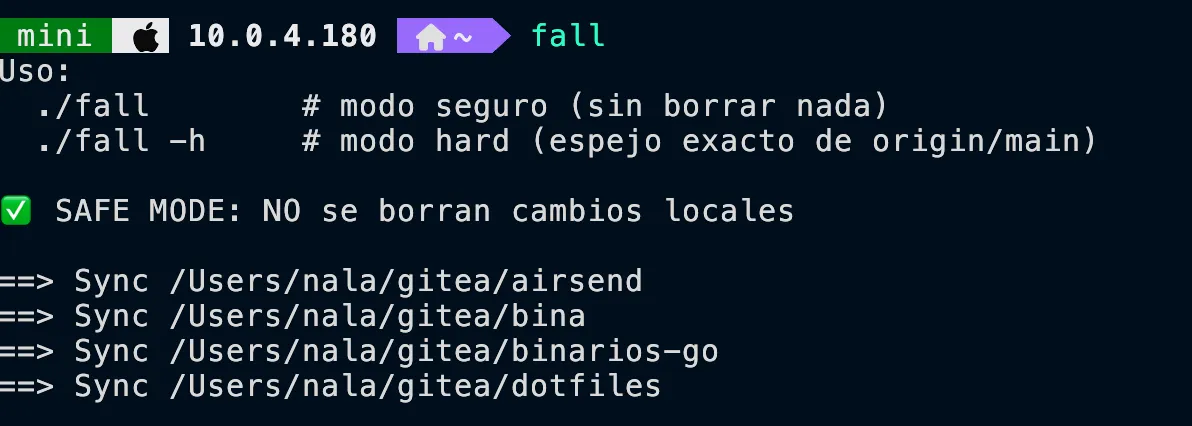
7
Bulk Repository Synchronization
To synchronize all repositories easily, we use two specialized scripts:
gcomallandfall.