Creating an Ephemeral Firefox Browser with Docker
In this guide, we'll create a disposable Firefox browser using Docker that automatically destroys its session after use. This is perfect for opening potentially risky links without leaving traces on your system.
Note: It is very useful because it allows changing the Firefox language, which helps avoid browser detection.
Step 1: Create the Dockerfile
First, let's create a Dockerfile that will set up our ephemeral Firefox environment:
root@kali:~/firefox-ephemeral# cat Dockerfile
FROM debian:bookworm

ENV DEBIAN_FRONTEND=noninteractive

RUN apt-get update && \
    apt-get install -y \
        firefox-esr \
        libgtk-3-0 \
        libdbus-glib-1-2 \
        libx11-xcb1 \
        libasound2 \
        x11-utils && \
    apt-get clean && \
    rm -rf /var/lib/apt/lists/*

ENTRYPOINT ["firefox-esr"]
Step 2: Build the Docker Image
Build the Docker image with the following command:
root@kali:~/firefox-ephemeral# docker build -t firefox-ephemeral .
Sending build context to Docker daemon  2.048kB
Step 1/3 : FROM debian:bookworm
 ---> 1234567890ab
Step 2/3 : ENV DEBIAN_FRONTEND=noninteractive
 ---> Running in abcdef123456
Step 3/3 : RUN apt-get update &&     apt-get install -y         firefox-esr         libgtk-3-0         libdbus-glib-1-2         libx11-xcb1         libasound2         x11-utils &&     apt-get clean &&     rm -rf /var/lib/apt/lists/*
 ---> Running in 7890abcdef12
Successfully built 1234567890ab
Successfully tagged firefox-ephemeral:latest
Step 3: Install XQuartz
Install XQuartz using Homebrew:
user@mac:~# brew install --cask xquartz
==> Downloading https://dl.bintray.com/xquartz/downloads/XQuartz-2.8.1.dmg
######################################################################## 100.0%
==> Installing Cask xquartz
==> Moving App 'XQuartz.app' to '/Applications/XQuartz.app'
==> Linking Binary 'xauth' to '/usr/local/bin/xauth'
==> Linking Binary 'xhost' to '/usr/local/bin/xhost'
==> Linking Binary 'xmodmap' to '/usr/local/bin/xmodmap'
==> Linking Binary 'xrdb' to '/usr/local/bin/xrdb'
==> Linking Binary 'xset' to '/usr/local/bin/xset'
==> Linking Binary 'xsetroot' to '/usr/local/bin/xsetroot'
==> Linking Binary 'xterm' to '/usr/local/bin/xterm'
Step 4: Configure X11
Run these commands in your terminal:
user@mac:~# export DISPLAY=:0
user@mac:~# /opt/X11/bin/xhost + 127.0.0.1
127.0.0.1 being added to access control list
Open X11 preferences and enable "Allow connections from network clients". IMPORTANT: After enabling network clients in X11, you must restart your machine for the changes to take effect.

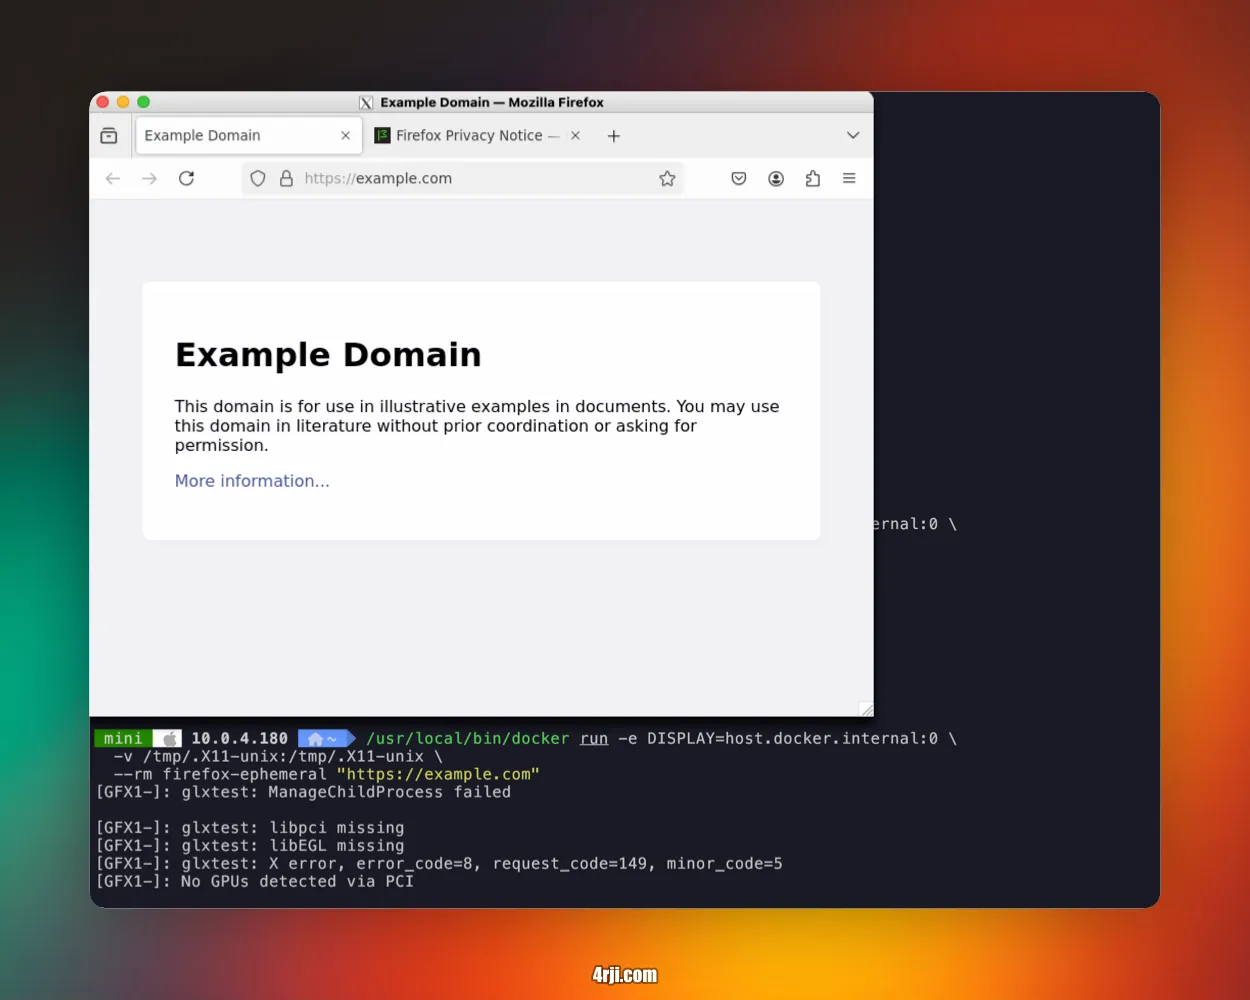
Step 5: Test the Setup
Test if everything works by running:
/usr/local/bin/docker run -e DISPLAY=host.docker.internal:0 \
  -v /tmp/.X11-unix:/tmp/.X11-unix \
  --rm firefox-ephemeral "https://4rji.com"
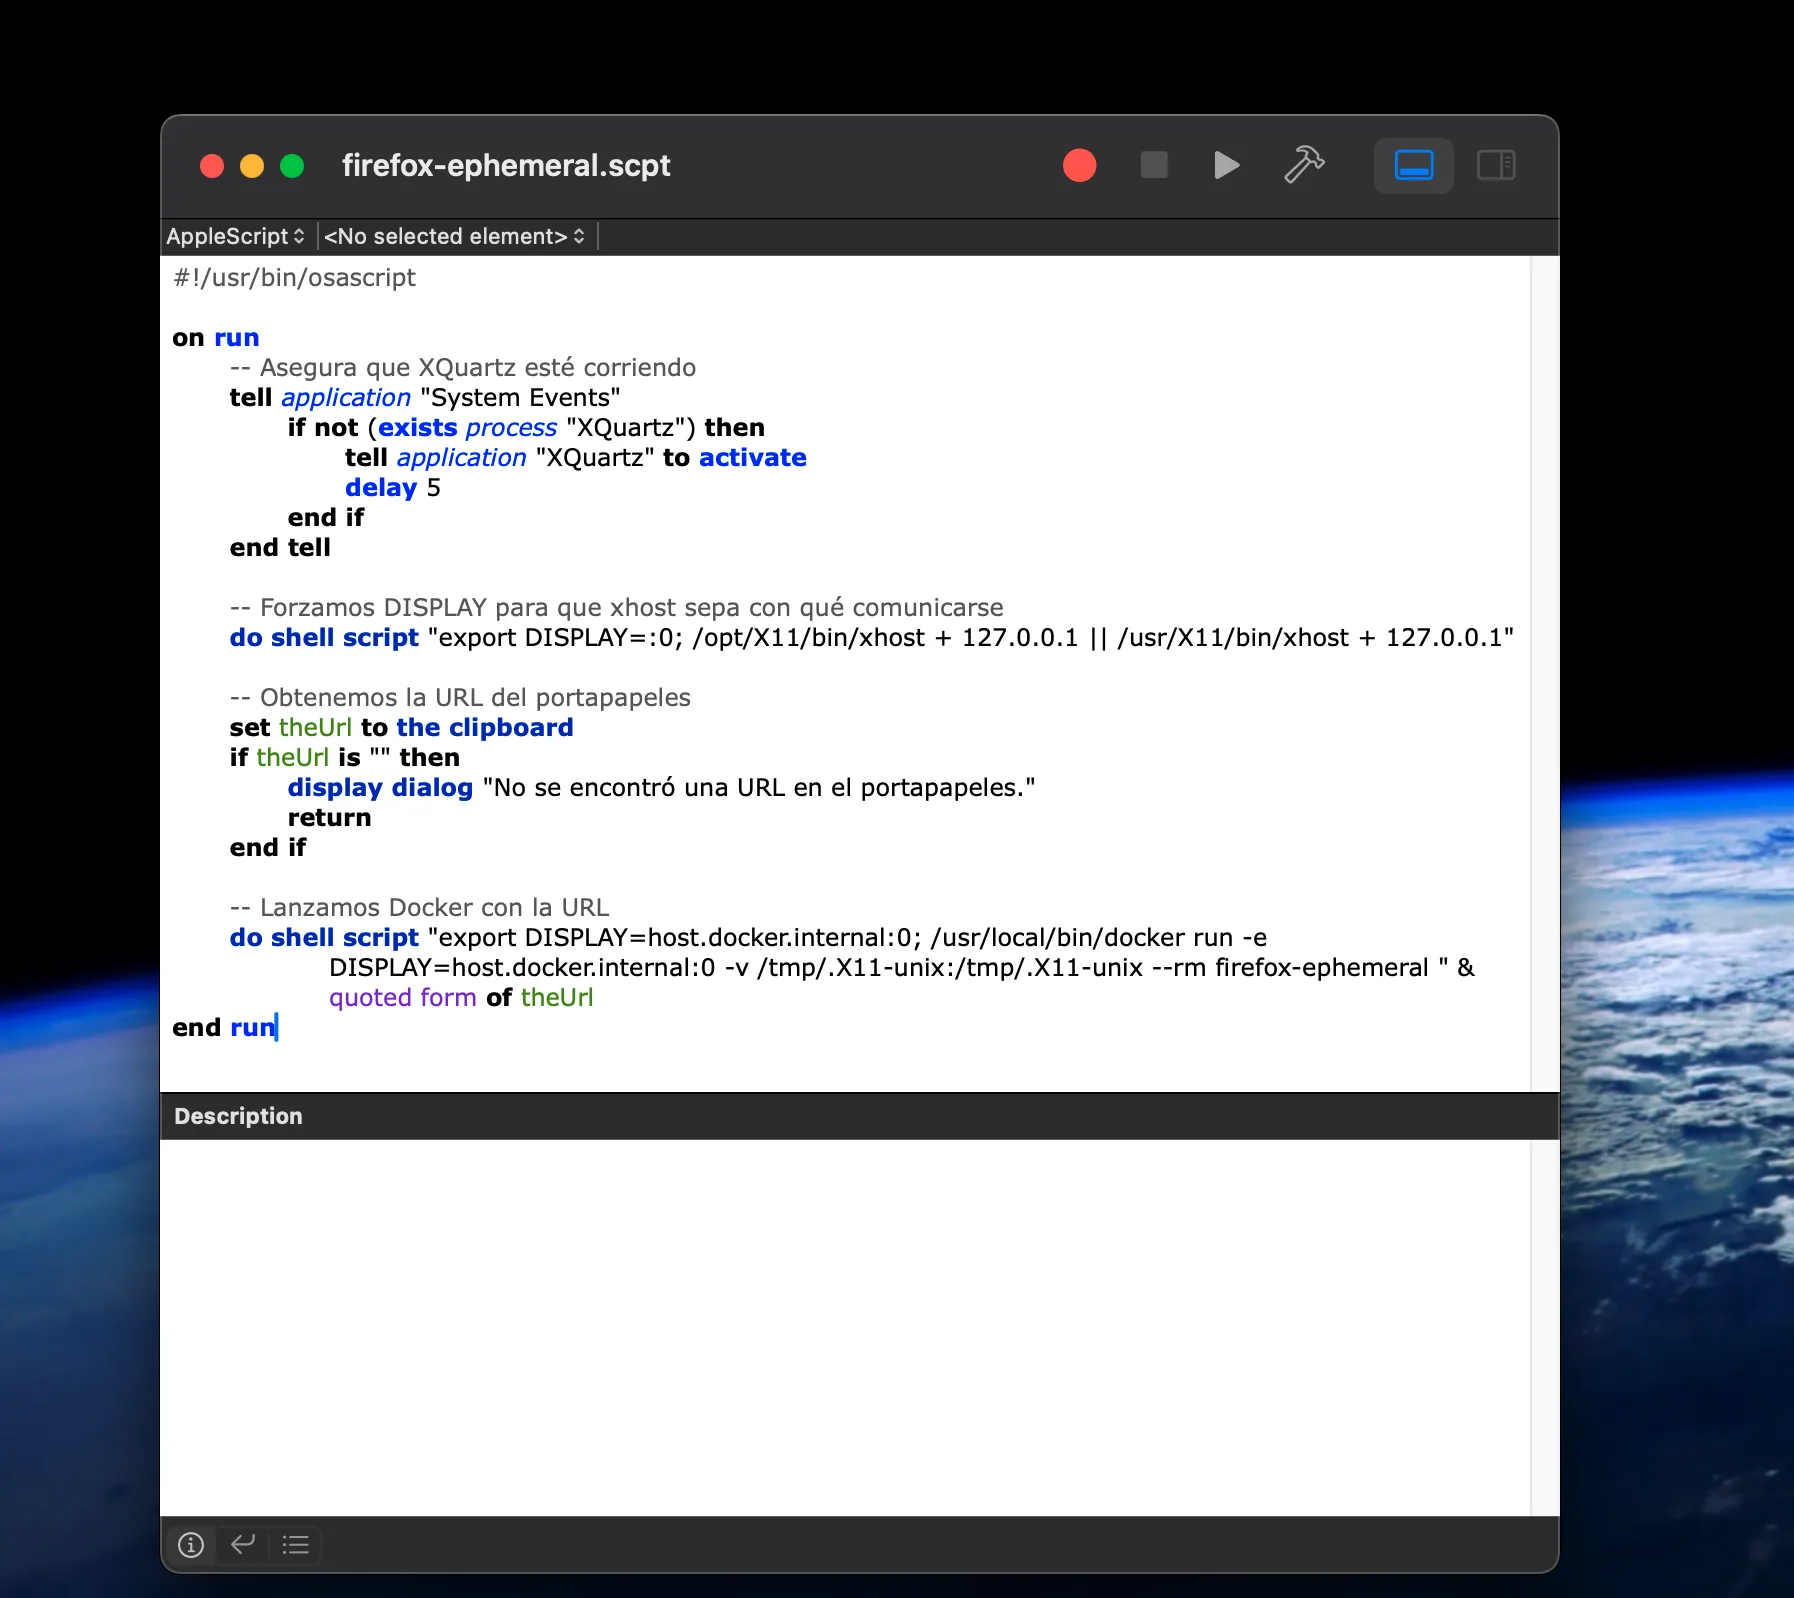
Step 6: Create an Automation Script