Cisco Class Project: Flashing an Access Point
This project was created as part of a Cisco networking class.
🎯 Objective
Flash and configure a Cisco Access Point (AP) as an extra hands-on activity beyond the standard class exercises.
ℹ️ Background
In a previous session, two routers were configured with three networks to connect two computers from different subnets. This project takes it a step further by flashing a Cisco AP.
🔧 Equipment
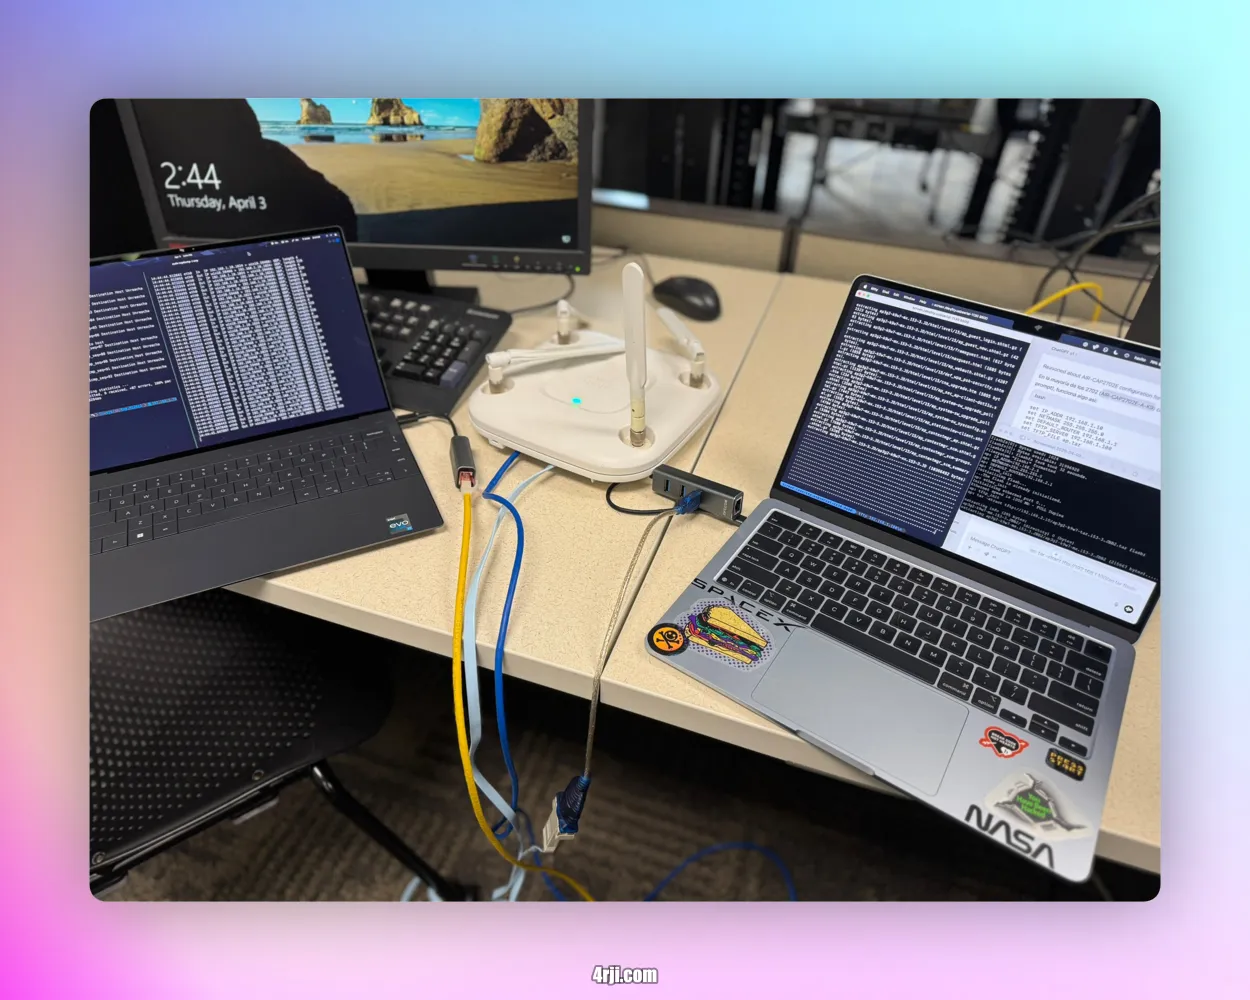
- Cisco Aironet Access Point (Model:
AIR-CAP3702I-A-K9) - macOS for serial access
- Kali Linux for TFTP server
❋️ Steps
1. Console Access
Connect the AP to your computer using a USB console cable. On macOS, access it via:
screen /dev/tty.usbmodemXXXX 9600
2. Set Static IP
ip addr add 192.168.1.100/24 dev eth0
ip link set eth0 up
3. TFTP Server Setup on Kali Linux
Install the TFTP server:
sudo apt update
sudo apt install tftpd-hpa
Edit the configuration file /etc/default/tftpd-hpa:
TFTP_USERNAME="tftp"
TFTP_DIRECTORY="/var/lib/tftpboot"
TFTP_ADDRESS="0.0.0.0:69"
TFTP_OPTIONS="--secure"
Create the directory, move the image, and set permissions:
sudo mkdir -p /var/lib/tftpboot
sudo cp ap_image.tar /var/lib/tftpboot/
sudo chmod -R 777 /var/lib/tftpboot
Restart the service:
sudo systemctl restart tftpd-hpa
4. Troubleshooting with tcpdump
Check if the AP is trying to reach the TFTP server:
sudo tcpdump -i eth0 port 69
If no traffic is visible, verify:
- Network cables
- Static IP settings
- Subnet matching
- Correct TFTP path and filename
5. Flashing the AP
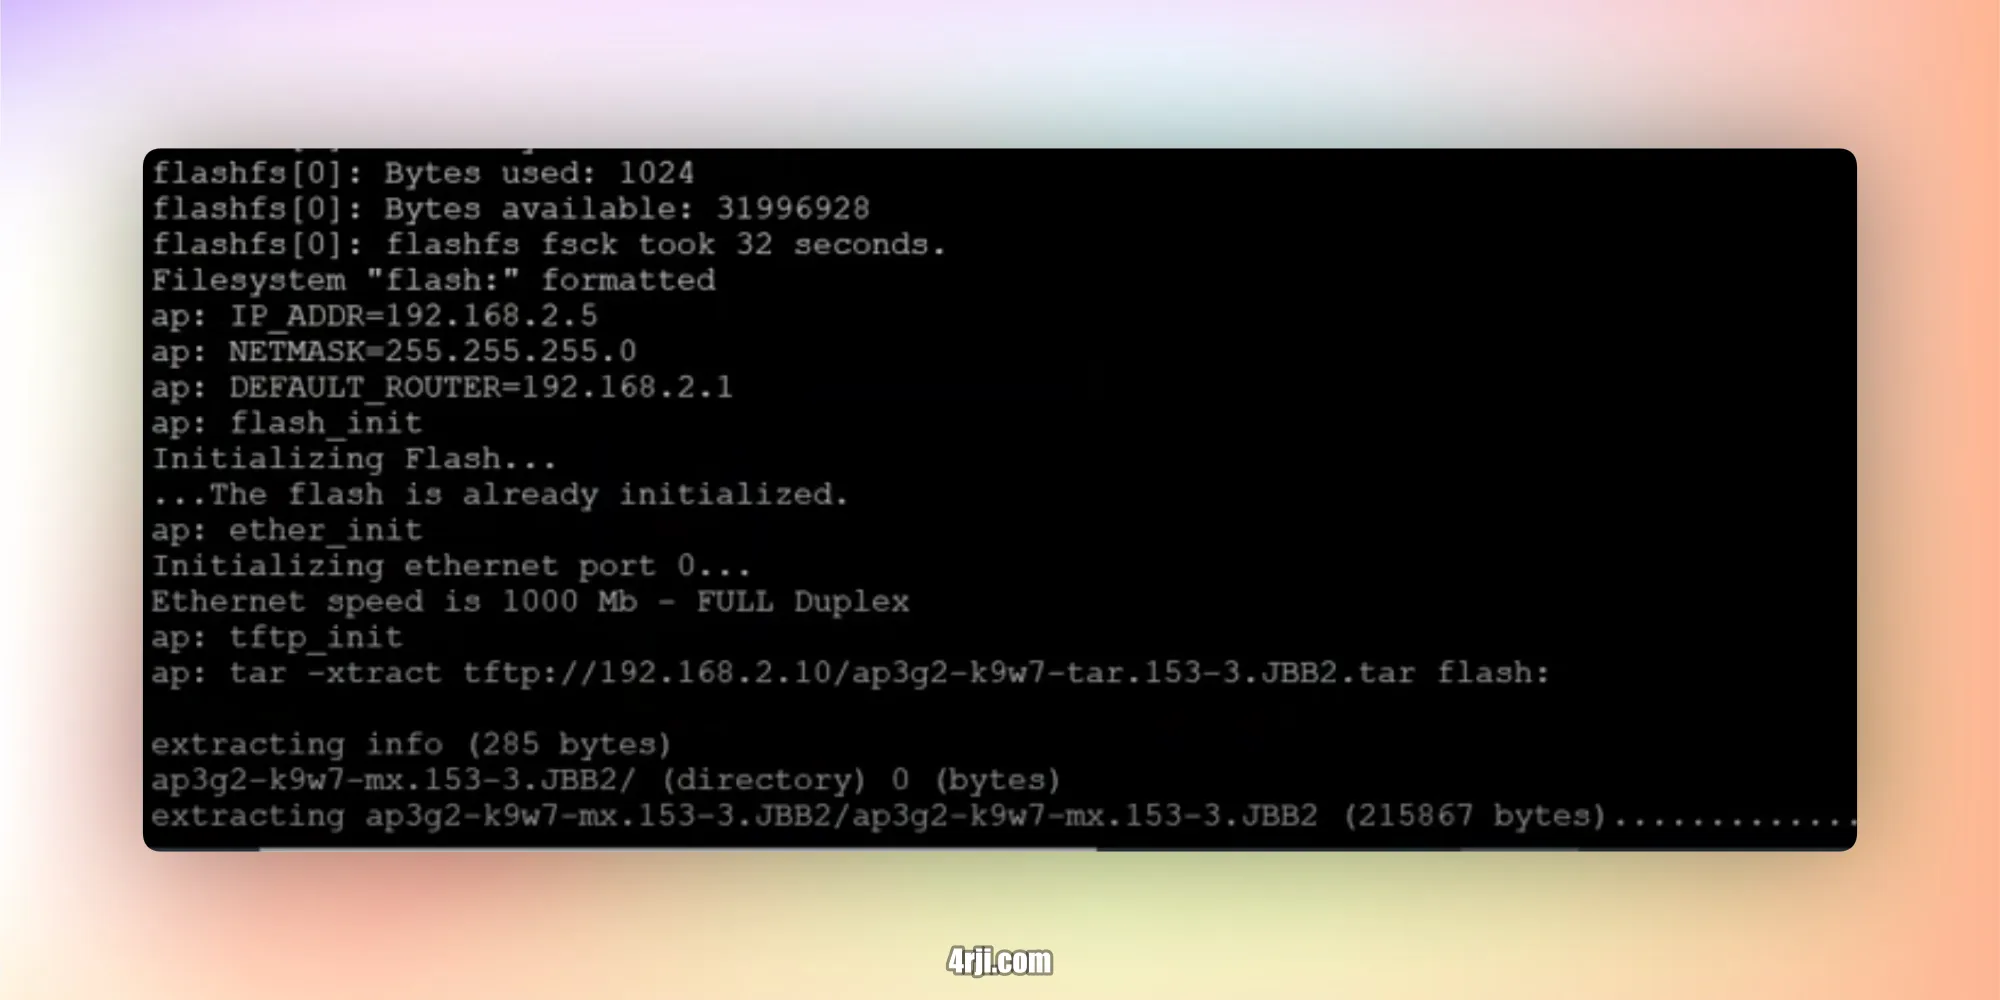
From the AP's console, execute the following commands:
set IP_ADDR 192.168.1.101
set NETMASK 255.255.255.0
set DEFAULT_ROUTER 192.168.1.1
set TFTP_SERVER 192.168.1.100
tar -xtract tftp://192.168.1.100/ap_image.tar flash:
boot
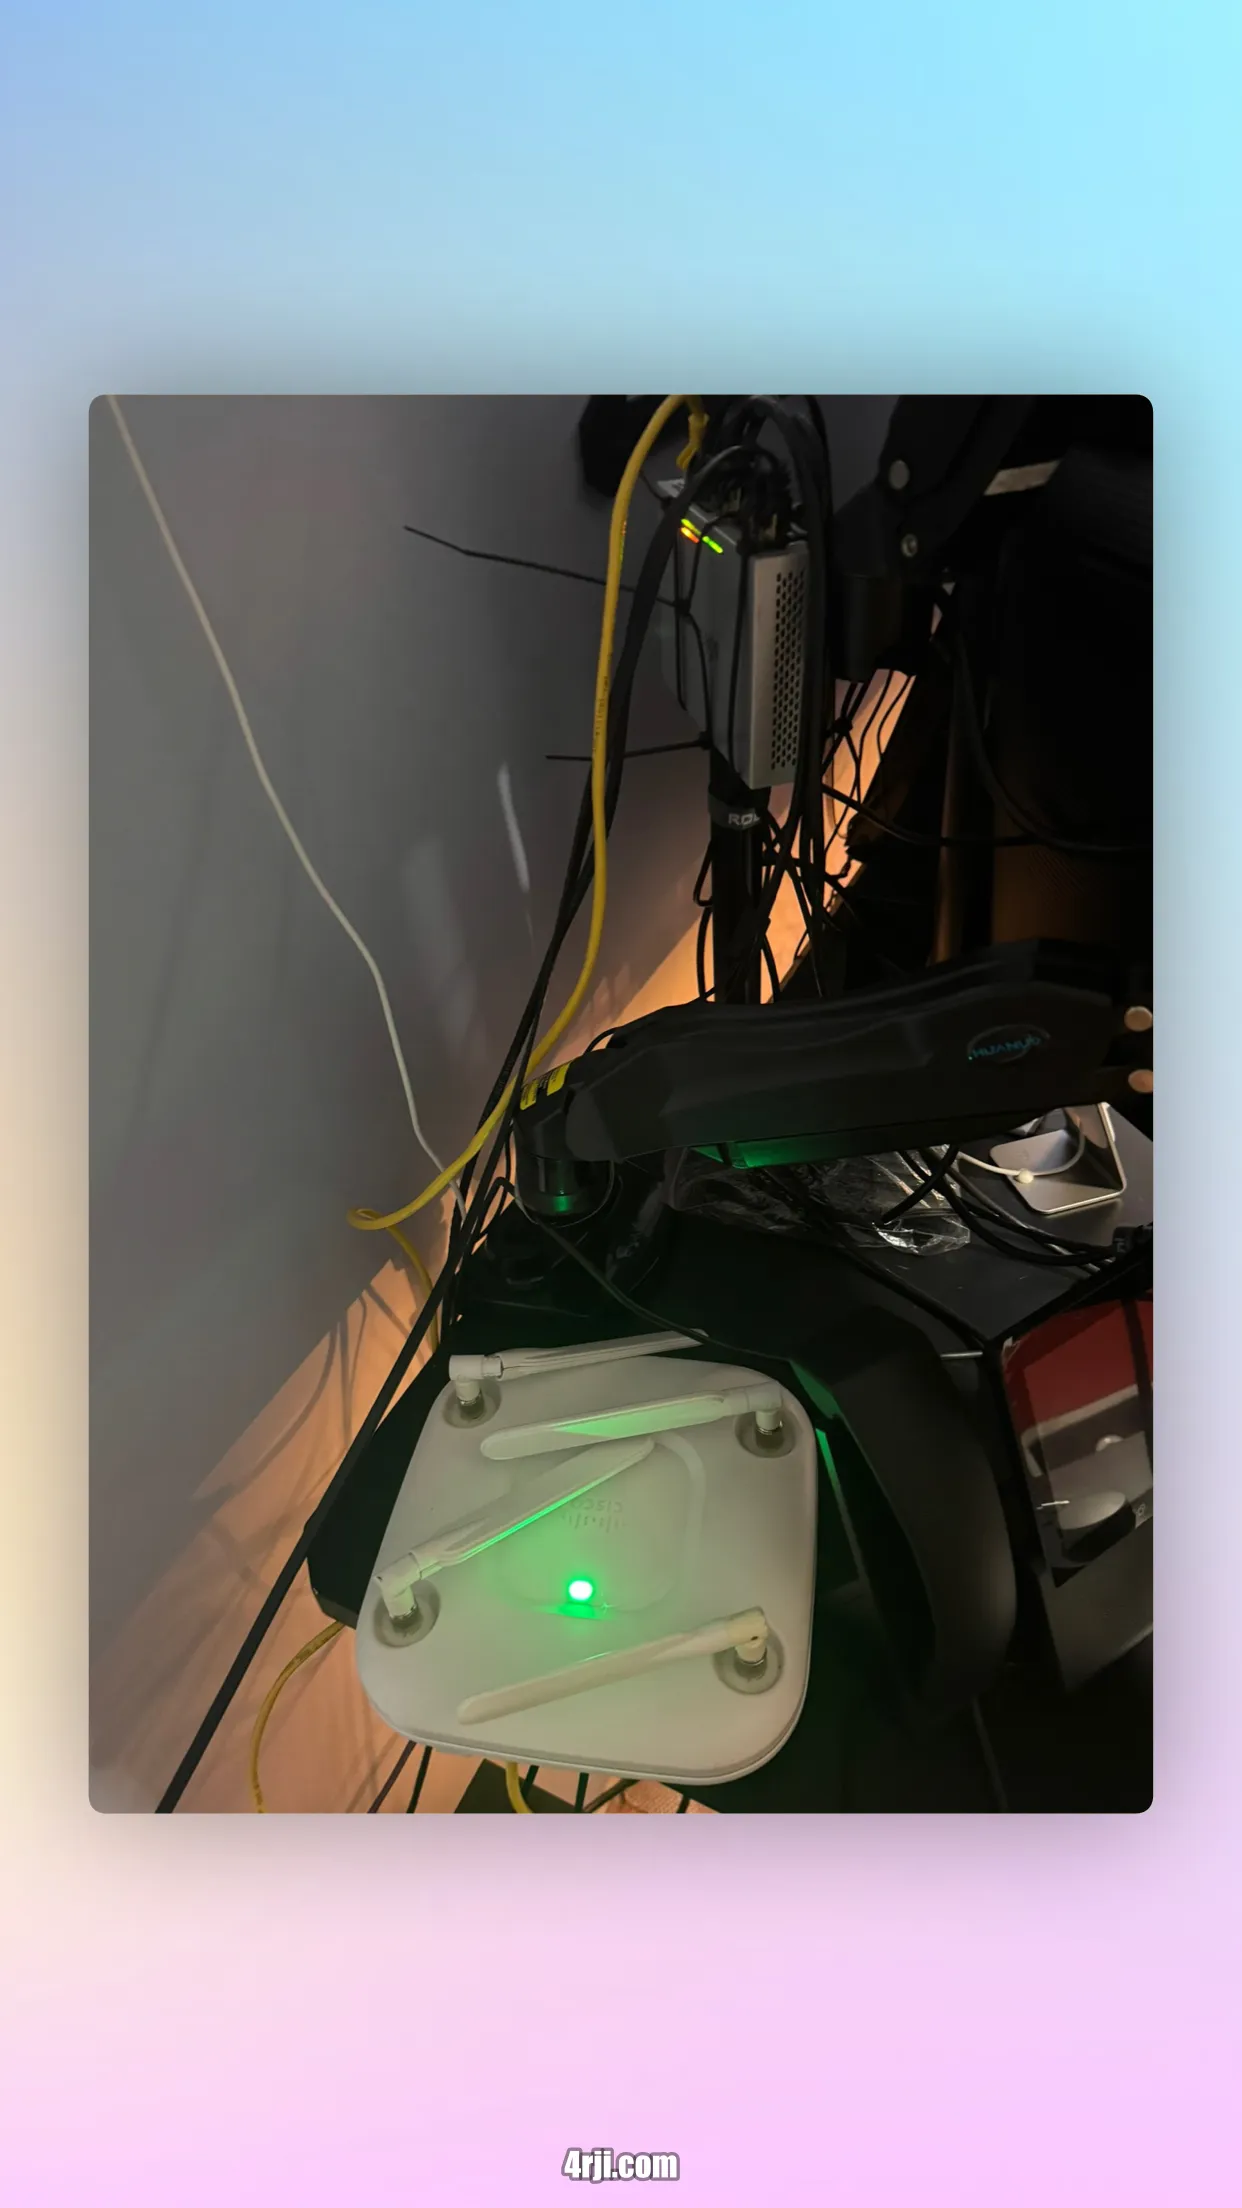
✅ Installed at home on a POE switch, directly connected to the AP.
✅ Panel
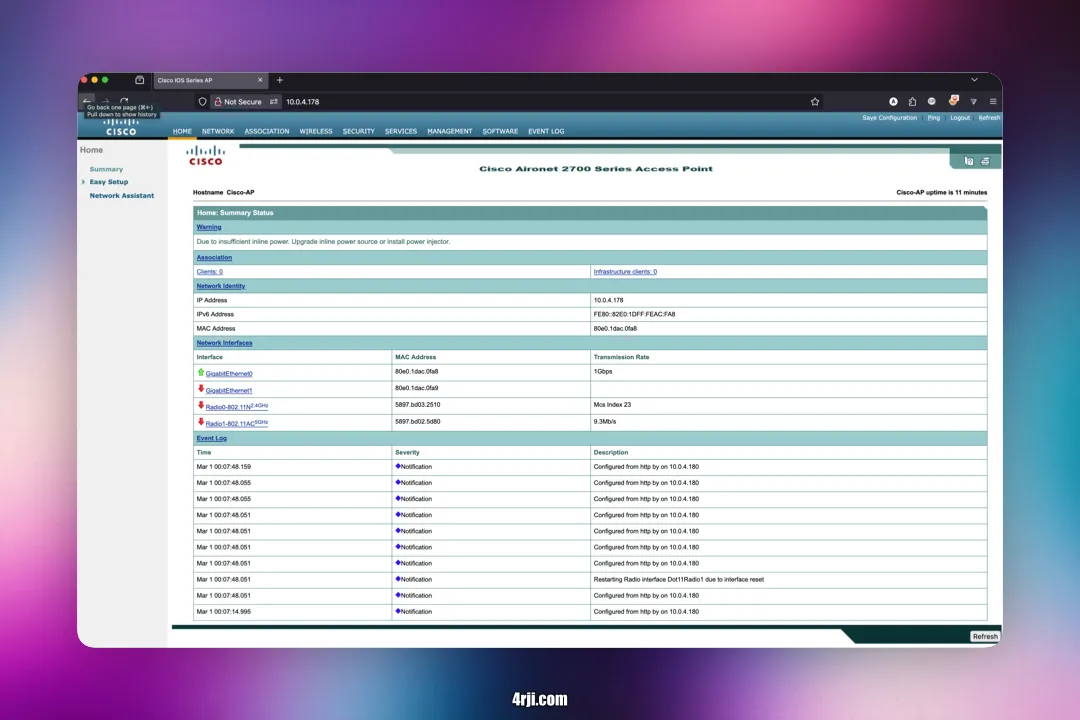
The AP is now functional and accessible with default credentials:
- Username: Cisco
- Password: Cisco
Cisco Network Administration
👨🏫 With the tutoring of Professor
Steven Frich | Professor Emeritus