Triple Boot Mastery: Windows, Arch Linux, and Kali Linux
This guide will walk you through installing three operating systems on a single machine, creating a powerful multi-purpose environment for development, security testing, and everyday use.
Since the installation gave me many problems, I will now try to install it better on my local server.
Installation Steps:
0. Connect to Wi-Fi
If you need to connect via Wi-Fi, use the following commands:
iwctl
device list
station wlan0 scan
station wlan0 get networks
station wlan0 connect WIFI-NAME
station wlan0 show
exit
ping -c 3 1.1.1.1
1. Install Windows
First, install Windows normally, but leave free space for Arch and Kali Linux. In this example, we'll use 250GB for Windows.
2. Prepare Arch Linux Installation
Download Arch Linux and create a bootable USB using Ventoy for convenience.
3. Start Arch Linux Installation
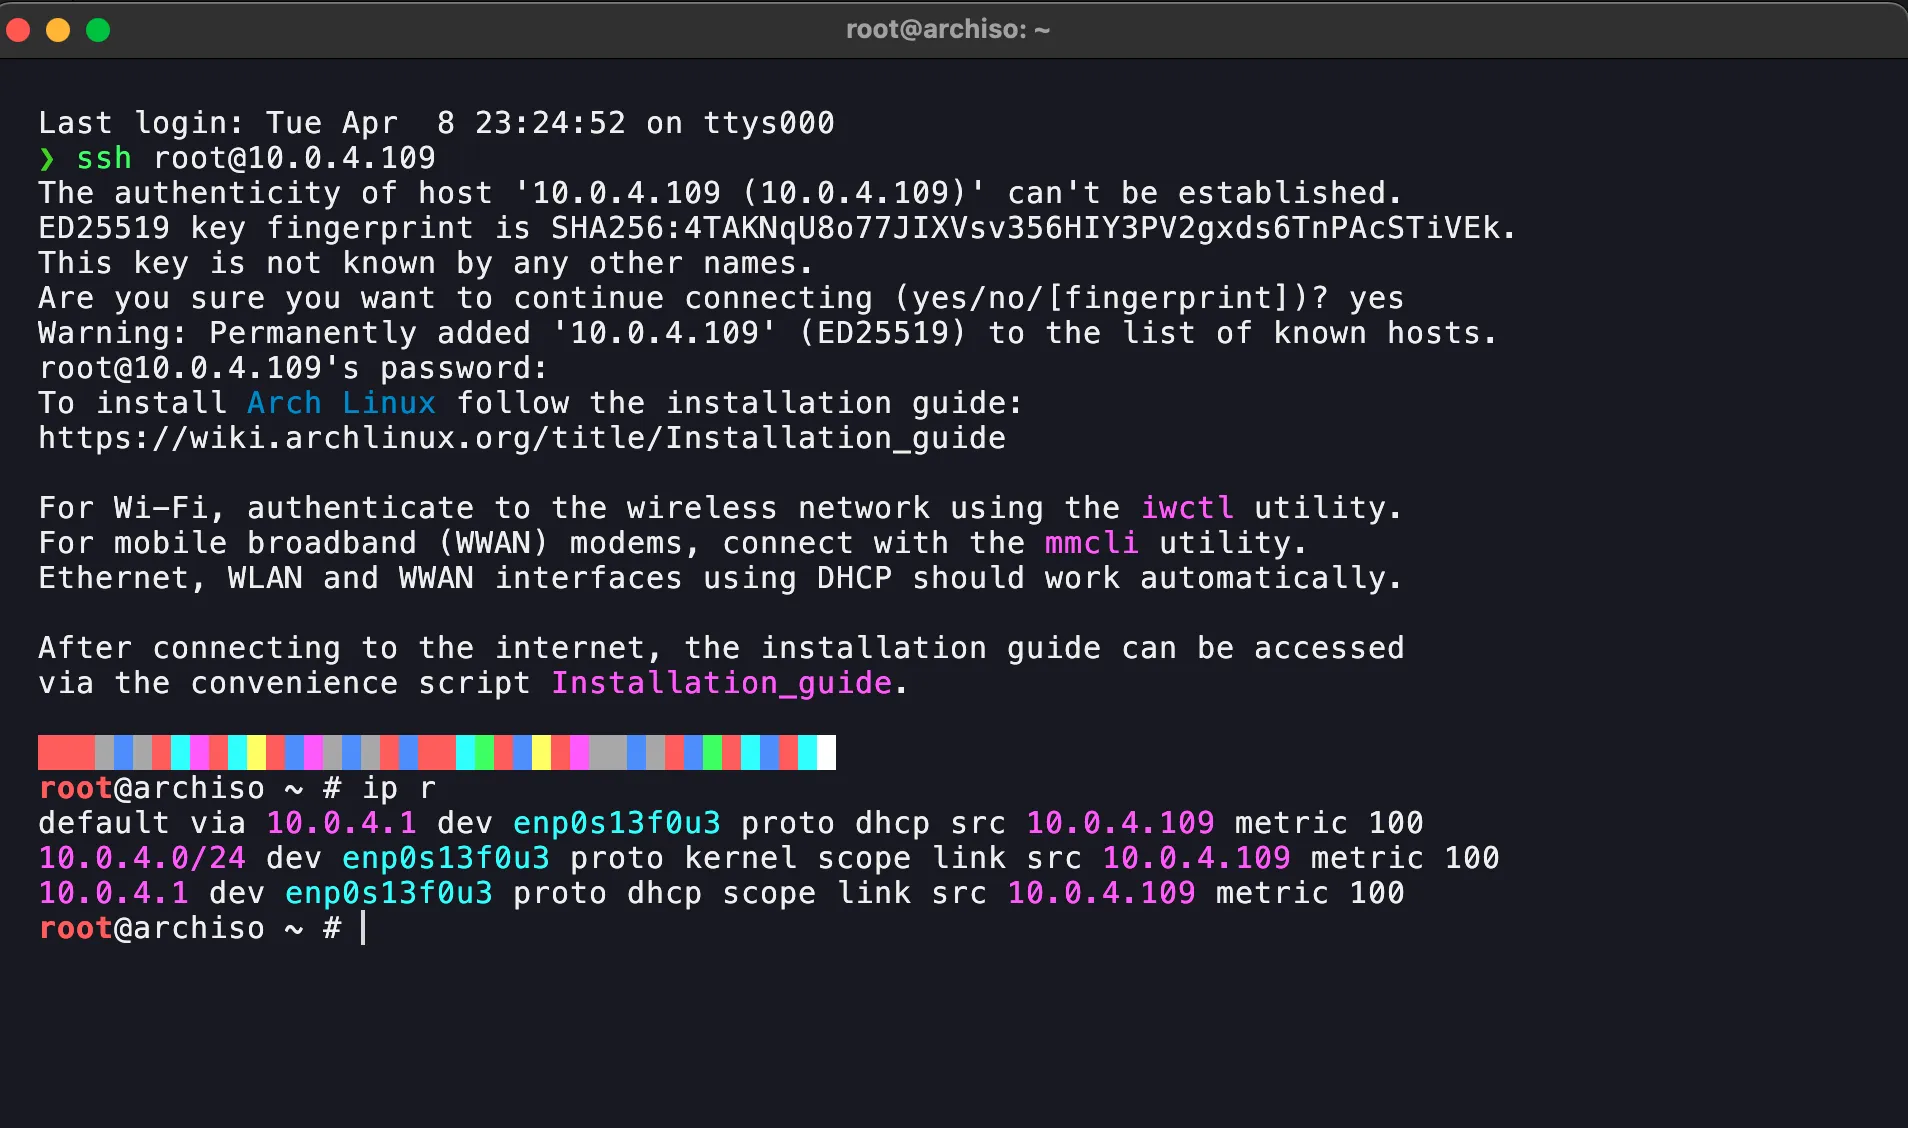
When the installer starts, SSH into the machine to install.
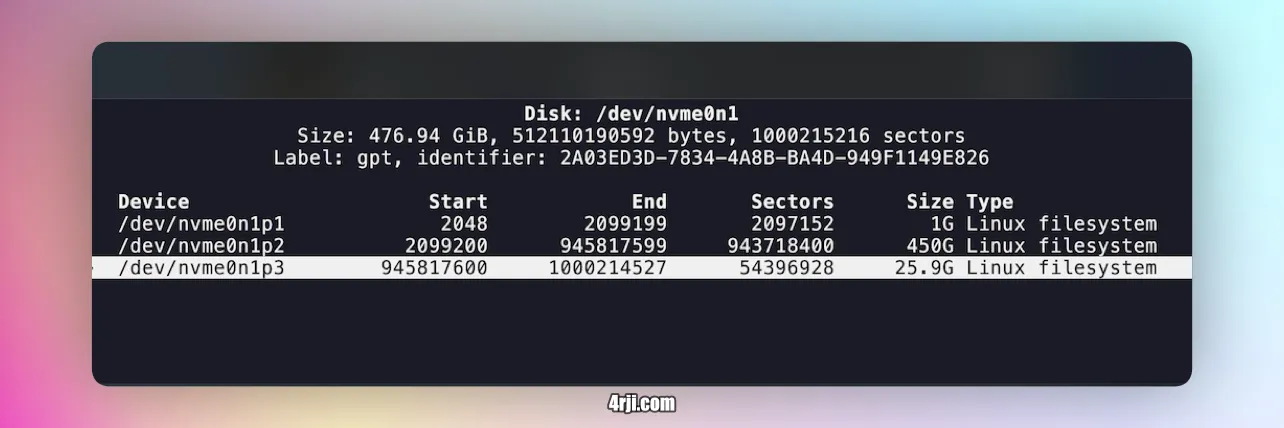
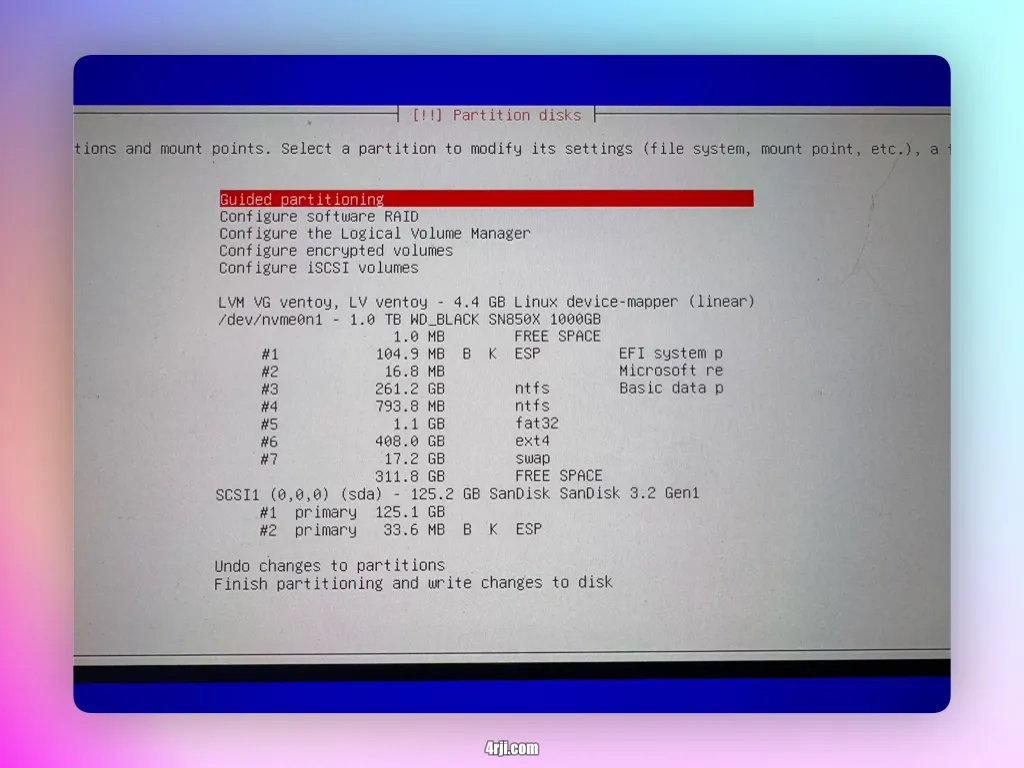
4. Partition the Disk
First, find your hard drive:
fdisk -l
Run cfdisk to partition the disk:
cfdisk /dev/nvme0n1
Select the DOS option if prompted.
Create the partitions as shown in the image below (this is a photo of a fresh installation without other OS, the next image shows the current layout):
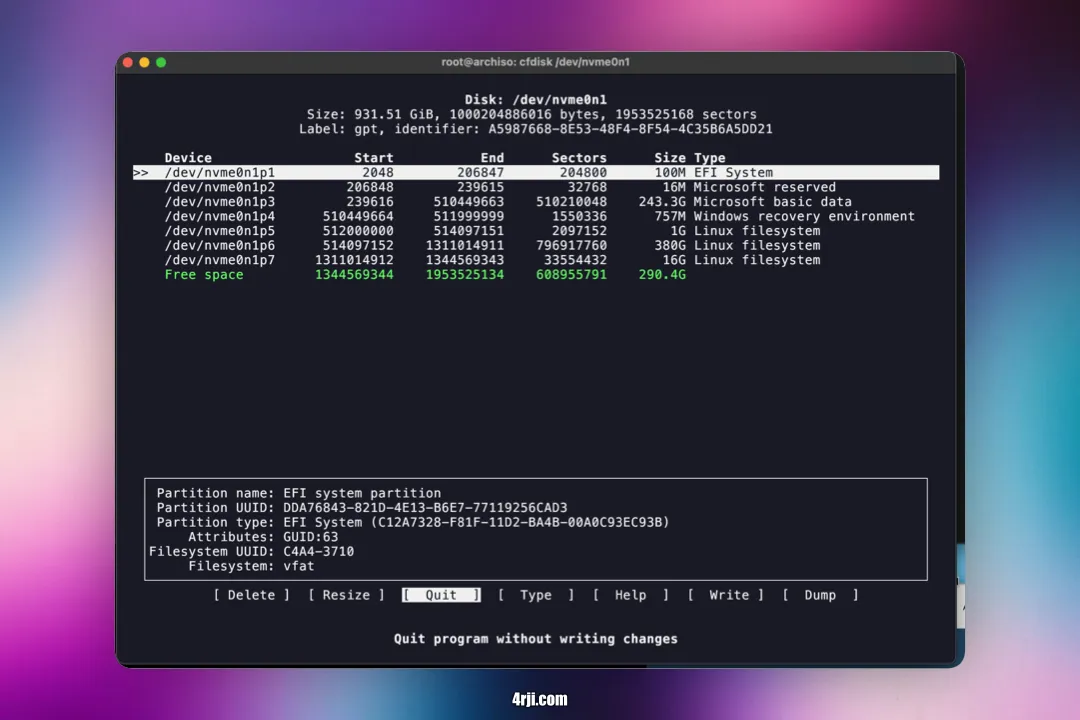
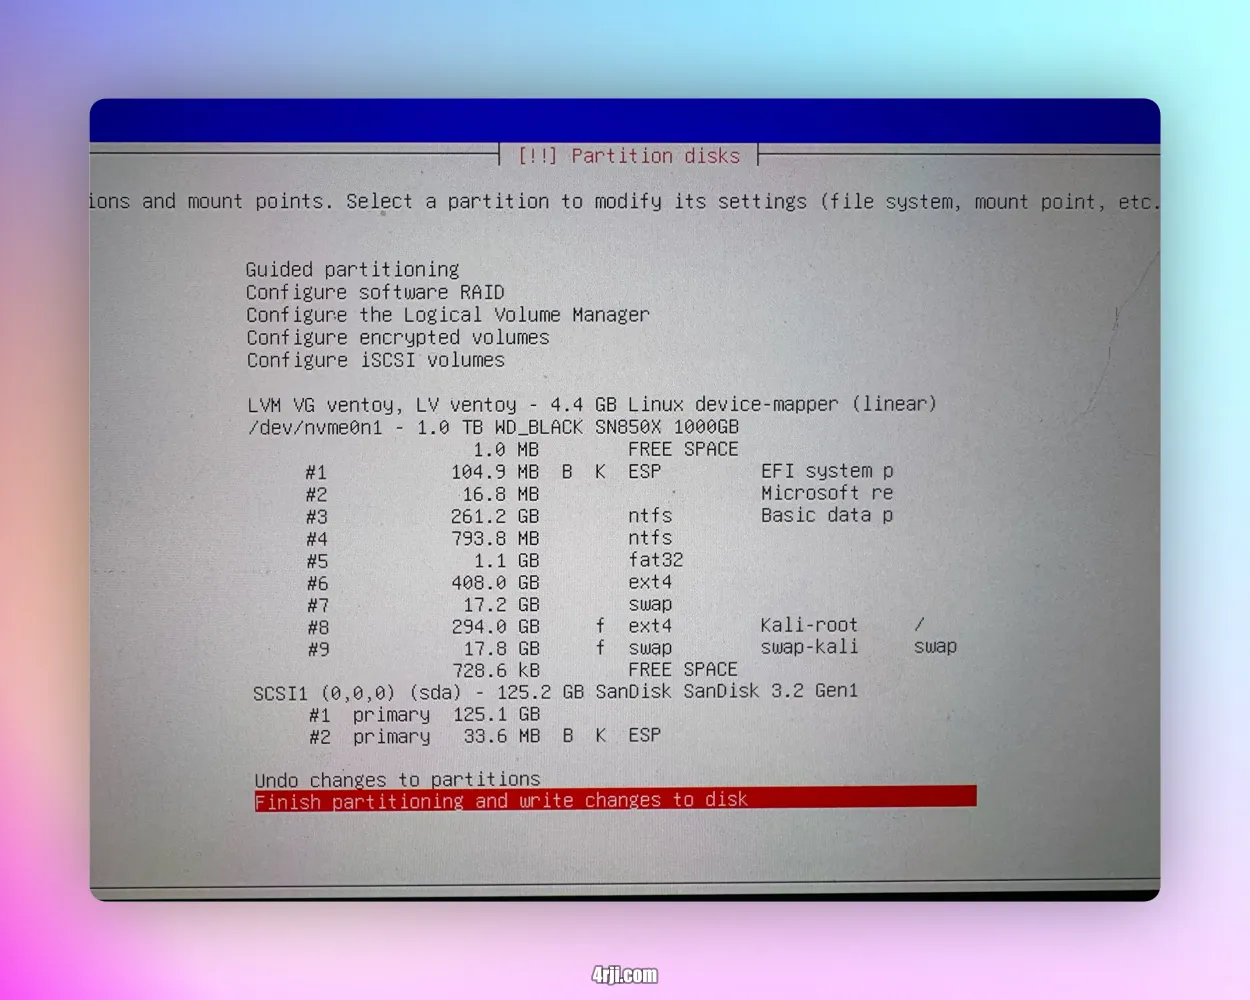
5. Final Partition Layout
After creating the 3 partitions as shown in the image above —where the first is for /boot, the second for / (root), and the third for swap— your partition layout should look like this: (I leave 290GB for kali linux)
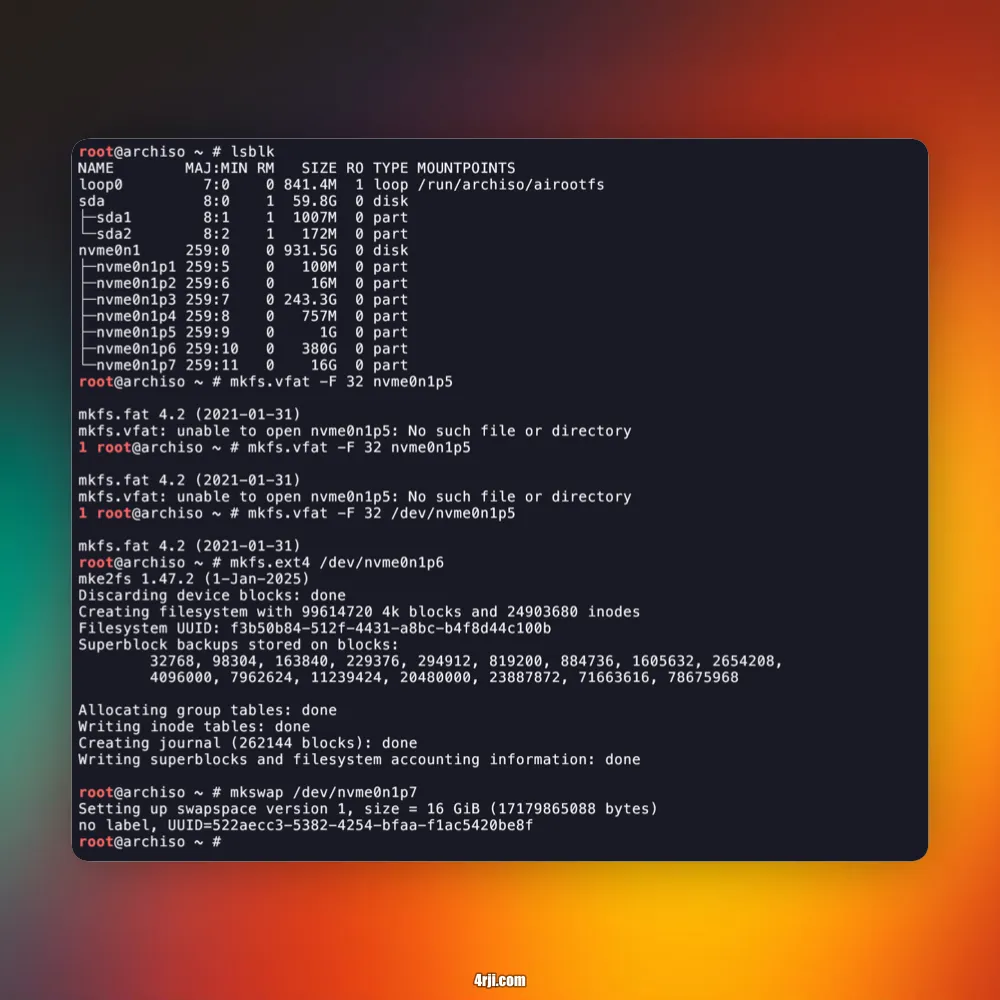
6. Format Partitions
First, find the partition names:
root@archiso ~ # lsblk
NAME        MAJ:MIN RM   SIZE RO TYPE MOUNTPOINTS
loop0         7:0    0 841.4M  1 loop /run/archiso/airootfs
sda           8:0    1  59.8G  0 disk
├─sda1        8:1    1  1007M  0 part
└─sda2        8:2    1   172M  0 part
nvme0n1     259:0    0 931.5G  0 disk
├─nvme0n1p1 259:5    0   100M  0 part
├─nvme0n1p2 259:6    0    16M  0 part
├─nvme0n1p3 259:7    0 243.3G  0 part
├─nvme0n1p4 259:8    0   757M  0 part
├─nvme0n1p5 259:9    0     1G  0 part
├─nvme0n1p6 259:10   0   380G  0 part
└─nvme0n1p7 259:11   0    16G  0 part
Format the partitions accordingly:
mkfs.vfat -F 32 /dev/nvme0n1p5
mkfs.ext4 /dev/nvme0n1p6
mkswap /dev/nvme0n1p7
7. Install Arch Linux
Run these commands:
mount /dev/nvme0n1p6 /mnt
mkdir /mnt/boot
mount /dev/nvme0n1p5 /mnt/boot
pacstrap /mnt linux linux-firmware networkmanager grub wpa_supplicant base base-devel

genfstab -U /mnt
genfstab -U /mnt > /mnt/etc/fstab

arch-chroot /mnt
passwd

pacman -S nano git
nano /etc/sudoers
# Uncomment this line:
# %wheel ALL=(ALL:ALL) ALL

useradd -m havi
passwd havi
usermod -aG wheel havi
groups havi

su havi
sudo nano /etc/locale.gen
# Uncomment this line:
# en_US.UTF-8 UTF-8

sudo locale-gen

pacman -Sy efibootmgr
mkdir /boot/efi
mount /dev/nvme0n1p1 /boot/efi
grub-install --target=x86_64-efi --efi-directory=/boot/efi --bootloader-id=GRUB /dev/nvme0n1
grub-mkconfig -o /boot/grub/grub.cfg

echo arch-xps > /etc/hostname

pacman -S linux linux-headers linux-lts linux-lts-headers nano base-devel openssh networkmanager wpa_supplicant wireless_tools netctl dialog lvm2 grub efibootmgr linux-firmware sof-firmware base base-devel nano git kitty zsh

# For graphic environment:
pacman -Sy plasma-meta dolphin sddm
systemctl enable --now sddm

exit
umount -a
reboot
8. Change Shell
After starting your session, change to zsh:
chsh -s /bin/zsh
9. Install Kali Linux
After verifying that Arch Linux starts correctly, insert the USB with Kali or Ventoy with the Kali installer.
Choose manual partitioning:
Create only two partitions in the free space without deleting anything:
Confirm that only two partitions will be created and the Grub will be installed automatically in the partition that Kali automatically detected:

Complete the normal installation process.
10. Update GRUB for Triple Boot
To update the boot menu and choose the default operating system, edit the GRUB configuration file:
sudo nano /etc/default/grub
Find
the GRUB_DEFAULT line and change it according to the OS
you want to boot by default. For example:
GRUB_DEFAULT=0
If you
want to boot the third OS in the menu (for example, Kali Linux),
change the value to 3:
GRUB_DEFAULT=3
Save the changes and update GRUB by running:
sudo update-grub
11. Configure SDDM (Remove Virtual Keyboard)
To fix issues with SDDM and remove the virtual keyboard, modify the configuration file:
sudo nano /etc/sddm.conf.d/virtualkbd.conf
Set the InputMethod as follows:
[General]
InputMethod=