Like Air - Airsend
This Python script creates a simple relay and file-sharing server. It listens on a custom domain and port, allowing users to exchange messages or send files using unique codes. All activity is logged, and sessions are managed in-memory for real-time communication. The server uses multithreading to handle multiple clients at once, making it efficient for lightweight communication tools or internal sharing platforms.
Usage Examples
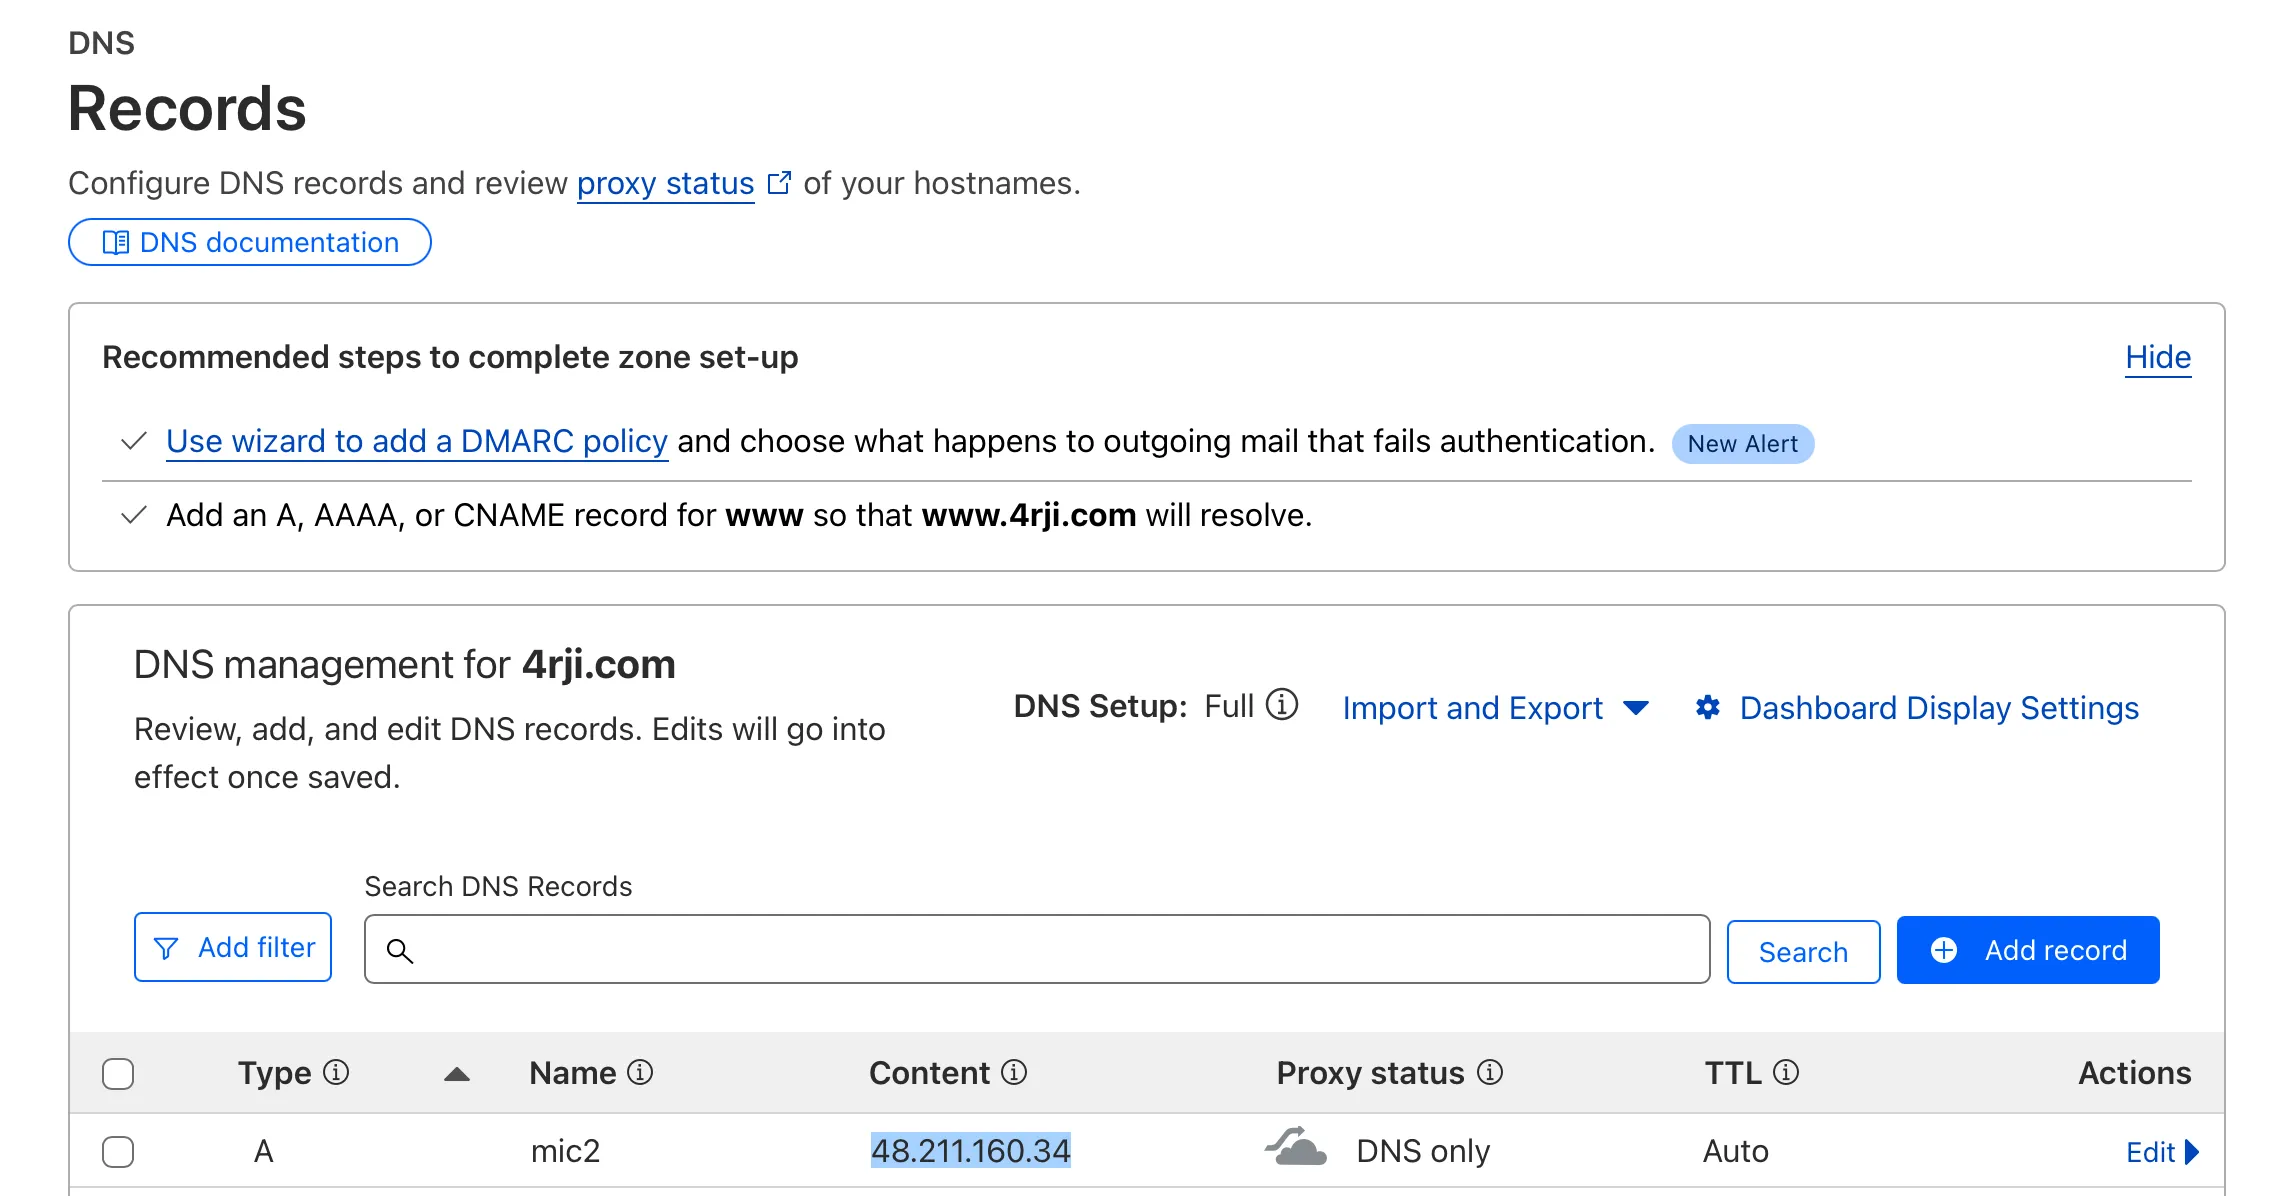
DNS
I updated the DNS of my new C2 server, but this step isn’t required. You can use any IP address by simply replacing it in the command used to send data.
Relay-send
Here, we use the -f flag to send a screenshot, which is then received on another ARM-based device using the casa48 code provided by the script.
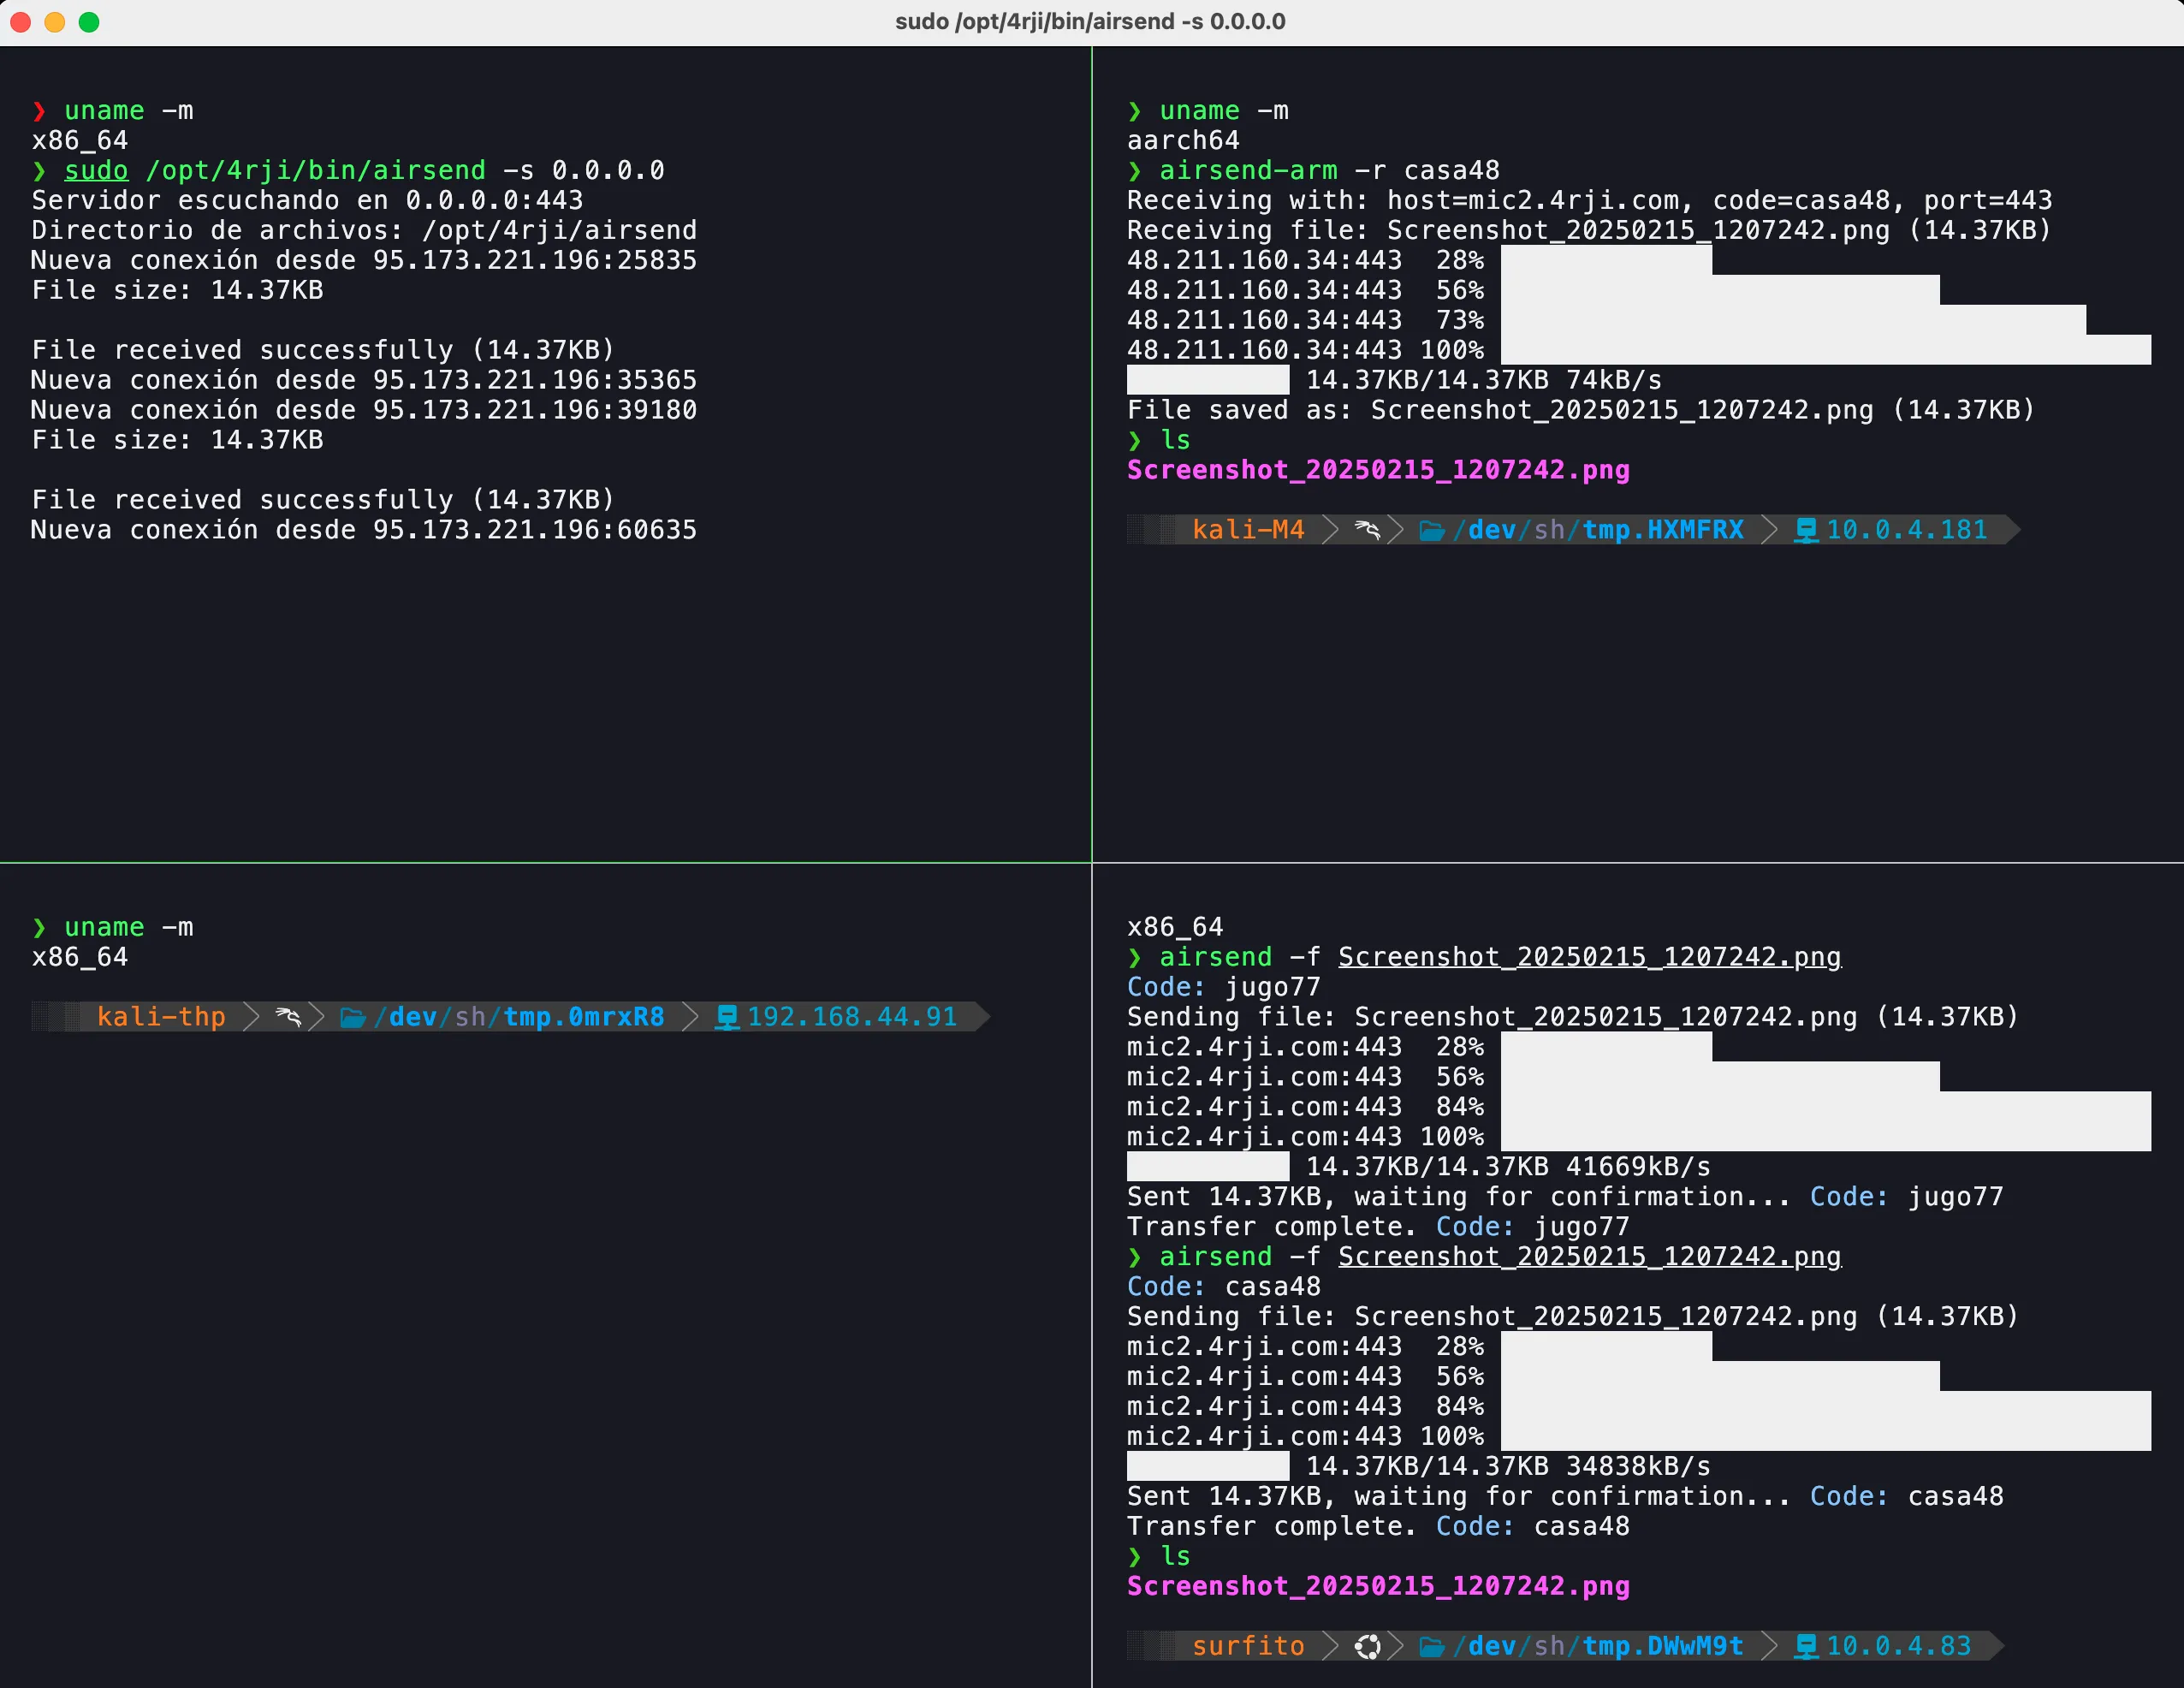
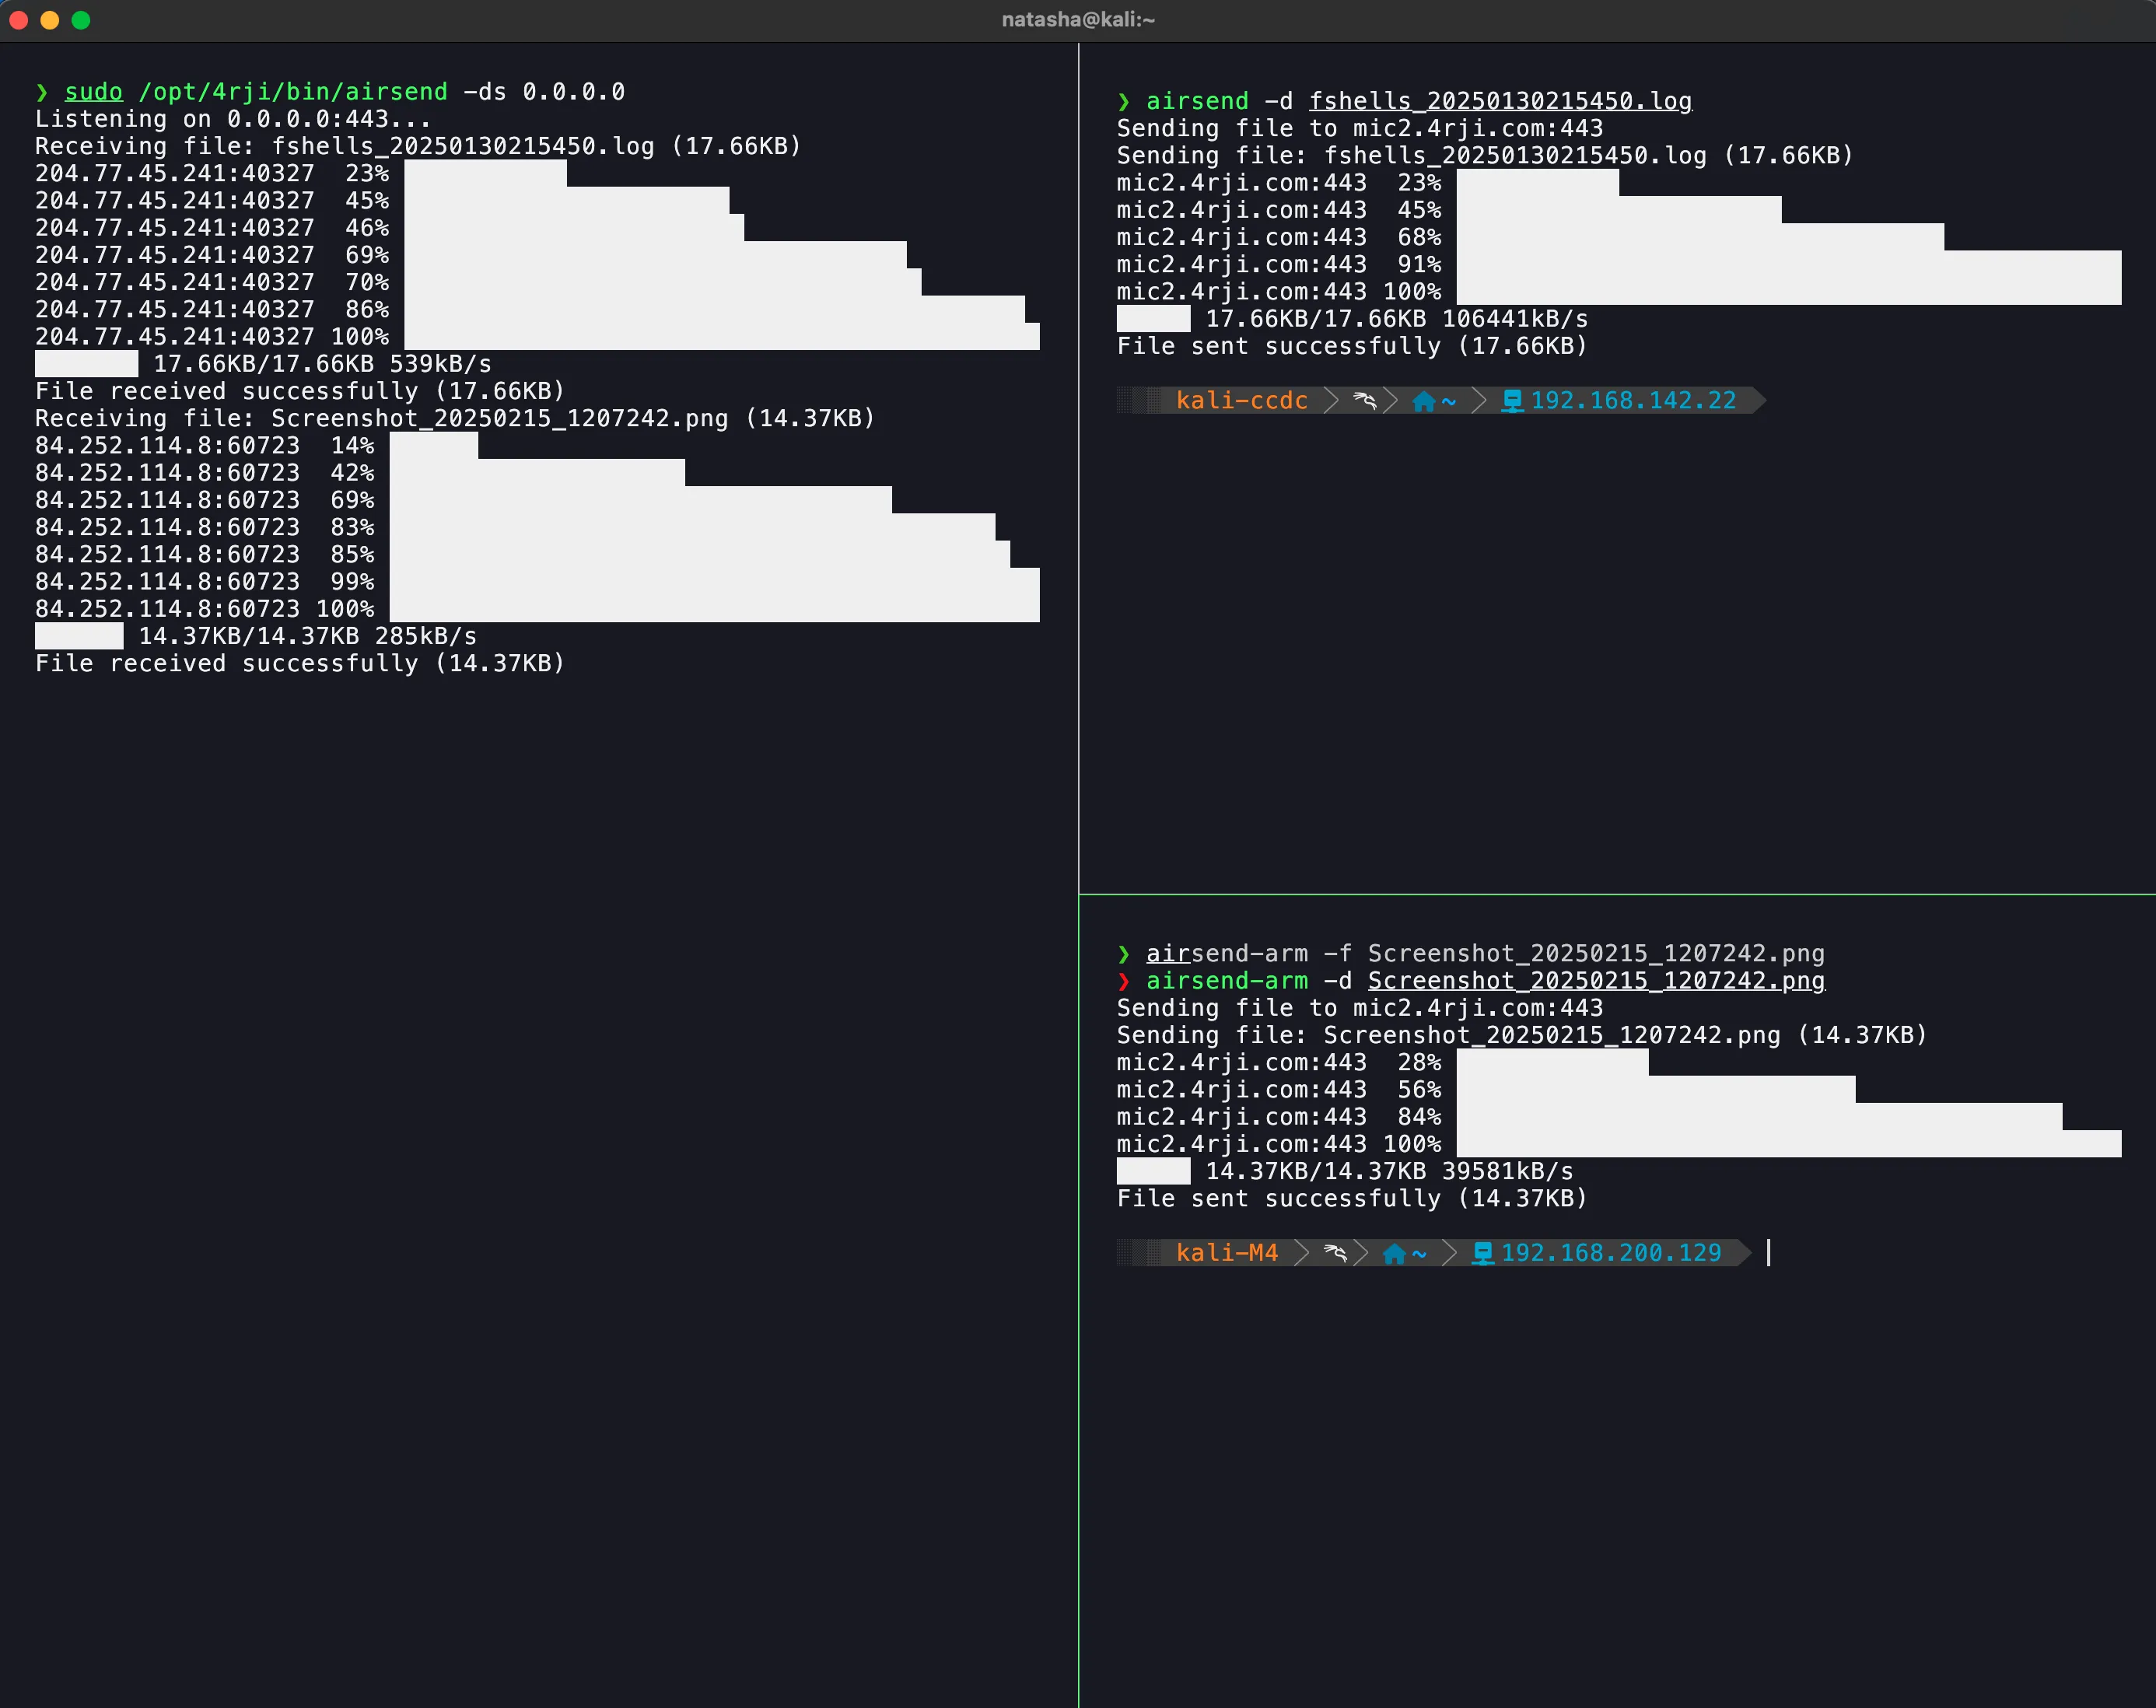
Direct
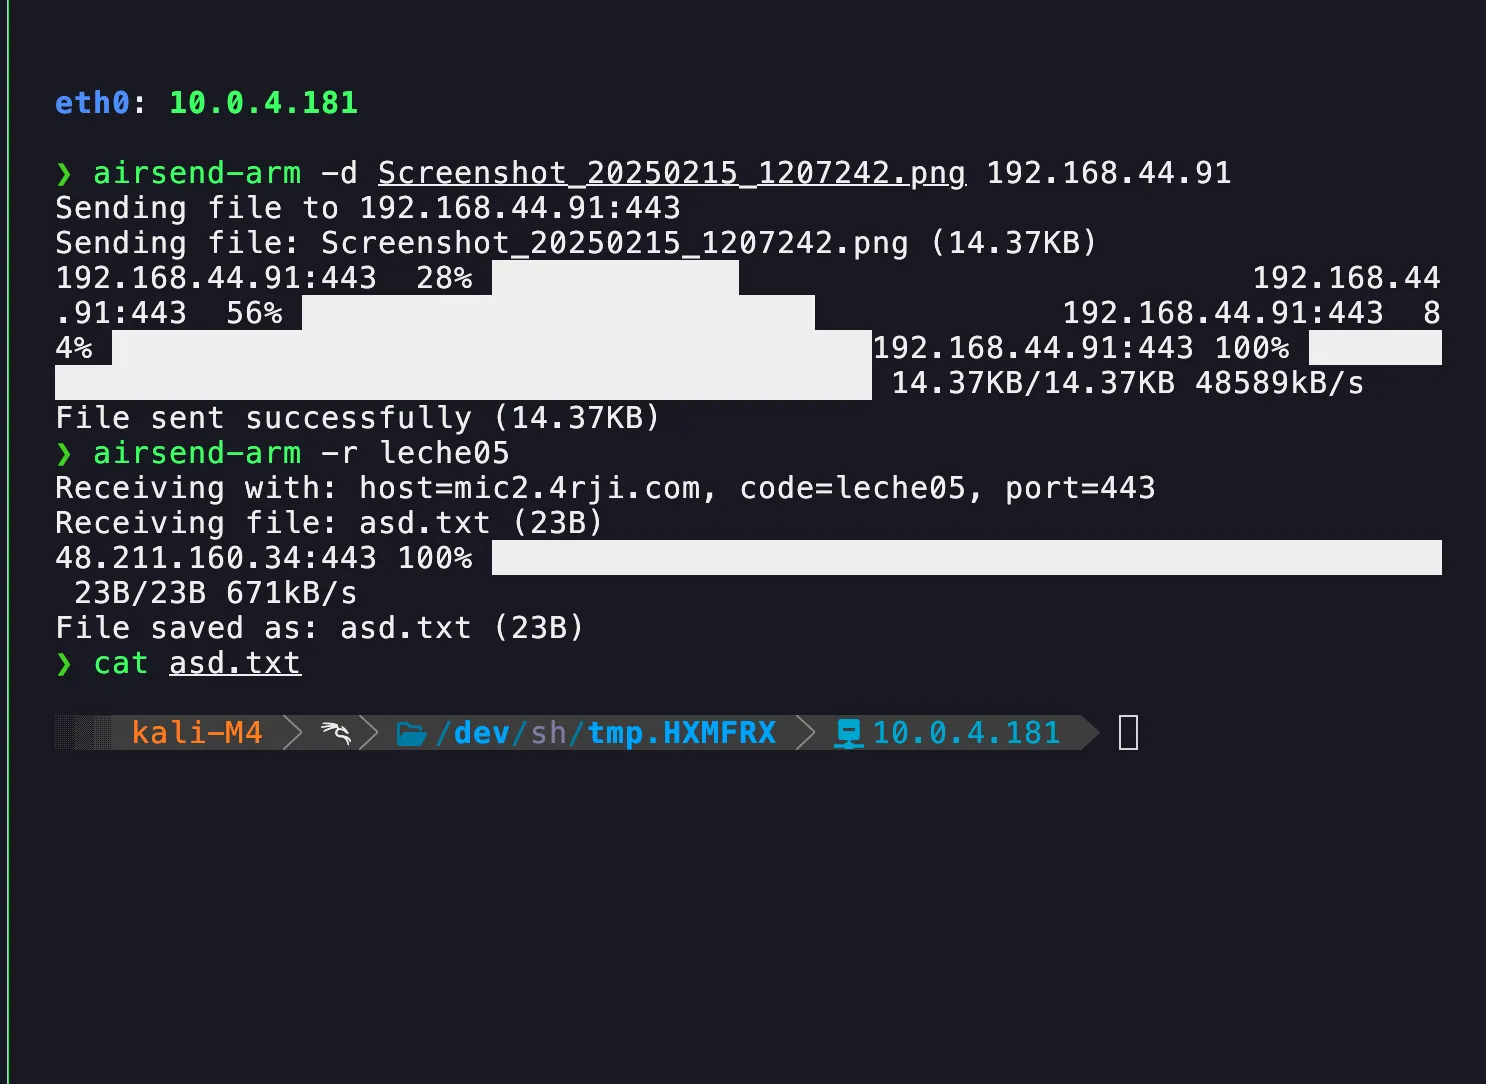
With the server listening using the -ds flag, we can send files directly to the C2 server. The image shows the transfer of two files located in different geographic regions, using the -d flag to send them.
Direct-LOCAL
We can also send files locally using -ds IP, by sending them with -d FILE IP:Port.
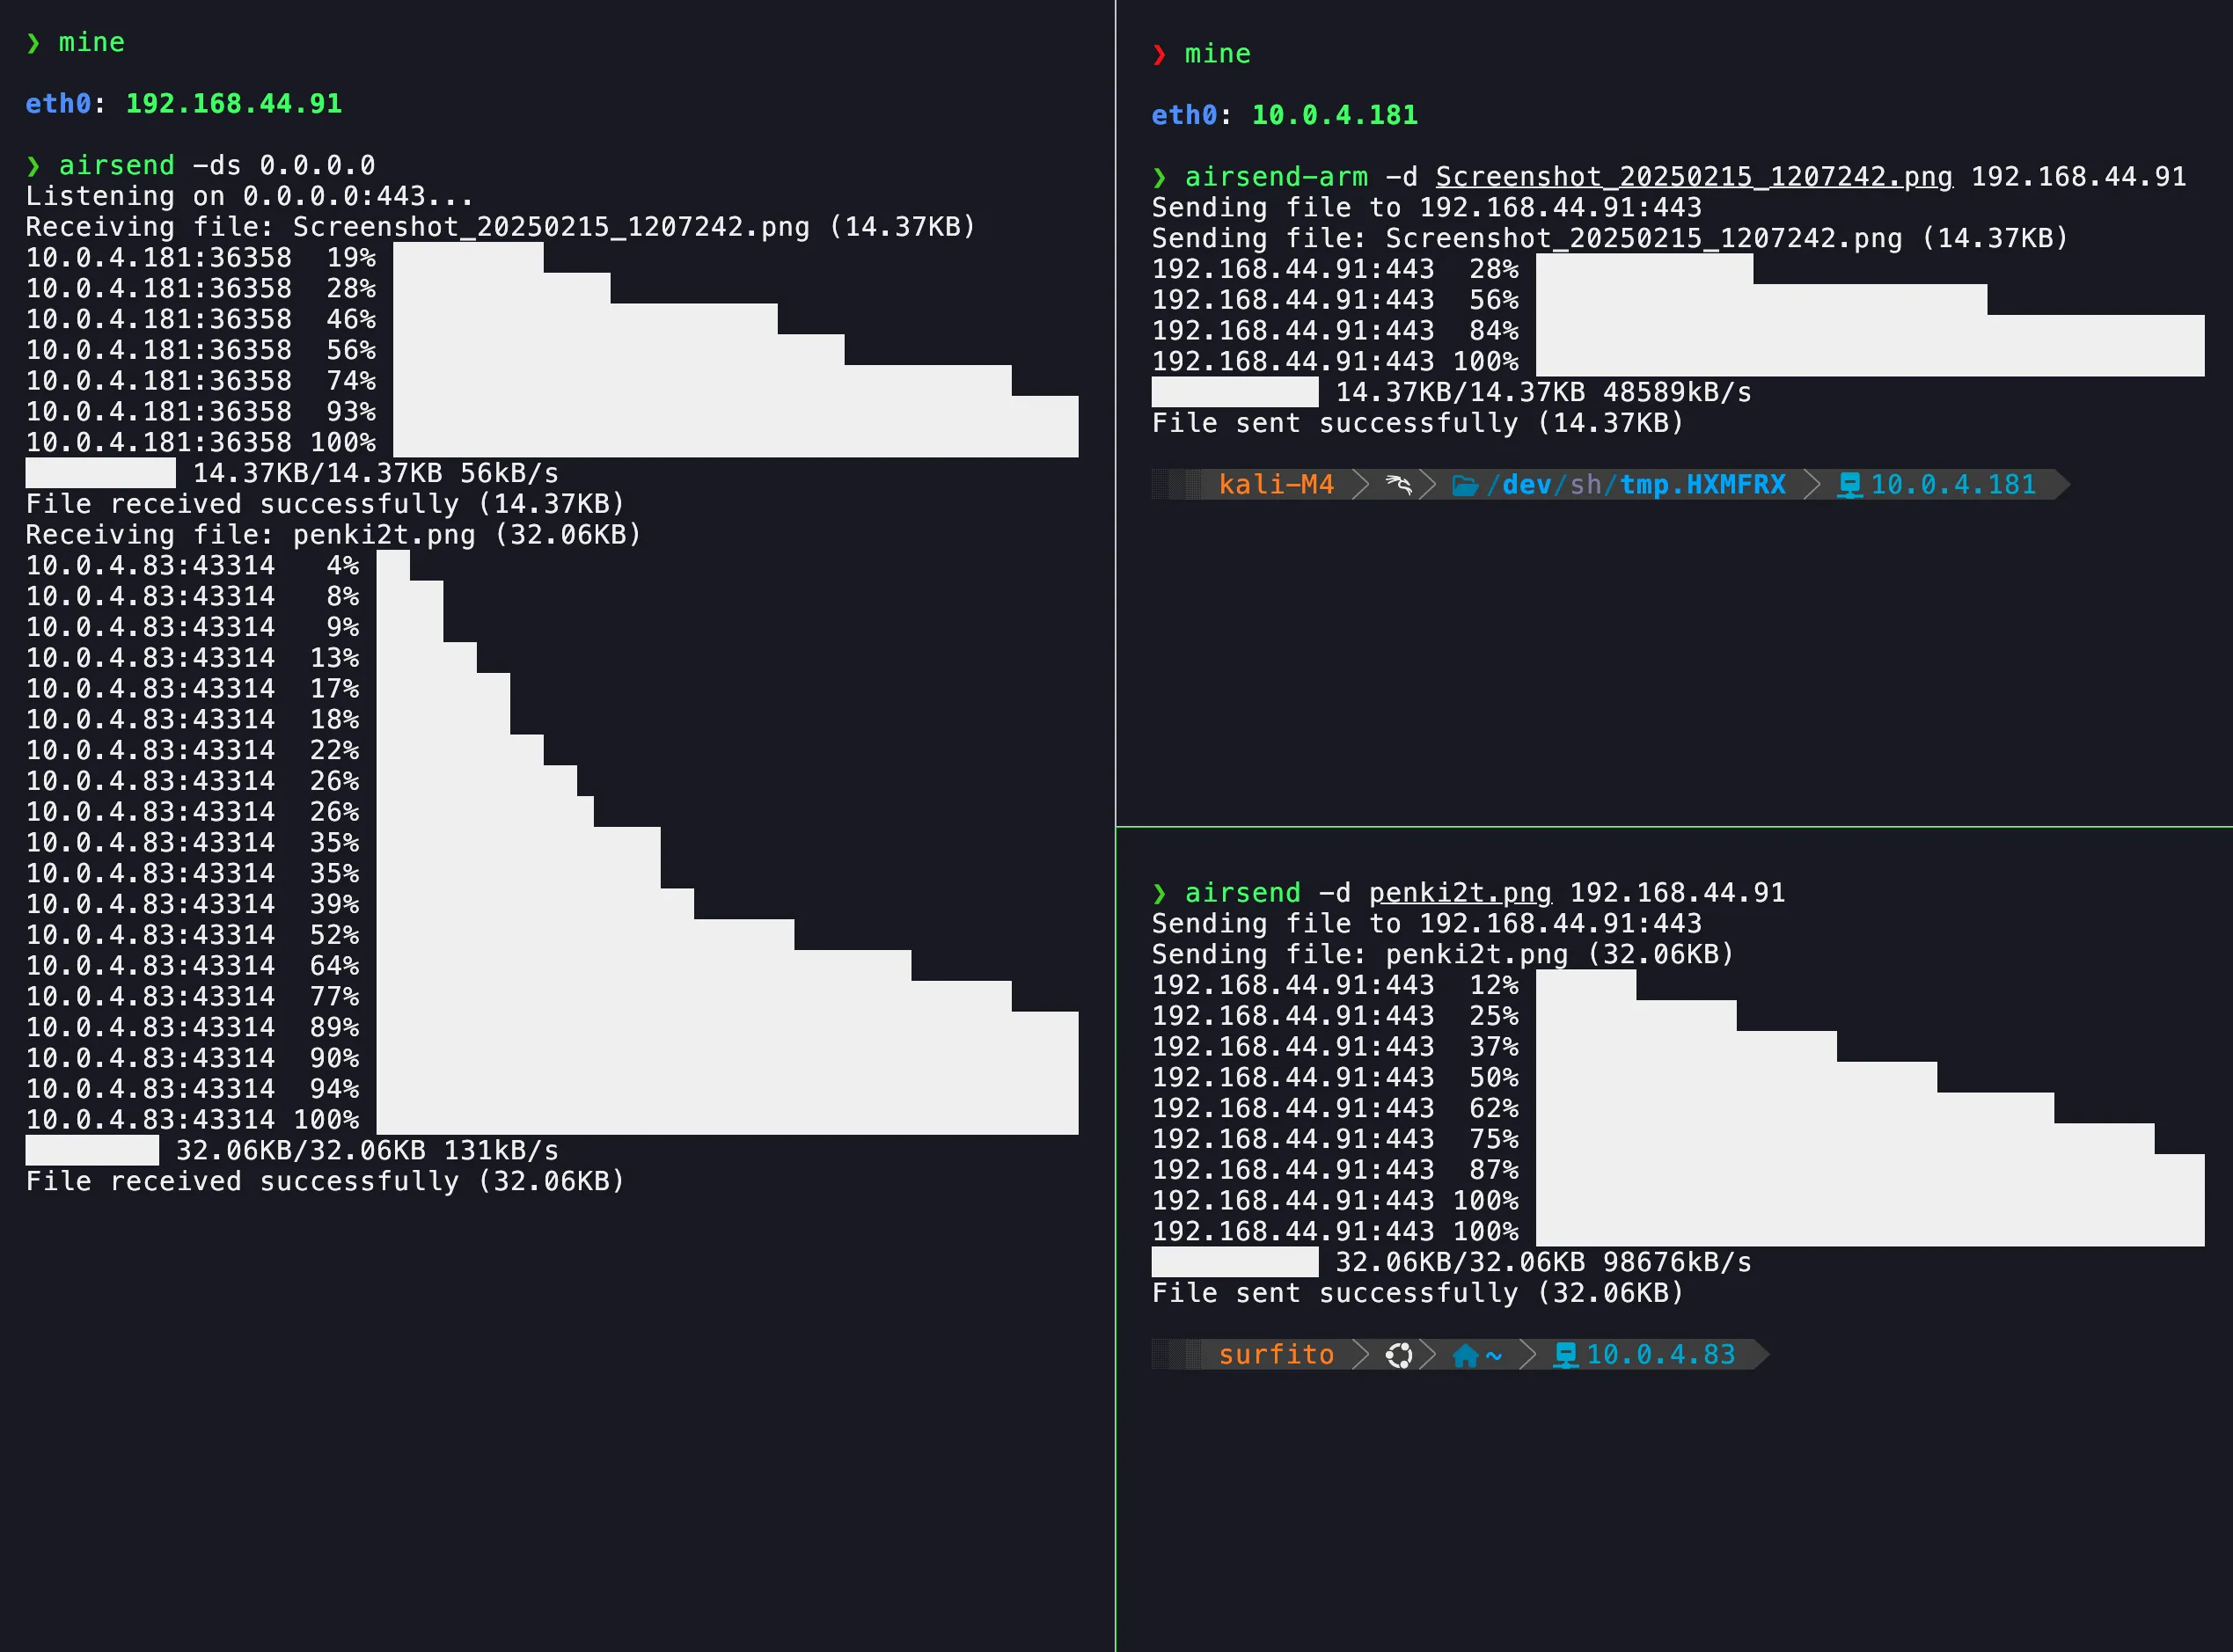
If no port is specified on the server, it will default to port 443, as shown in the image.
Windows
Here, we download airsend.exe from a local server (wget). Then, we receive a file using -r CODE (the file is a screenshot). After that, we send a file using -r (the file is asd.txt).
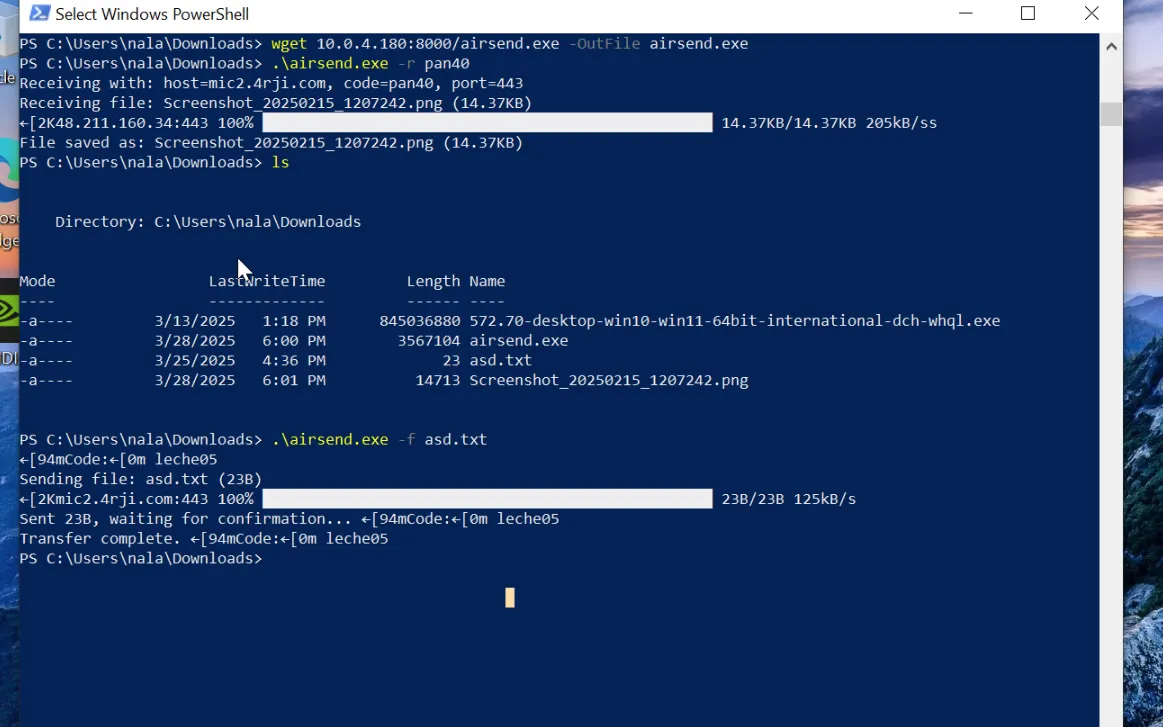
In the next screen, we receive it using the C2 server.
Win -r
Here, we receive the Windows file (asd.txt) on a Kali ARM machine using the C2 server with the -r flag and CODE.
Airsend Usage Examples
• Send a screenshot: airsend -f screenshot.png IP:Port
• Send file to C2 server: airsend -d file.txt IP:Port
• Receive file with code: airsend -r CODE
• Send file with return channel: airsend -r file.txt
• Start C2 server listener: airsend -ds
• Start C2 listener on specific IP: airsend -ds IP
• Download airsend.exe from local server: wget http://local-server/airsend.exe -OutFile airsend.exe
We need a C2
In this guide, we use the server configured as C2, as explained in our C2-domain tutorial. Once a connection with the server is established, we run the script with the -s option to activate its server mode.
airsend
Usage:

Server:                sudo airsend -s [host] [port]
  Send file:             airsend -f  [host] [port]
  Receive file:          airsend -r  [host] [port]
  Message (sender):      airsend -m [host] [port]
  Message (receiver):    airsend -mr  [host] [port]
sudo /opt/4rji/bin/airsend -s 0.0.0.0


Server listening on 0.0.0.0:443
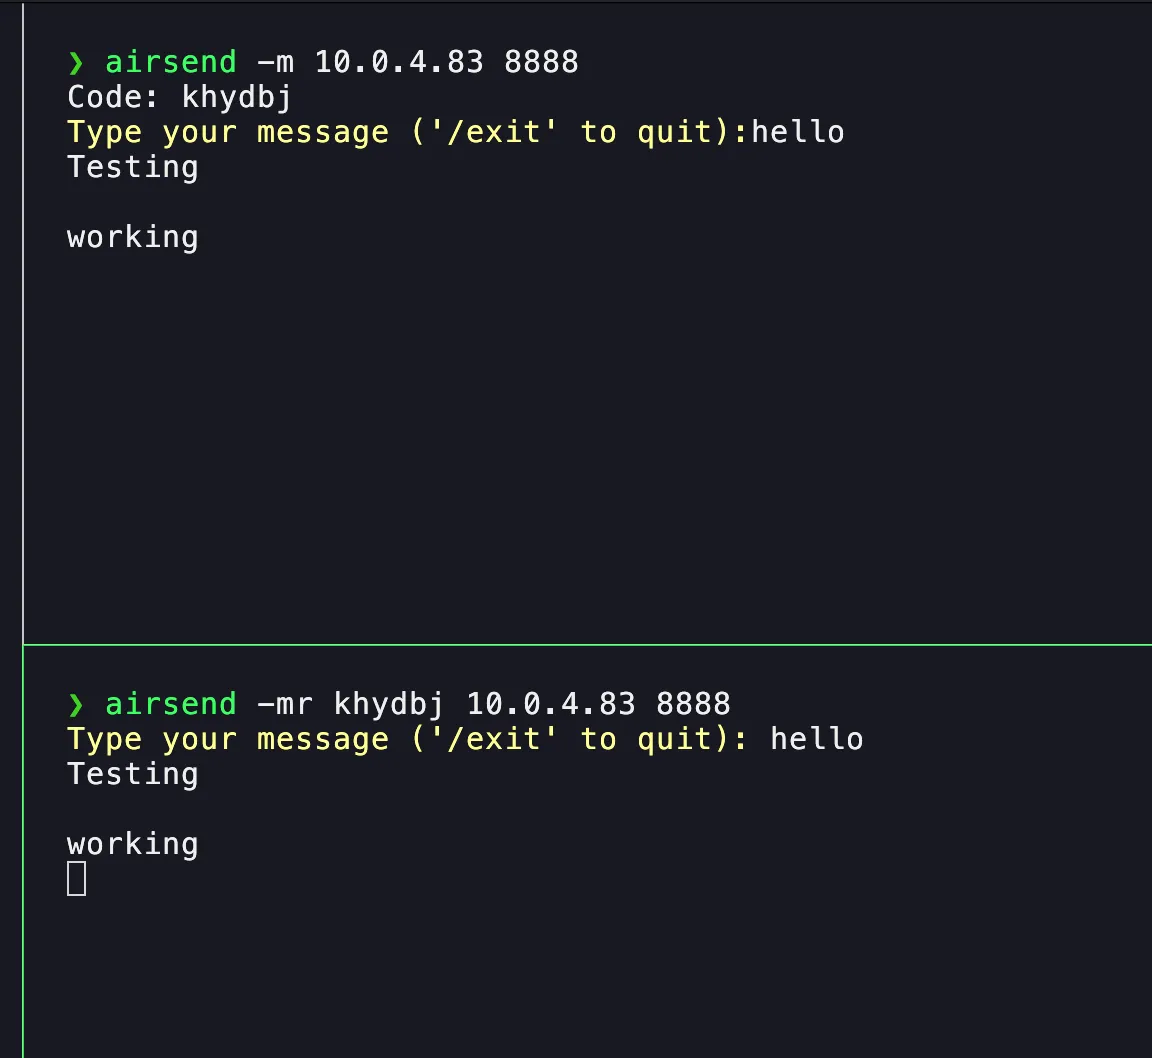
Now, we test if the message sending works using the -m option.
❯ airsend -m


Code: deyrss
Type your message ('/exit' to quit): hola
que hay
Sending files
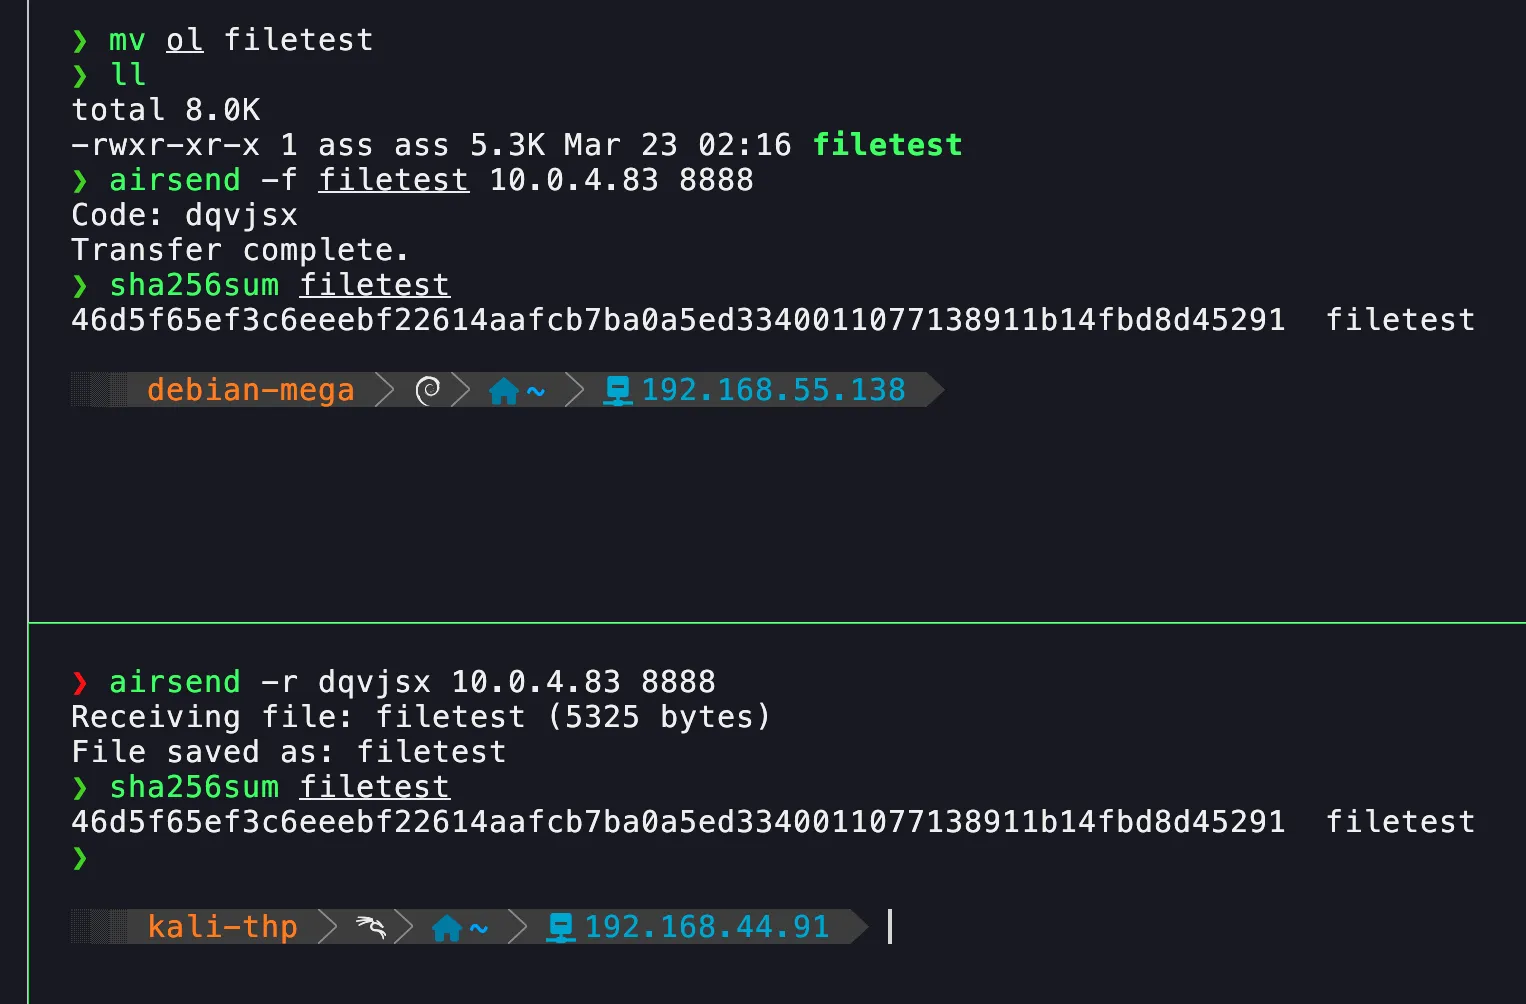
We will send our first file using the -f option.
❯ airsend -f asl_mnist_model.h5


Code: jtqobc
Transfer complete.
❯ sha256sum asl_mnist_model.h5
a9457d44bb96fbd38cddaefbe2444b3154e6849ce5eaacd05ba78929b2bd620b  asl_mnist_model.h5
Receiving the file.
On the receiving machine, we simply copy the code and then verify that the SHA256 checksum matches, ensuring that the file arrived correctly.
❯ airsend -r jtqobc
 Receiving file: asl_mnist_model.h5 (2765888 bytes)


GREFile saved as: asl_mnist_model.h5EN
❯ sha256sum asl_mnist_model.h5
a9457d44bb96fbd38cddaefbe2444b3154e6849ce5eaacd05ba78929b2bd620b  asl_mnist_model.h5
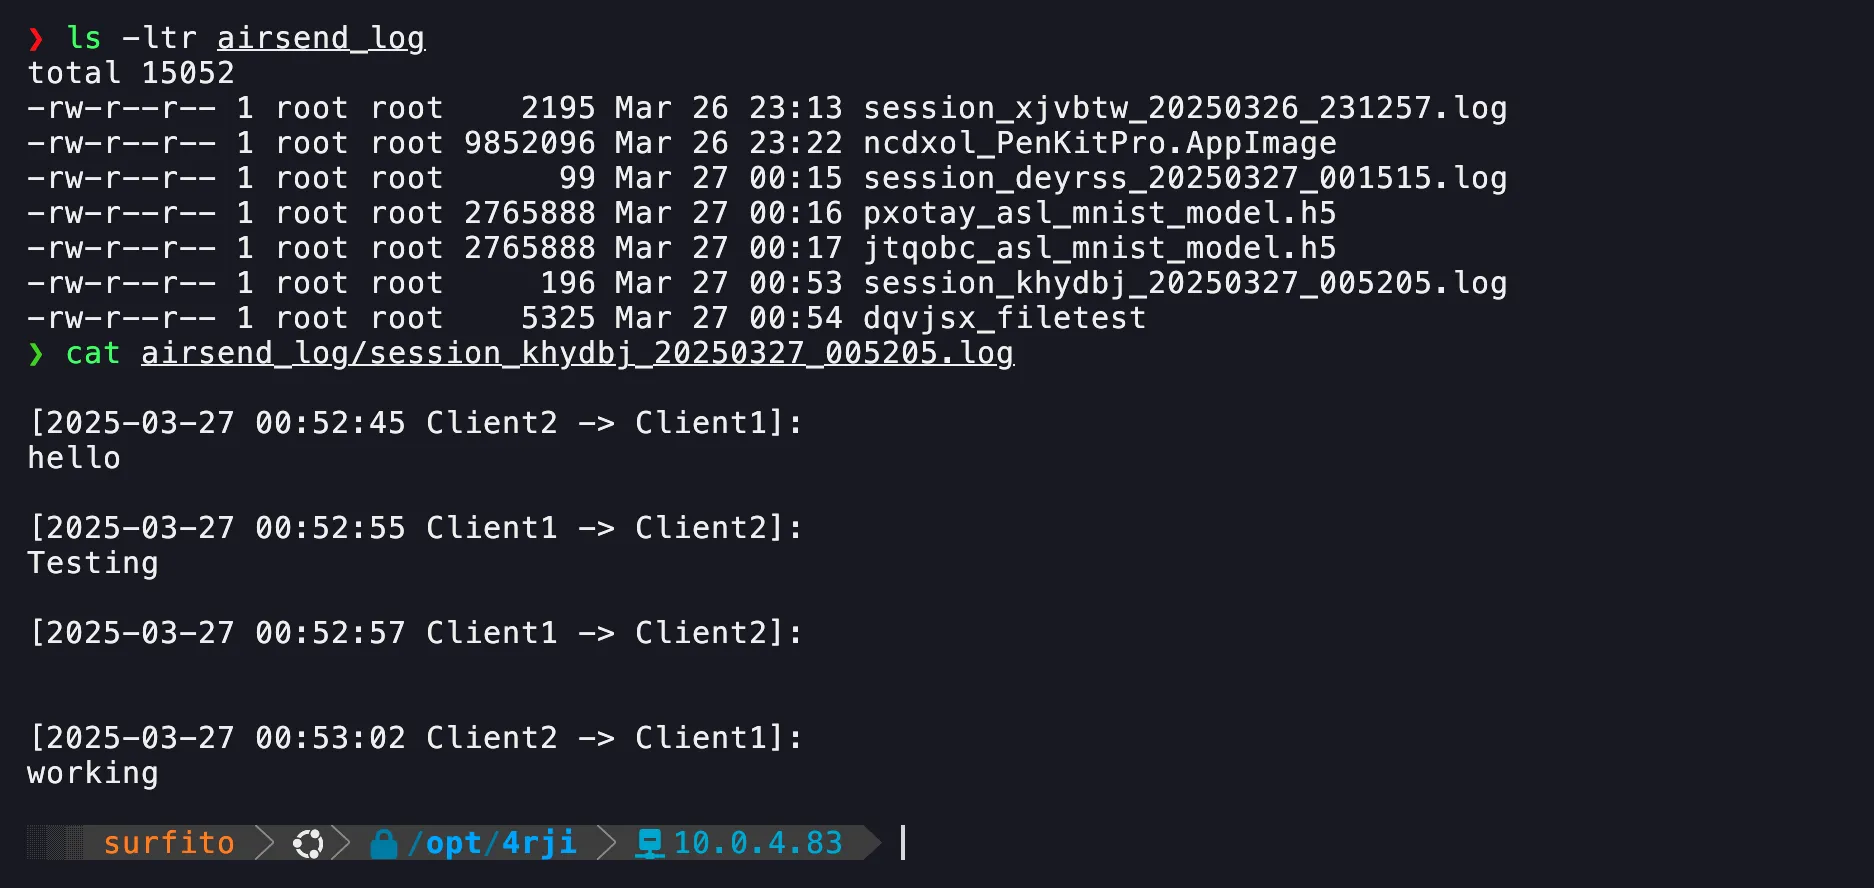
Logs
We can verify the message history and the files sent by the server at the following path:

Without C2
If you don’t have a C2, you can specify a different IP address and port for sending the file, without changing the script.
❯ sudo /opt/4rji/bin/airsend -s 0.0.0.0 8888
Server listening on 0.0.0.0:8888